Most bonding lines do not lose time on the timer. Time disappears inside the loop that starts with “almost good.” Clean again, align again, laminate again, then de-bubble again. A reliable vacuum laminating machine breaks that loop by making the core bond step predictable. Output rises because fewer units circle back to the start.
In real production, that predictability matters more than a flashy spec sheet. Stable bonding reduces surprise defects, reduces handling damage, and calms the entire workflow. “Faster” often arrives as a side effect. The line simply stops fighting itself.
Vacuum Laminating Machine for OCA Optical Bonding: A Practical Workflow
A good workflow feels almost boring. The same steps run the same way, every day. That consistency is where the yield lives.
If a microbubble only shows under backlight, the cost is not the bubble. The cost is the second attempt, plus the extra cleaning, plus the lost rhythm. That is why process clarity matters more than clever parameter tricks.
What the bonding stack is doing during contact
A bonding stack behaves like layers trying to settle into one uniform plane. Air pockets resist that settling. Residues do the same. Adhesives then add another layer of complexity, because they change with time and temperature.
Common adhesive routes include:
-
OCA film: stable thickness and strong clarity when handling is clean.
-
LOCA optical bonding: flow-based adhesive that can help certain geometries, but it needs curing control.
-
Hybrid stacks: film plus local fill, used when edges or structures demand it.
OCA often wins for repeatability in refurbishment. LOCA can still be the right tool, especially around shapes and gaps. The key is matching the process window to the material behavior.
A workflow that reduces rework loops
A practical line flow usually follows five phases. Each phase has one job. Mixing jobs is where drift begins.
1) Surface prep (job: remove contamination, then stop touching)
-
Use one wipe direction and one wipe count.
-
Let solvent fully flash off before bonding.
-
Keep clean staging trays separate from in-process trays.
2) Film handling (job: keep OCA clean and tension-free)
-
Standardize liner peel style and speed.
-
Define an “open time” window after peel, then stick to it.
-
Cut edges cleanly to avoid edge air paths later.
3) Alignment and fixturing (job: lock position without sliding)
-
Use fixtures that prevent micro-sliding at contact.
-
Support thin glass so it does not bow under pressure.
-
Stage the stack in the same orientation every cycle.
4) Vacuum lamination (job: remove air before full contact)
-
Evacuate air, then bring surfaces into contact smoothly.
-
Hold long enough for wet-out, not long enough for creep.
-
Keep the pressure path uniform across the platen.
5) Stabilization and downstream steps (job: let the bond settle)
-
Add a short settling step when edge lift is common.
-
Use de-bubble when microbubbles appear later in inspection.
-
Inspect with consistent lighting and angles every run.
That flow is not complicated. It is just consistent. Consistency is what turns output into a schedule instead of a gamble.
First-piece confirmation and sampling that actually helps
Sampling is not about paperwork. It is about catching drift early, before drift becomes a rework pile.
A practical routine looks like this:
-
First piece of the shift: full backlight inspection, edge check, and alignment check.
-
After any change (film batch, glass batch, fixture change): repeat the first-piece inspection.
-
Steady sampling: small counts at stable intervals, rather than rare big checks.
Mixed-batch refurbishment benefits the most from this routine. Variation is normal there. A stable check routine keeps variation from turning into chaos.
Where film handling fits in the station layout
When film application drives the defect chart, vacuum lamination becomes a cleanup step. That is a hard place to be. Cleaner inputs create calmer cycles.
A dedicated film station reduces wrinkles, edge contamination, and exposure time. It also reduces the urge to “fix” problems with longer dwell. For a quick comparison of platform sizes and handling styles, this category view is the fastest reference:
Compare Film Laminating Machines for cleaner OCA handling →

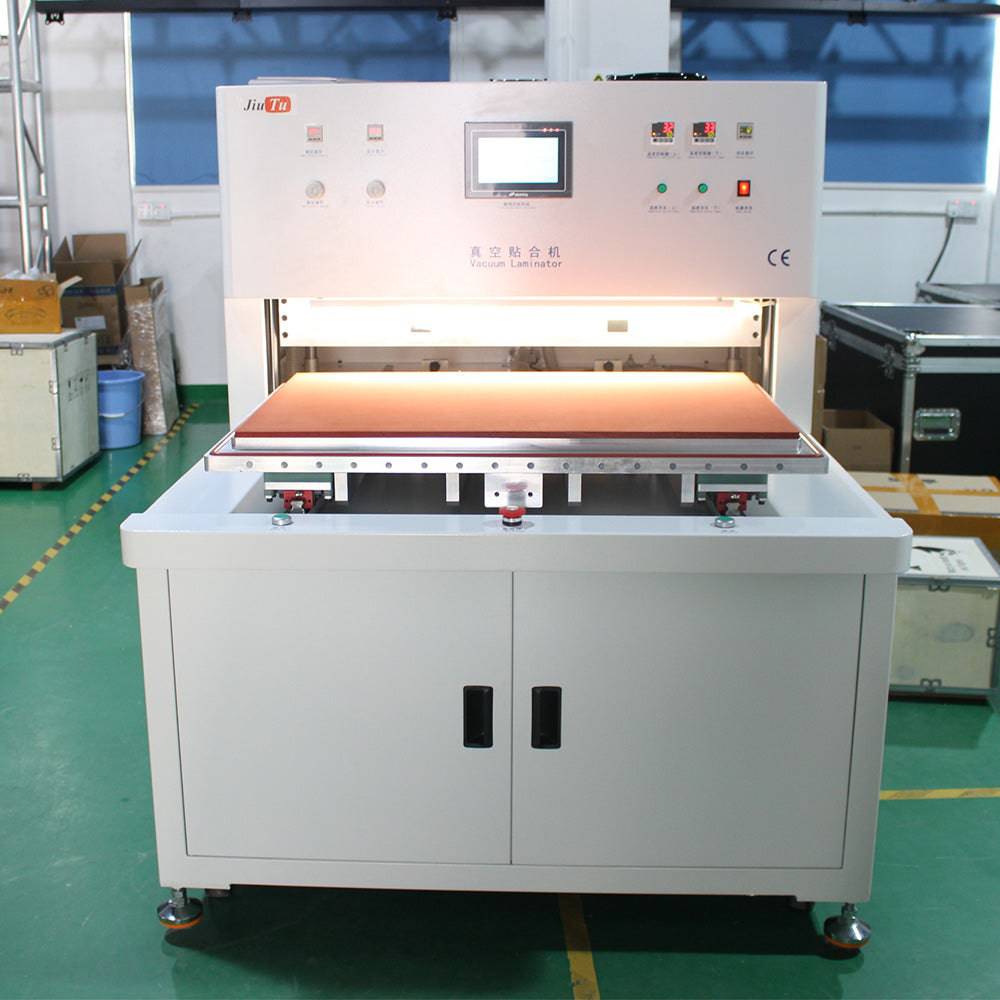
Caption: An OCA film station reduces edge contamination and exposure time before vacuum lamination.
Vacuum Laminating Machine vs Autoclave Bubble Remover: What Each Step Fixes
These two steps often get blended together. On a working line, they solve different problems. Mixing them up leads to wasted tuning and unstable output.
A simple way to separate them is to ask one question: When does the defect appear?
If it appears at first contact, lamination control is the first suspect. If it appears after time or heat, de-bubble matters more.
What vacuum lamination fixes best
Vacuum lamination is strongest at preventing air entrapment during contact. It reduces big, visible bubbles that come from trapped air pockets. It also improves wet-out uniformity, which supports clean optical appearance.
It also reduces the temptation to “press harder.” Aggressive pressing can hide defects for a moment. Then edge lift or rings show up later.
What a bubble remover autoclave fixes best
A bubble remover autoclave is best when defects are small, delayed, and stubborn. Microbubbles can appear after heat soak, after a unit sits, or after mild stress. Outgassing and residue behavior often drive those late surprises.
De-bubble is not a substitute for clean lamination. It is a finishing tool. It removes the last small fraction that usually costs the most rework time.
A clear division of labor
| Step | Best at fixing | Usually not great at fixing |
|---|---|---|
| Vacuum lamination | trapped air at contact, uneven wet-out, some edge air paths | dust points, residue haze, delayed outgassing bubbles |
| De-bubble (autoclave) | microbubbles after bonding, delayed bubbles, minor voids | dirty surfaces, major trapped bubbles, alignment shift |
Used together, the workflow becomes calmer. Lamination prevents the big errors early. De-bubble cleans up the small ones that appear later.
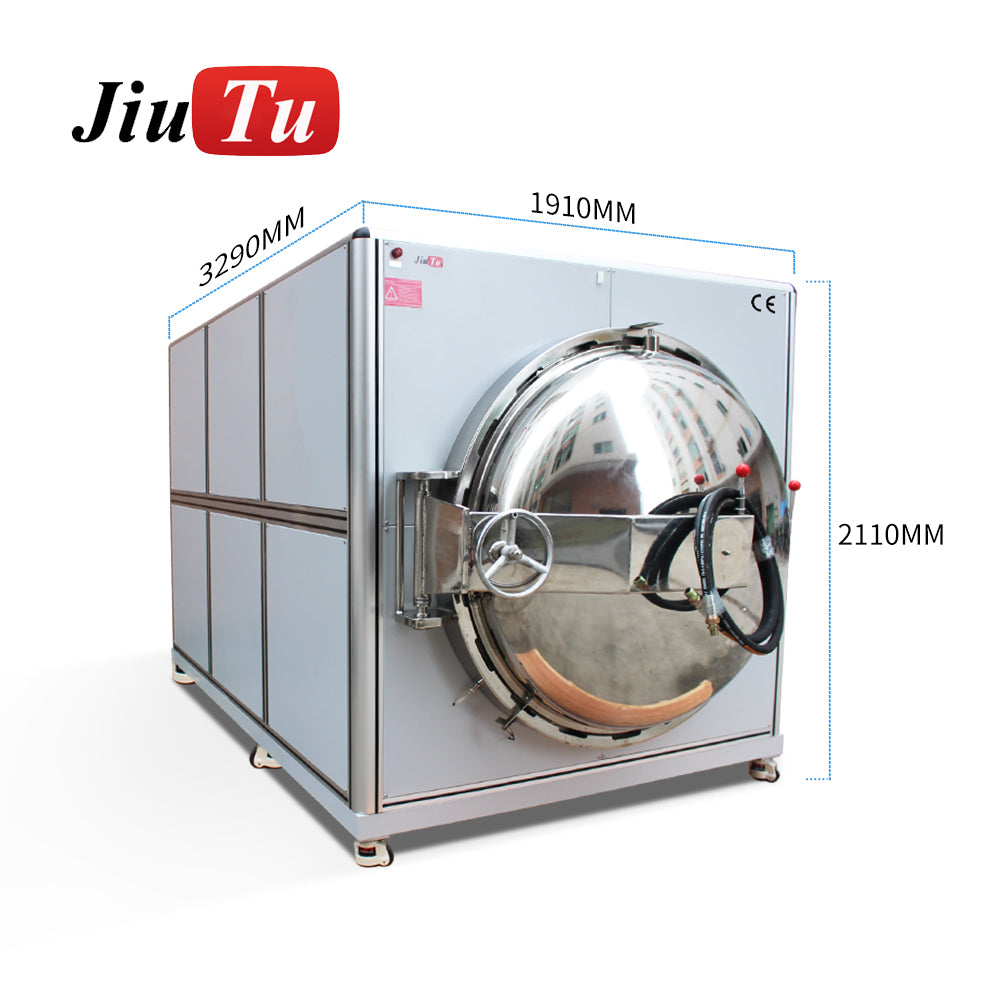
Caption: De-bubble helps when microbubbles appear after time or mild heat soak.
Why pairing often beats chasing “perfect lamination”
Some defects are expensive because they are delayed. They appear after a unit looks fine at first glance. That delay creates the worst kind of rework, because time has already been invested.
Pairing reduces the late surprises. It also stabilizes inspection time, because appearance becomes more consistent. The line gets quieter. Quiet lines usually output more.
For larger panels and optical stacks, browsing by category can speed up size comparisons and workflow planning:
Browse Optical Bonding Machines by worktable size →
Vacuum Laminating Machine Process Parameters: Practical Windows, Not Myths
Parameter ranges can help, but only when they stay grounded. On real lines, materials vary. Fixtures vary too. A stable window beats a “perfect” recipe that only works on one day.
A vacuum laminating machine is only as stable as its reach time, sealing behavior, and contact uniformity. Those are the items that keep cycles repeatable. Timers alone will not do that.
Typical starting windows (useful, not absolute)
The ranges below are commonly used starting points across OCA lamination and optical bonding laminator workflows. Adhesive type, glass thickness, and equipment design will shift the window. The goal is direction, not a single fixed recipe.
| Control | Common starting window | What to observe | What drift looks like |
|---|---|---|---|
| Vacuum level (relative) | roughly -90 to -98 kPa | bubble frequency, edge air paths | slow reach time, random bubbles, inconsistent results |
| Vacuum hold time | about 10–60 s | air removal before contact | longer holds help less over time, then dust risk rises |
| Contact / lamination dwell | about 20–90 s | wet-out uniformity, alignment stability | long dwell increases creep on thin stacks |
| Heated plate temperature | about 30–80°C (sometimes higher) | adhesive flow, haze risk | too hot increases outgassing or clouding |
| Environment temperature | about 20–26°C | viscosity consistency | day-to-day shifts change defect patterns |
| Relative humidity | about 40–60% RH | static and dust attraction | low RH often increases dust points |
Extreme settings rarely beat sealing quality. A moderate target that repeats is more useful than a high target that drifts.
Two timing metrics that tell the truth
Cycle time is a visible number. Reach and recovery are the numbers that predict stability.
Track these:
-
Vacuum reach time: time to hit the target vacuum level.
-
Recovery time: time to return to baseline conditions between cycles.
Reach time creeping up often signals seal wear, leaks, or pump drift. Recovery time creeping up predicts rhythm problems, because spacing between cycles becomes less consistent.
Pressure distribution and platen uniformity: the quiet drivers
Pressure is not only a value. Pressure is distribution. Uneven pressure creates uneven contact, which creates rings, haze, and edge behavior.
Quick checks that save time:
-
Look for consistent squeeze-out patterns at the perimeter.
-
Check fixtures for local high points or wear marks.
-
Support thin panels so they do not bow under load.
On wide panels, flatness issues become visible patterns. That is why large-format work emphasizes platen rigidity and verification routines.
Temperature: use it as a tool, not a crutch
Moderate heat improves adhesive flow and wet-out. Excess heat can trigger outgassing or haze. Heat also changes open time behavior, which changes bubble behavior.
A stable approach is to treat temperature as part of the recipe. The recipe should not drift across shifts. If temperature varies, adhesive behavior varies too.
Environment controls that cut defect randomness
Humidity and static control do not look impressive on a product page. They decide dust behavior. Dust behavior decides yield.
A stable humidity band reduces static-driven particle attraction. It also makes cleaning results repeatable. That repeatability is a real throughput feature.
Vacuum Laminating Machine Troubleshooting: Microbubbles, Edge Lift, Newton Rings
Troubleshooting becomes expensive when it turns into “change everything.” A faster method is triage. Narrow causes quickly, then change one variable at a time.
A short reminder fits here: defects often come in waves. Something shifts, then everything looks worse. That is why a repeatable triage sequence matters.
A two-minute triage sequence
When defects spike, start with checks that cost almost no time:
-
Compare vacuum reach time to the normal value.
-
Inspect seal surfaces for debris and compression damage.
-
Confirm cleaning flash-off time and any solvent changes.
-
Check humidity and static conditions for that day.
-
Verify adhesive open time drift caused by pacing changes.
If those checks look normal, move to fixture support and platen behavior. That second layer is slower. It is also where ring patterns are born.
Defect → likely causes → fast checks
| Defect pattern | Likely causes | Fast checks |
|---|---|---|
| Microbubbles across active area | residue, outgassing, open time drift, vacuum instability | confirm flash-off time; record open time; check reach and recovery |
| Bubbles near one edge | edge contamination, uneven support, fixture edge pinch | inspect edge squeeze-out; confirm support; check edge cut quality |
| Edge lift after cooling | contamination, too much squeeze-out, early handling | verify edge cleanliness; reduce dwell; add short stabilization hold |
| Newton rings / interference | uneven contact, localized force, flatness drift | check fixture high points; verify flatness routine; reduce local force |
| Dust points under backlight | static, tray hygiene drift, long exposure | verify RH band; shorten exposure; improve tray separation |
| Haze or clouding | residue, heat too high, adhesive scuffing | confirm solvent compatibility; lower heat; review handling |
This table is about speed. Each defect points to a small set of checks. Once those checks are logged, the defect stops being “random.”
Microbubbles: why “almost good” is so expensive
Microbubbles rarely look dramatic at first glance. They hide until light hits at an angle. They also become obvious after mild heat. That delay is what makes them costly.
Common drivers include:
-
Solvent residue that has not fully flashed off.
-
Adhesive open time drifting with pacing.
-
Outgassing from materials or protective layers.
-
Vacuum instability caused by seal wear or leaks.
A practical fix sequence keeps things calm:
-
Stabilize flash-off time and open time.
-
Confirm reach time and seal condition.
-
Use de-bubble to remove the last fraction that returns later.
If de-bubble removes most microbubbles, delayed behavior is likely the driver. If de-bubble does not help, contamination and contact uniformity should be checked again.
Edge lift: late failures that ruin schedules
Edge lift often appears after handling or after cooling. Sometimes it shows after de-bubble. That timing points to edge contamination, squeeze-out behavior, and handling routines.
Three frequent contributors show up again and again:
-
Edge contamination from dust, fingerprints, or liner fragments.
-
Excess squeeze-out that changes edge stress and adhesion balance.
-
Handling too soon, before the bond stabilizes.
A short stabilization step often helps. It does not need to be long. It only needs to be consistent.
Newton rings: a pressure-uniformity warning sign
Newton rings often signal uneven contact and stress paths. Fixture high points, flatness drift, and uneven pressure distribution are common triggers.
Fast checks usually reveal the cause:
-
Inspect fixtures for wear points that create local high spots.
-
Verify support under the panel is uniform, especially on thin glass.
-
Reduce localized force concentration near corners.
-
Re-check platen flatness using the same reference method every time.
If rings appear in a consistent location, the cause is often mechanical. If rings appear randomly, environment and handling variation may be driving contact differences.
Vacuum Laminating Machine Maintenance Checklist for Stable Yield
Maintenance is not only equipment care. It is yield protection. A stable maintenance rhythm also makes troubleshooting easier, because drift becomes traceable.
A vacuum laminating machine maintenance checklist should focus on the items that affect reach time, sealing stability, and contact uniformity. Those are the items that protect output. Cosmetic cleaning alone will not do it.
Daily checks (fast, high impact)
-
Clean platen and fixtures with a residue-safe method.
-
Inspect seal surfaces for debris, cuts, and compression damage.
-
Confirm the system reaches the target vacuum within the usual time band.
-
Confirm pressure readings stay within the normal range for that recipe.
-
Check filtration and moisture traps if air supply is used.
-
Keep staging trays clean and separated by process status.
Daily checks prevent slow drift. Slow drift is what turns one bad day into a bad week.
Weekly checks (catch drift early)
-
Run a basic leak check and record reach time and recovery time.
-
Inspect seals for compression set and replace if needed.
-
Inspect guides and moving parts for uneven wear.
-
Clean vents and airflow paths to reduce thermal instability.
-
Review defect logs and look for pattern shifts.
Weekly logging turns “feel” into data. Data makes decisions faster.
Monthly checks (protect long-run repeatability)
-
Verify platen flatness with a consistent reference method.
-
Verify heating uniformity if heated plates are used.
-
Service vacuum pump consumables on schedule.
-
Check fixture datums and alignment repeatability.
-
Review recipes and lock parameters that should not drift.
Monthly checks are also a good moment for a process reset. Cleaning routines and staging discipline tend to slip over time. A reset brings them back.
Small spares that reduce downtime pain
Basic spares reduce the temptation to “push through” a problem. That push-through behavior is what creates defect spikes.
Useful spares include:
-
Seals and sealing strips used in daily operation.
-
Filters and pump consumables.
-
Common fixture wear parts and alignment pins.
-
Cleaning supplies that stay consistent batch to batch.
Vacuum Laminating Machine for Phone Screen Repair: What Improves Output Fastest
Phone work moves fast, but standards stay high. Dust points are visible. Microbubbles show under backlight. Small edge issues become obvious during reassembly.
In this range, the fastest gains usually come from workflow discipline, not extreme settings. A moderate recipe that repeats will outperform a “perfect” recipe that only works sometimes.
Practical priorities for small screens
These priorities protect both yield and pace:
-
Keep open time consistent, even during peak hours.
-
Reduce touch count per unit, especially after final cleaning.
-
Use fixtures that prevent sliding during contact.
-
Standardize inspection lighting so defects are caught early.
Phone workflows also benefit from stable film handling. Cleaner film input reduces edge bubbles and liner fragments. That reduces late defects.
“Clean room lite” habits that work on refurbishment lines
A full cleanroom is not always realistic. Still, small habits make a big difference:
-
Separate “dirty staging” and “clean staging” on the bench.
-
Use covered trays for cleaned glass and prepared stacks.
-
Keep wipe packs sealed until use.
-
Replace tack surfaces before they become contamination sources.
These habits reduce random dust points. Random dust points are time killers.
Handling and stacking rules that prevent scratches
Scratches and edge chips are not lamination defects. They still destroy yield. Handling rules prevent those losses.
A stable rule set is simple:
-
Use separators between bonded units.
-
Avoid stacking warm units without support.
-
Keep transport trays clean and dedicated per process stage.
-
Reduce handoffs between stations.
Fewer handoffs means fewer surprises.
How to Choose a Vacuum Laminating Machine for Large Screens
Large panels amplify everything. Dust points become more visible. Flatness drift becomes visible patterns. Handling damage risk rises with weight and size.
That is why large-format selection is not about maximum numbers. It is about stable contact over area.
The large-screen priority list
A strong large-format setup typically has:
-
Working area with handling clearance for fixtures and safe loading.
-
Rigid platen and verifiable flatness across the entire contact zone.
-
Stable vacuum reach behavior and stable recovery between cycles.
-
Thermal uniformity at steady state, not only at warm-up.
-
Maintenance access for seals and cleaning without long downtime.
Those traits decide whether output stays stable across real production hours.
Caption: Large-format platforms focus on uniform contact and stable behavior across wide working areas.
A simple size-based selection map
Small screens (phones and compact modules)
-
Prioritize fast changeover and stable fixturing.
-
Focus on open time control and clean handling.
-
Add film handling support when edge contamination dominates.
Mid-size screens (tablets, laptops, specialty panels)
-
Prioritize platen flatness and support under thin stacks.
-
Focus on pressure distribution and fixture wear control.
-
Watch for alignment creep when dwell becomes excessive.
Large screens (automotive, industrial HMI, wide refurbishment)
-
Prioritize table rigidity, thermal uniformity, and vacuum stability.
-
Focus on staged handling and dust control.
-
Pair de-bubble capacity to panel area and inspection standards.
This map avoids overbuilding for small work and underbuilding for large work.
Spec questions that matter more than headline specs
Maximum vacuum and maximum pressure are not useless. They are also not the best predictors of daily output.
Practical questions reveal more:
-
How stable is vacuum reach time across long runs?
-
How consistent is recovery time between cycles?
-
How is flatness verified, and what is the routine?
-
How uniform is heating across the table at steady state?
-
How easy is seal inspection and replacement?
These questions tie directly to yield stability.
Using “typical” language the right way
Exact numbers can mislead without a defined stack and fixture. Many large-panel systems run in moderate pressure bands designed for uniform contact. Cycle times often land in the tens-of-seconds range, depending on material and handling flow. Validation on the intended stack is the cleanest proof.
For large-format comparisons across worktable sizes and related stations, category browsing stays efficient:
Browse Optical Bonding Machines by worktable size →
A 3-Step Rollout Plan Plus a Tracking Template
Random tuning feels busy. It rarely feels productive. A structured rollout gives better results, especially on mixed refurbishment lines.
Short sentences help here. Control the basics. Then scale.
Step 1: Baseline the current line (3–7 days)
Start by measuring what is already happening. This prevents “improvements” that just move defects elsewhere.
Baseline items worth capturing:
-
First-pass yield and rework rate
-
Top defect types by count
-
Average reach time and recovery time
-
Typical adhesive open time window
-
Time lost to repeated cleaning and alignment retries
Even a basic baseline reveals the real bottleneck quickly.
Step 2: Lock a stable recipe window (1–2 weeks)
After baseline, stabilize one product class first. Choose a common stack and lock a recipe window for vacuum, dwell, heat, and handling timing.
During this phase, change one variable per test. Record it. Avoid mixing changes. Mixed changes create mixed conclusions.
Step 3: Expand to mixed models with guardrails (ongoing)
Once one product class is stable, expand recipes with guardrails:
-
A fixed cleaning routine that does not drift per shift
-
A standard open time window per adhesive type
-
A first-piece confirmation routine after changes
-
A short triage checklist when defects spike
At this point, training becomes easier. Scheduling becomes easier too.
Tracking template that reads like an engineer’s notebook
A template like this builds credibility because it makes defects traceable. It also catches vacuum drift early.
Use one log per batch or per shift:
| Field | Example entry | Why it matters |
|---|---|---|
| Date / shift | 2026-02-14 / Day | Links defect waves to environment shifts |
| Product class | Phone / Tablet / Large panel | Ties recipes to stack behavior |
| Stack type | OCA film / LOCA / Hybrid | Adhesive behavior differs a lot |
| Vacuum target | Recipe A | Keeps logs consistent across operators |
| Vacuum reach time | 18 s | Signals sealing and pump health |
| Recovery time | 14 s | Predicts cycle stability |
| Hold time | 30 s | Affects air removal before contact |
| Plate temperature | 50°C | Controls flow and haze risk |
| Dwell time | 45 s | Affects wet-out and creep |
| Adhesive open time | 2 min | Common hidden drift source |
| De-bubble used | Yes / No | Separates contact issues from delayed issues |
| Defect type + count | microbubbles: 2, dust: 1 | Turns “feel” into data |
| Notes | RH low today | Context for later pattern review |
A weekly review is enough to spot trends. Watch reach time drift, recovery drift, and defect type shifts. Those signals usually show trouble before yield collapses.
Pairing the Line: Lean Additions That Raise Yield
Pairing decisions should be based on defect type and where time is truly lost. That approach keeps the line lean.
When film handling is the main bottleneck
If edge bubbles and liner fragments dominate defects, film handling is likely the weak link. A stable film station reduces variation. It also reduces exposure time, which helps dust control.
This category view is a quick reference for comparing platforms and sizing:
Compare Film Laminating Machines for cleaner OCA handling →
When microbubbles are the main bottleneck
If defects appear late, de-bubble tends to pay back quickly. Late defects destroy rhythm because they trigger disassembly after time has already been invested.
A clear split of responsibilities helps. Vacuum lamination prevents the big failures early. De-bubble reduces the late surprises.
When dust points are the main bottleneck
Dust points often need discipline more than new equipment. Stable humidity, clean trays, reduced touch count, and consistent wipe routines usually beat endless parameter changes.
For broader station planning and accessory browsing, a single navigation point can help map the whole workflow:
See all JiutuStore collections →
Common Myths That Keep Lines Stuck
Some ideas sound helpful, yet they slow output over time. Clearing these myths improves decision-making.
Myth 1: Longer dwell always reduces bubbles
Long dwell can reduce some bubbles. It can also increase creep and contamination risk. If dwell becomes the default fix, other causes stay hidden.
A better response is to check reach time, seal condition, open time drift, and flash-off timing first. Those checks are faster. They also fix the actual cause more often.
Myth 2: Higher vacuum is always better
Higher vacuum can help, but stability matters more than extremes. A stable level that repeats is valuable. A high level that drifts is a headache.
Sealing quality and reach behavior often define output more than the top number.
Myth 3: Dust is “just luck”
Dust is rarely luck. Dust is routine. Trays, humidity, wipe discipline, and staging rules decide dust more than hope does.
A repeatable routine reduces random dust points. Less randomness means less rework.
FAQ (Q/A Format)
Q: What matters more for output, deeper vacuum or better pressure uniformity?
A: Both matter, but pressure uniformity often decides optical appearance. Deep vacuum removes air, yet uneven contact can still create patterns.
Q: Why do microbubbles show up after lamination looked clean?
A: Microbubbles can appear after mild heat or time soak. Outgassing, residue behavior, and open time drift are common causes.
Q: Does deeper vacuum always mean better results?
A: Not always. A stable vacuum level that repeats is more valuable than a higher level that drifts.
Q: What is the quickest way to tell if leaks are driving defects?
A: Track vacuum reach time and recovery time. If reach time creeps up, seals and vacuum paths should be checked early.
Q: Why does edge lift appear after cooling?
A: Edge lift often involves contamination, squeeze-out behavior, or early handling. A consistent stabilization step reduces late lift.
Q: What causes Newton rings on some models but not others?
A: Newton rings usually reflect contact uniformity and stress paths. Fixture high points, flatness drift, and uneven pressure distribution are common triggers.
Q: When is LOCA optical bonding worth considering?
A: LOCA can help when shapes, gaps, or special structures make film difficult. It also introduces cure and thickness control requirements.
Q: How can inspection time be reduced without missing defects?
A: Standardize lighting and inspection angles. Use first-piece confirmation and small steady sampling, rather than long random checks.
Q: What makes a fixture “good” for bonding work?
A: A good fixture prevents sliding, supports thin stacks, and avoids local high points. Repeatability is the main value.
Q: Why does output look good early, then drift later?
A: Thermal soak, seal wear, and humidity shifts can cause drift. Logging reach time, recovery time, and environment conditions helps isolate the driver.
Conclusion: Turning Stability Into Daily Throughput
Throughput improves when rework loops shrink. That happens when inputs stay clean, contact stays uniform, and drift becomes measurable. The pairing between film handling, lamination control, and de-bubble also matters, especially when defects appear late. With that system in place, the vacuum laminating machine stops being a “tuning project” and becomes a steady production anchor.
Three actionable steps that hold up in real workflows:
-
Stabilize timing: lock cleaning flash-off time and adhesive open time windows.
-
Log the right metrics: reach time, recovery time, and defect counts by type.
-
Build guardrails: first-piece confirmation, quick triage checks, and scheduled maintenance.