
A repair bench can look calm until a newly bonded iPad panel shows a faint silver line near one corner. Then the real question starts. Was it dust, fixture flatness, vacuum instability, or pressure imbalance? In iPad repair, small errors show up fast because the panel is large and the glass gives them room to spread. That is why the right OCA laminating machine matters. It does more than press glass onto a display. It keeps alignment steady across a wider surface, controls pressure more evenly, and protects yield when every rework cycle costs film, labor, and bench time.
What an OCA Laminating Machine Does in iPad Repair
An OCA laminating machine bonds cover glass, touch layers, or display stacks with optically clear adhesive. In plain shop language, it removes air first and then brings the layers together under controlled pressure. On a phone panel, that job is usually straightforward. On an iPad panel, the same step becomes less forgiving because the bonding area is wider and the edges are longer.
That difference changes the workflow. A phone screen may hide a small setup error, but an iPad screen usually exposes it quickly, especially along the long edge.
So iPad screen lamination is not just “phone lamination, but bigger.” It is closer to optical bonding work. The target is a clean bond line, stable optical clarity, and fewer surprises under side light.
For daily tablet refurbishment, a compact machine often makes more sense than people expect. Jiutu’s compact lamination product page is built around smaller-format OCA and film work, while the broader optical bonding machine collection covers lamination and related post-bond equipment for a wider repair workflow.
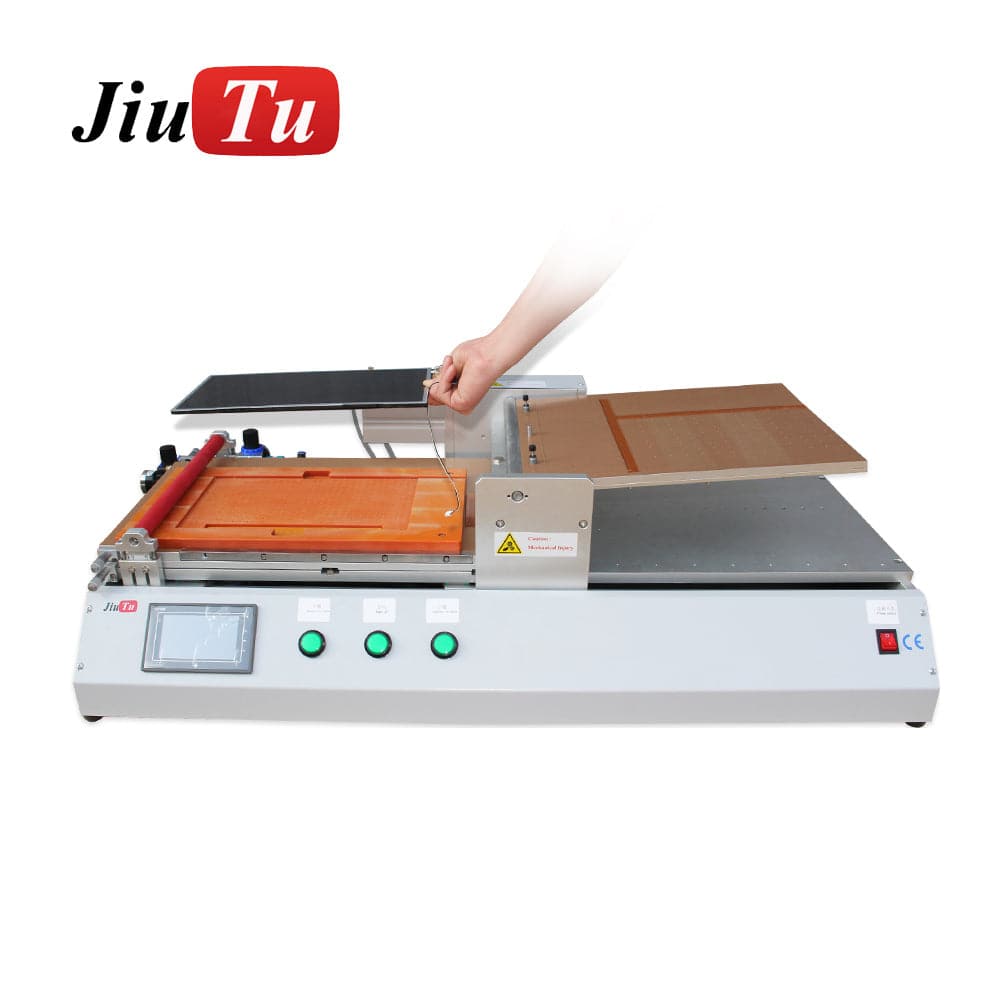
Compact OCA laminating machine with tablet fixture bed for iPad glass alignment
Where It Fits Best
A compact setup is a strong fit for glass-only iPad refurbishment, mixed phone-and-tablet repair, and benches where fixture changes happen several times a day. The footprint stays manageable, loading feels quicker, and the operator can keep the part under closer control.
A larger system becomes useful when the work has already moved into mixed LCD module repair, car display refurbishment, or wider industrial panels. Jiutu’s larger OCA film laminating machine is positioned for broader screen sizes and vacuum lamination workflows, which makes it a better match once the daily panel mix is no longer mainly tablets.
Why iPad Lamination Is Less Forgiving Than Phone Lamination
The first reason is panel span. A phone display is compact, so small shape errors have less room to travel. On an iPad display, the same error can become a visible line along the bezel.
The second reason is handling. A 6-inch panel can often be corrected in one motion. A 10.9-inch or 12.9-inch panel resists that kind of casual adjustment. Once the glass starts landing off-axis, recovery gets harder and the adhesive stops feeling cooperative.
The third reason is rework cost. Reworking a phone panel hurts a little. Reworking an iPad panel hurts more because the adhesive area is larger, the cleaning step takes longer, and the second attempt usually happens under worse bench conditions. That is why yield discipline matters earlier in tablet repair.
There is also a timing issue. Many benches do not run iPads in a constant flow. Two units show up in the morning, then none until the next day. That stop-start rhythm punishes any workflow that relies on memory instead of written settings, repeatable prep, and stable setup notes.
Core Parameters That Actually Affect Yield
Working Size and Usable Fixture Area
The first buying mistake is focusing only on headline size. A machine may look spacious on paper and still feel cramped once the mold, stops, release liners, and hand clearance are in place. For iPad work, usable fixture area matters more than the number in the brochure.
That is why a compact machine is often the better fit for a tablet-heavy line. The panel stays within easy reach. Placement feels more controlled. Mold changes are faster. Oversized capacity sounds safe, but on a normal bench it often just adds awkward hand travel and extra fixture cost.
Vacuum Stability and Leak Control
In OCA LCD lamination, vacuum quality determines how fully air leaves the stack before pressure completes the bond. Weak or unstable vacuum does not always fail in an obvious way. Sometimes the panel looks fine at first, then shows haze or edge bubbles later under inspection light.
Leaks rarely announce themselves. A dirty seal, a loose hose fitting, or a slightly warped mold can be enough. That is why leak checks deserve routine attention. One small air path can ruin a clean adhesive sheet.
Jiutu’s compact OCA laminator page highlights a built-in mini vacuum pump and positioning features for smaller LCD lamination work, which is relevant for tablet repair benches that want a simpler, tighter setup.
Pressure Delivery and Plate Behavior
Pressure matters, but even pressure matters more. A larger iPad panel does not need dramatic force. It needs the two surfaces to meet in a controlled way. If one edge lands first because support is uneven, the bond front moves badly and the defect usually appears where the bezel is least forgiving.
This is why repeatable motion matters. A stable machine closes the same way at 10 a.m. and again at 4 p.m., and that consistency recovers more yield than many shops expect.
Mold Design and Panel Support
A mold is not just a holder. It defines the geometry of the bond. If the panel floats at the center, the bond path changes. If the corners do not sit evenly, pressure arrives unevenly. Then the machine gets blamed for a shape problem it never created.
For iPad glass lamination, the best molds do three things well. They support corners and center without twist. They locate the glass accurately. They also leave enough access for careful placement without brushing across the adhesive.
Heating Control
Heat can help, but only when the process actually needs it. Some stacks run well cold. Others benefit from controlled warming because of adhesive behavior or room conditions. The mistake is treating heat like a universal cure.
Too much heat can make handling worse and change how the adhesive behaves during transfer. So the useful question is not whether heating exists. The useful question is whether it is even, stable, and easy to control from one batch to the next.
Throughput and Bench Rhythm
A fast cycle time looks good on a product page. It means much less if prep, cleaning, and debubbling cannot keep up. On most benches, real output is decided by the slowest step in the chain, not the fastest one.
That is why machine choice should follow the actual work rhythm. A tablet-focused bench benefits from quick loading and easy mold swaps. A mixed-format line can accept slower setup if it gains wider process range.
The comparison below helps clarify which setup matches different repair volumes and panel mixes.
| Setup path | Best fit | Main advantage | Main watch point |
|---|---|---|---|
| Compact laminator | iPad and phone refurbishment | Faster loading, smaller footprint, easier fixture changes | Mold support has to stay accurate |
| Large-format vacuum laminator | Mixed tablet, car display, and LCD module work | Wider panel coverage and more room for expansion | Setup complexity and floor-space demand increase |
| Laminator plus debubble unit | Yield-focused optical bonding line | Better final finish and fewer residual bubbles | Process timing between steps becomes more important |
Recommended iPad Lamination Workflow
1) Panel Inspection
Start with shape, not with cleaning. Place the panel on a flat reference surface and check for corner lift, edge chips, and slight bow under angled light. This takes less than a minute. It can save an hour of rework.
If the panel rocks, the fixture plan may need to change before lamination starts. That matters because a hidden lift of half a millimeter can turn into a visible edge defect after bonding. The machine will not correct geometry that the fixture ignores.
2) OCA Handling
OCA handling should feel slow and uneventful. That is a good sign. The liner should peel evenly, the sheet should stay relaxed, and no corner should be rushed because the bench is busy.
Static control matters here. So does movement around the part. A sleeve brushing over an open adhesive sheet can do more damage than a poor wipe from thirty seconds earlier. That is why a quiet prep area usually pays off.
3) Fixture Setup
Set the panel in the mold and check support with light pressure at the corners and center. If the panel flexes, the support is wrong. If it shifts under a fingertip, alignment may drift during bonding.
This step often gets rushed because it looks finished before it really is. On an iPad panel, that habit is expensive. Weak fixture support rarely fails in a dramatic way. It fails by creating just enough shape error to show up later as a thin edge line.
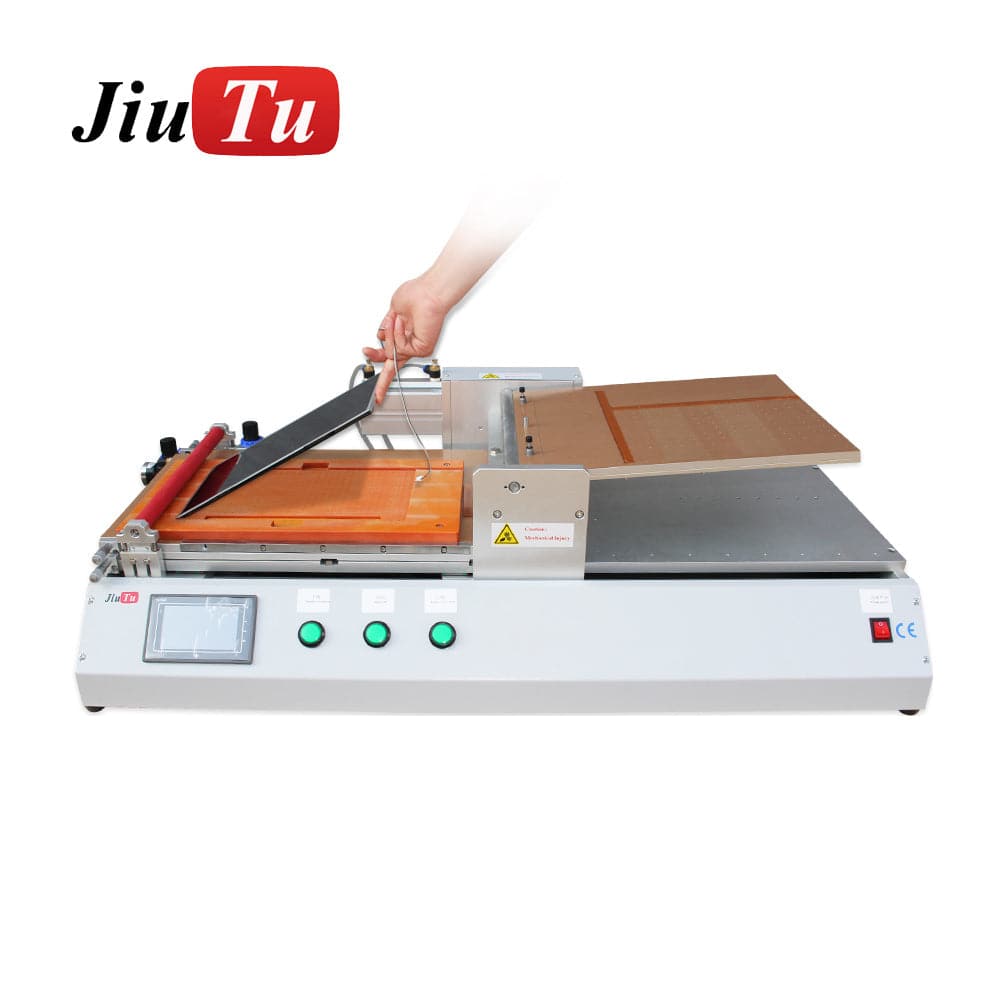
iPad panel placement on a compact OCA laminating machine during fixture setup
4) Vacuum Lamination
During vacuum lamination, air needs time to leave before pressure closes the bond line. If this stage is rushed, pressure traps what should have been evacuated. The panel may look acceptable at first and still fail later.
A properly maintained OCA laminating machine helps because it keeps vacuum behavior and mechanical motion more consistent from run to run. On a tablet-sized panel, that consistency matters more than on a small phone screen.
5) Immediate Post-Bond Check
Inspect the panel right away under low-angle light. This is the cleanest moment to spot dust, edge hesitation, camera-hole misalignment, or a narrow silver line near the bezel. Wait too long, and handling marks start to compete with the real defect pattern.
A simple four-point scan works well. Check the top camera area, one long edge, the opposite corner, and the center field. That fixed routine reduces the chance of staring at the middle while missing the edge that usually fails.If the center looks clean but one long edge shows a silver line, do not increase force first. Check fixture support, vacuum path, and pressure arrival before changing the pressure setting.
6) Debubbling
For serious tablet repair, debubbling is not just a finishing touch. It is part of the yield strategy. Residual microbubbles can move, fade, or show more clearly after a short rest. A dedicated screen debubble machine helps stabilize the final optical finish.
Jiutu’s bubble remover product page describes it as equipment for removing air bubbles after vacuum lamination with OCA and related optical glues, which matches how many optical bonding lines are structured in practice: bond first, stabilize second. A panel can pass the first visual check and still show faint edge defects after resting, which is exactly why the debubble step matters more on iPad-sized glass.
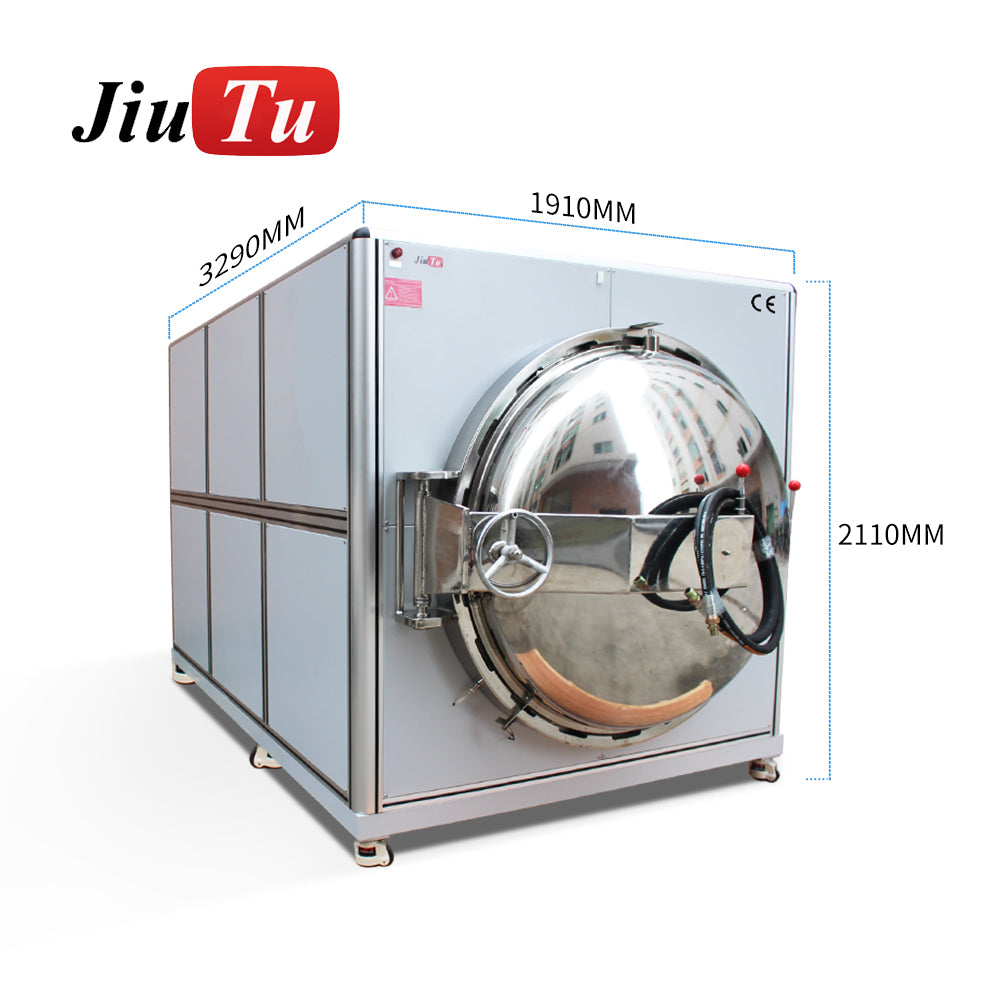
Bubble remover machine used after OCA lamination for tablet screen debubbling
7) Final QC
After debubbling, let the panel rest briefly and inspect it again under front light and side light. This is where faint edge bubbles, contamination halos, or local haze become easier to judge fairly.
A good QC routine is repetitive by design. Same light. Same angle. Same inspection order. That routine may sound dull, but dull is exactly what high-yield tablet repair looks like on a Wednesday afternoon.
Pre-Run Checklist
-
The panel sits flat with no rocking on the reference surface
-
Corners and center have even support in the mold
-
The OCA sheet is clean and free of stretch marks
-
Camera openings and edge features line up before loading
-
Hoses, seals, and fittings pass a quick leak check
-
Bench lighting is angled for dust inspection, not only overhead brightness
-
Release liners are removed in a consistent sequence
-
Debubbling capacity is available before lamination starts
-
Final inspection points are fixed: top edge, long edge, corner, center
How to Choose the Right OCA Laminating Machine
A lot of buying mistakes come from shopping for the biggest future job instead of the common daily job. That sounds sensible at first. In practice, it often produces a machine that is underused, awkward to load, and expensive to fixture.
For an iPad-heavy line, a compact OCA laminating machine is usually the safer starting point because it improves hand control, keeps fixture changes simpler, and makes it easier to standardize the process across shifts. It keeps the working area tighter, shortens hand travel, and makes process control easier. That matters more than oversized capacity when most jobs stay in the same size band week after week.
A different choice makes sense when the bench also handles vehicle displays, laptop panels, industrial modules, or larger commercial screens. In that case, a larger vacuum laminating machine becomes more reasonable because the bed size and process range can support mixed-format work. Jiutu’s large-format OCA film laminating page is built around that broader use case.
There is also a floor-space question that often gets ignored. Machine dimensions are only part of the story. Loading space, service access, fixture storage, and the distance between cleaning and bonding zones all affect daily performance. A machine that barely fits the room often harms the workflow long before it harms the budget.
Mold turnover matters too. If the line changes models several times a day, quick fixture access can be more valuable than a larger platform. If the line repeats the same iPad model for hours, a bigger system may be fine. Buying logic should follow the actual work rhythm, not an abstract wish list.
One practical rule helps. Count the last two normal weeks of real jobs. Not the busiest week. Not the most ambitious week. The normal one. If most work stays in the tablet range, buy for that. If larger panels already appear in steady numbers, then a wider system earns its place.
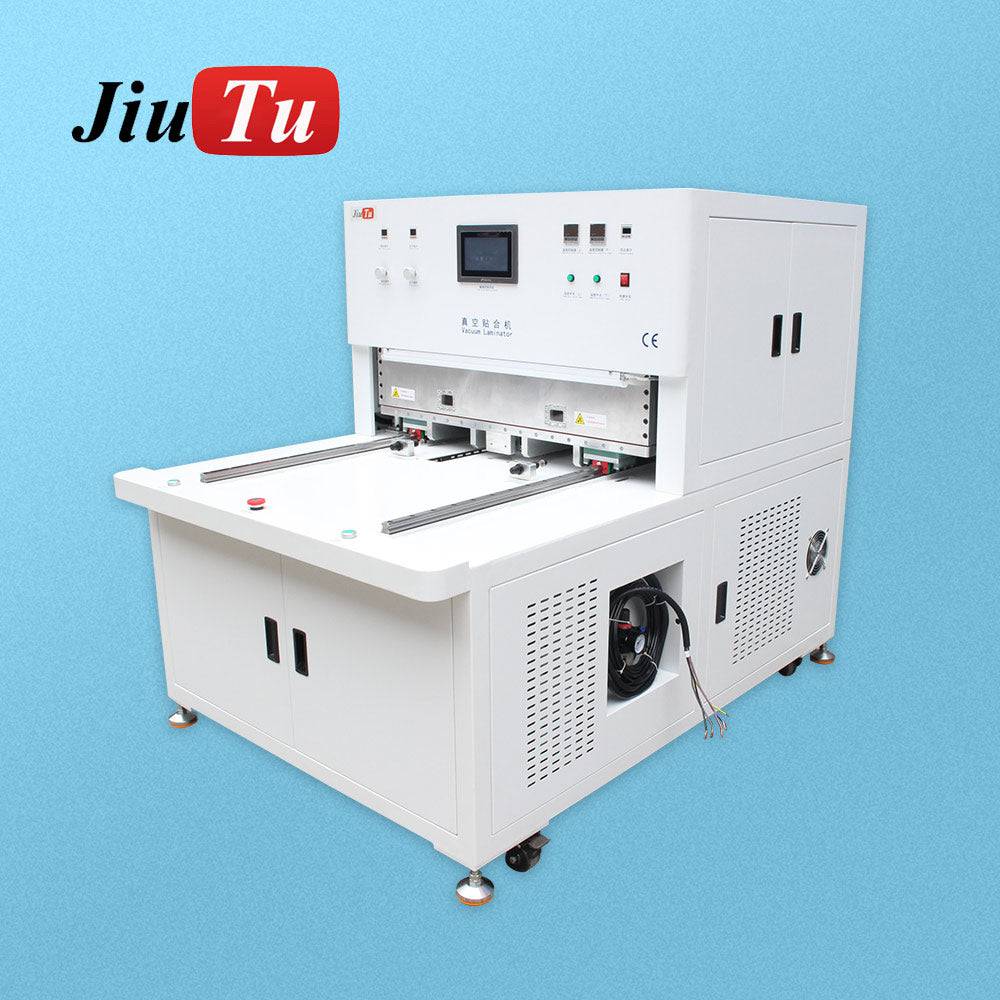
Large-format OCA film laminating machine for tablet and LCD module repair
FAQ
What causes edge bubbles when the center looks clean?
Most of the time, edge bubbles come from uneven support, weak vacuum, contamination near the bond path, or pressure arriving badly at one side first. On an iPad, long edges make those faults easier to see. The center can still look fine because it received more even contact.
Does size matter more than fixture design when choosing a laminating machine for LCD screen repair?
Fixture design matters more than many people expect. Size still matters because the panel must fit comfortably. However, once basic size is covered, flat support and accurate location usually have a larger effect on yield than buying one more step up in capacity.
Is debubbling always necessary after tablet screen bonding?
Not always, but it becomes much more valuable as panel size grows. A small, clean job may pass inspection without it. Larger iPad panels are less forgiving, and residual microbubbles tend to show more clearly under inspection light or after the panel rests.
Can one machine handle OCA film, polarizer work, and iPad glass lamination?
Sometimes, yes. Jiutu’s compact laminator page presents that machine around OCA, polarizer, and related film-lamination use, which is why smaller-format benches often lean toward that style of setup.
When does a larger OCA film laminating machine make more sense than a compact unit?
A larger OCA film laminating machine starts to make more sense when the workflow has already moved beyond mostly iPads and phones into mixed display-module work. That includes wider LCD assemblies, vehicle displays, and industrial screens where bed area and broader process range matter more than compact footprint.
If the bench mainly handles iPads, start with the setup that gives stable fixture support, repeatable vacuum performance, and a practical debubbling path. Jiutu can help compare suitable options, prepare a quote, or suggest a workflow adaptation plan based on the actual panel mix.
-
Check the next 20 lamination defects by location, not only by total count
-
Match machine size to the normal two-week panel mix, not the occasional large job
-
Pair lamination planning with debubbling capacity before increasing output