Anyone who has watched a panel look clean on the bench and then show two bright pinpoints under backlight ten minutes later knows the problem. The problem is usually not one dramatic mistake. More often, the workflow drifted somewhere between cleaning, alignment, pressing, and pressure release. That is where a laminator oca setup earns its place. It is not just there to stick glass to a display. It holds a process together, step by step, so the bonded stack stays stable when the panel leaves the plate and moves to debubble, inspection, and final packing. In practice, the same pattern shows up again and again: alignment, vacuum behavior, plate control, and debubbling discipline matter more than one flashy spec on its own.
A lot of writeups stop at “bubble-free lamination.” That misses the point. In real repair and module work, the hard part is not only getting a panel to look good once. The hard part is getting the same result at 9:20 in the morning, again at 2:40 in the afternoon, and still again when the model changes from a flat LCD to a narrower edge structure. So this article stays with the full path in the title: from alignment to debubble. That path is where yield lives.
What a laminating setup really does, and where it fits
An OCA process starts with a simple job on paper. A cover glass, touch layer, or display stack is brought together with optically clear adhesive under controlled vacuum and pressure. In practice, though, the job is less simple. The machine has to remove trapped air, keep the stack from skating during press-down, and give the adhesive enough help to wet out without introducing edge stress, local haze, or trapped channels. The optical bonding equipment family is broader than many buyers first expect, ranging from compact screen lamination units to vacuum laminators and separate bubble-removal equipment.
That is why the right laminator oca setup belongs in the middle of a process, not at the end of a shopping list. A good line is never just “buy a press.” It is a sequence: clean the stack, hold alignment, evacuate air, laminate with control, let the panel settle, then remove residual micro-bubbles under debubble conditions that match the structure.
Put simply, an OCA laminating machine presses a display stack together under vacuum so air leaves before the adhesive fully locks the layers. That one sentence sounds tidy. Yet the real job has four separate demands packed into it.
First, the fixture must keep alignment stable in the first few seconds, which is the moment many panels drift. Second, the pressure path must be even enough that one corner does not wet out while another corner still traps a thin channel. Third, the plate and bed need enough flatness that local force does not print defects into the stack. Finally, the result has to be compatible with the next step, because a debubble chamber can clean up micro-voids, but it cannot rescue bad alignment or dirt anchored inside the bond.
Typical scenarios where the process matters most
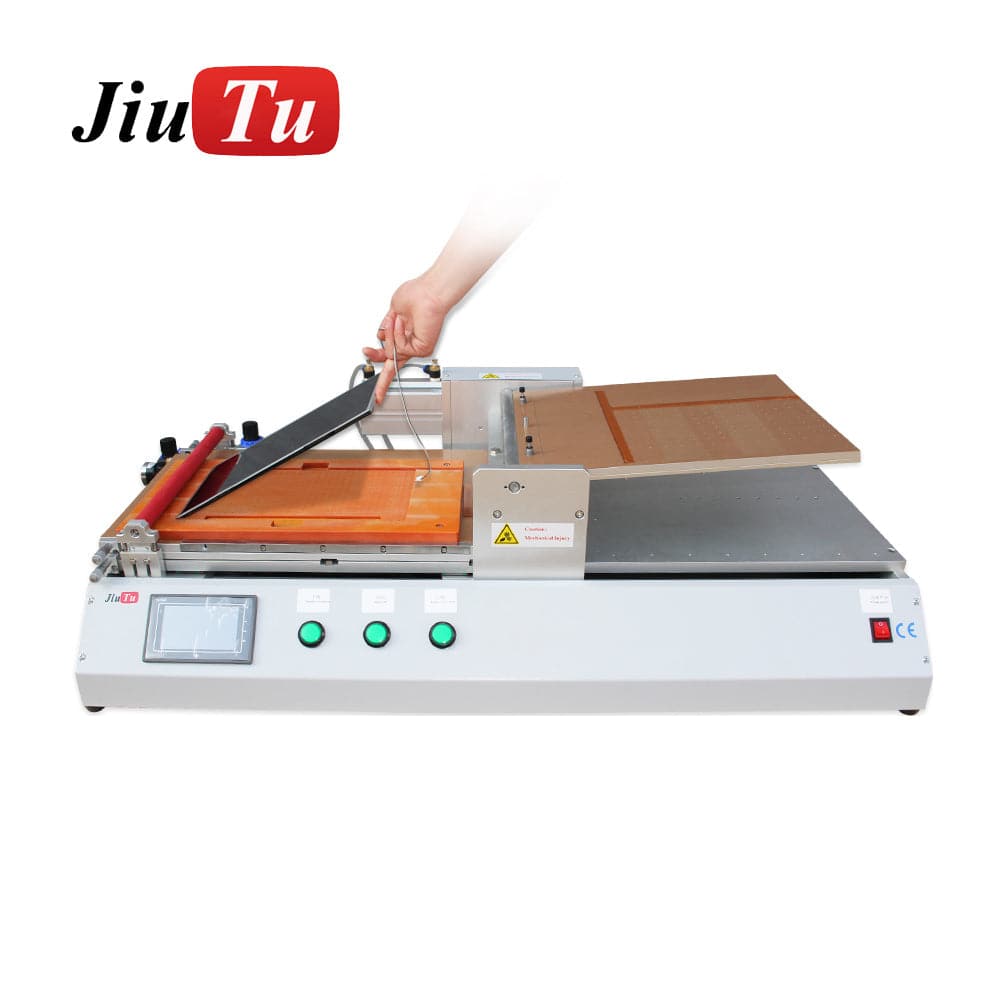
On a phone refurbishment bench, the most common case is front-glass replacement on common LCD and OLED models. Here, throughput matters, but bench space matters too. A panel may spend only seconds on the plate, then move to a rack and on to debubble. The weak point is usually not raw tonnage. It is repeatability under mixed models and mixed operators. Compact automatic vacuum setups make sense in high-frequency phone repair when the upstream cleaning routine and downstream debubble rhythm are already controlled.
On a rework bench handling tablets or larger all-in-one panels, another pattern shows up. The bonding area gets wider, the glass has more room to flex, and fixture design stops being a side issue. A slight tilt that feels harmless on a phone becomes a visible problem on a 10-inch or 13-inch part. Larger vacuum laminators tell the same story in hardware form: once size grows, plate area, pressure balance, and custom molds stop being optional extras.
For industrial display module work, the workflow gets less forgiving again. A screen for a control panel, a vehicle display, or an equipment interface does not only need optical clarity. It needs consistency across runs. The same bonding line may need to handle black border areas, cutouts, sensors, thicker cover lenses, or odd-shaped windows. That is why industrial teams often care more about fixture repeatability, usable plate area, and the stability of the vacuum path than about the single fastest advertised cycle time.
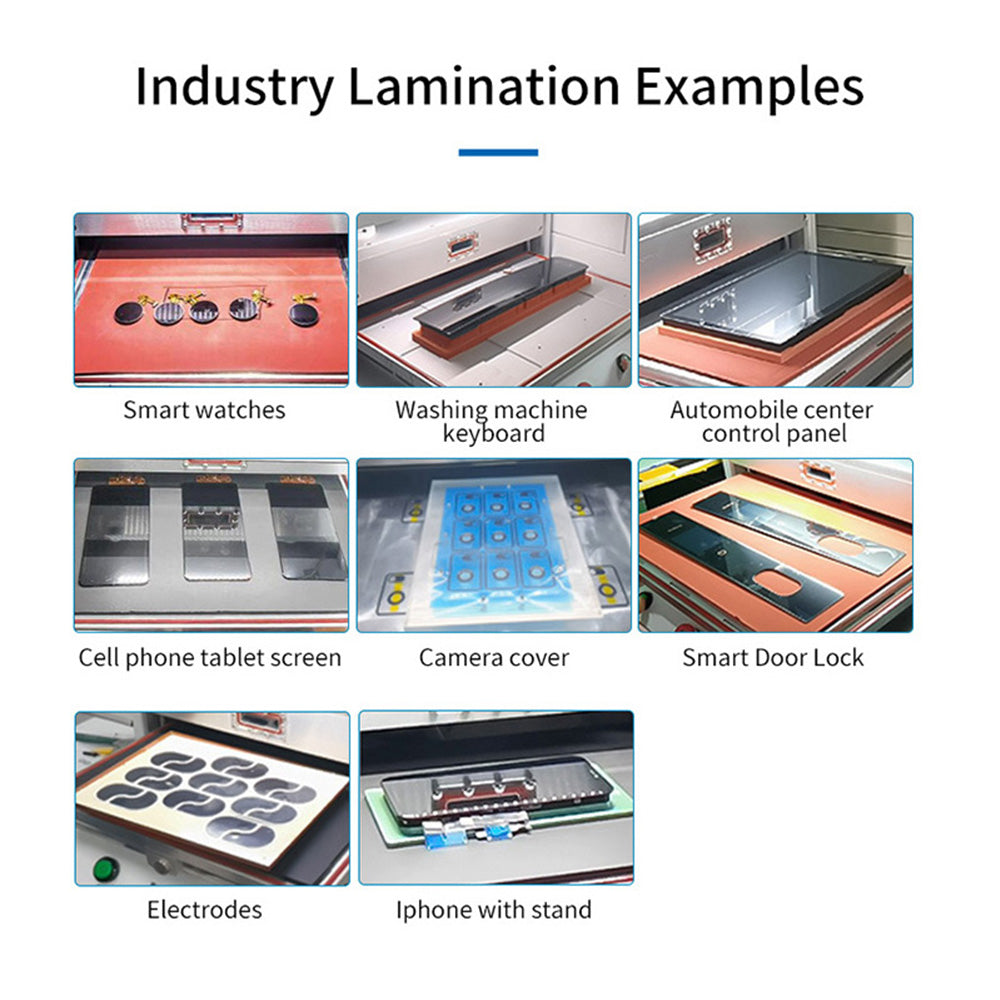
The application range matters. Small screens, tablets, control panels, and shaped parts do not ask the same thing from one bonding station.
Why “from alignment to debubble” is the right frame
The title works because it follows the defect chain backward. If a finished panel shows edge crescents, pin dots, haze, or late bubble rebound, the cause rarely sits only in the final chamber. A late bubble may begin as a flattened micro-void. A haze patch may start with weak wet-out. A repeating corner defect may trace back to fixture flatness or pressure imbalance. In real workflow analysis, the same thing keeps showing up: small errors appear faster on wider panels, edge structures reduce process margin, and bubbles are usually patterned rather than random.
That is also why the term laminator oca should not be read too narrowly. The machine matters, yes. Still, what matters more is whether the full station around it makes the machine easy to run the same way every time. A stable bench is boring in the best sense. Liners open in the same order. Fixtures return to the same position. Vacuum starts at the same point in the sequence. Panels rest the same amount of time before debubbling. Good yield usually looks ordinary when the line is under control.
Core parameters that actually decide yield
Spec sheets can be noisy. A line about pressure sounds strong. A line about automation sounds modern. Yet on the bench, only a handful of parameters keep showing up when results drift. The hard truth is this: for most OCA work, force is not the first question. Control is.
1) Alignment method and fixture repeatability
Alignment is where avoidable rework often begins. A display stack that shifts by a small amount may still pass a quick glance under room light, especially on black-bordered panels. Under a tighter check, though, the mismatch appears at the edge, at a camera window, or around a notch. Once that happens, debubbling cannot help.
For that reason, the fixture system deserves more respect than it usually gets. Custom molds deserve more attention than they often get. On standard phone models, a well-made jig speeds up centering and reduces hand correction. On larger or irregular parts, a custom mold is not a luxury. It is the difference between repeatable alignment and constant nudging before every cycle.
A simple rule holds up well here: the wider the panel, the less room there is for “good enough” positioning. A narrow phone screen may forgive a small placement error during first contact. A tablet or industrial panel usually will not. That is why a laminator oca should be judged by how calmly alignment can be repeated, not by how dramatic the press motion looks.
Alignment is not glamorous, but it decides whether the next three steps are routine or annoying.
2) Usable support area, not just machine size
There is a big difference between an outer machine frame and the plate area that actually supports work. That difference becomes obvious the moment a larger stack sits close to the edge of the usable zone. Suddenly the question is not “Can the machine take this part?” but “Can the machine support this part evenly?”
A compact setup and a larger-format setup support very different working styles. One is built for repeated small-screen handling at speed. The other is built for bigger glass and mixed-format work where support area matters far more.
That distinction matters during selection. A team that mainly handles 6-inch phone panels can live happily with a smaller plate if the fixture and vacuum behavior are stable. A line that mixes phones, tablets, and wider display modules will feel cramped on that same plate almost immediately. In that case, choosing by external footprint alone is a mistake.
3) Vacuum behavior and pressure path
Most discussions talk about “having vacuum” as if it were one switch. It is not. Vacuum quality matters because it changes how air leaves the stack and how evenly the adhesive begins to wet out. Pressure matters because once the vacuum stage has done its part, the press-down path has to finish the contact without forcing trapped channels into a different place.
The real sequence matters more than the headline spec: evacuation first, controlled plate movement next, not random pressing and hoping the air disappears. That is especially true in larger-format work, where uniformity matters as much as pace.
In phone repair, speed only helps when the vacuum path stays consistent and the small panels do not shift during first contact. High-frequency work does need pace, but fast without control just creates fast rework.
4) Temperature range and when heat actually helps
Heat gets overstated. Not every OCA workflow needs aggressive heating. In many screen refurbishment cases, the goal is not to cook the adhesive. The goal is to help wet-out, reduce viscosity where needed, and keep the contact path even enough that the bond finishes cleanly.
This is also where bad selection often happens. A line sees a higher temperature number and assumes it is safer. Not always. On delicate stacks, especially with mixed materials and edge structures, too much heat in the wrong place can create new stress instead of fixing old defects. Control range is usually more useful than a dramatic top-end number.
Put simply, lamination heat and debubble heat are not the same tool used twice. One helps establish the bond. The other helps finish a near-correct bond by collapsing residual voids under controlled conditions.
5) Parallelism and local pressure balance
Parallelism sounds like a lab term. On the bench, it shows up as one corner always behaving a little differently. Maybe that corner wets slower. Maybe it holds a faint crescent. Maybe it only causes trouble on wider panels. Those repeating patterns are often more informative than any spec sheet.
The same problem keeps showing up in practice: pressure balance, fixture flatness, and corner behavior matter more than people first assume. A machine can have decent power and still perform badly if the plate, bed, or fixture introduces local imbalance. On a busy line, these issues often get mislabeled as “bubble problems,” even though the true source is uneven first contact or inconsistent plate support.
6) Throughput that stays stable under mixed work
Advertised speed is easy to quote and hard to use well. Yet the important number is not the shortest run in a clean demo. It is the average run that still gives clean backlight, low rework, and manageable operator rhythm across a full shift.
When one workflow combines lamination and immediate follow-up bubble control in a tighter sequence, handling steps can drop, dust exposure can drop, and the line can move with fewer interruptions. Still, a compact combined layout only helps if the machine fits the real part size and real defect pattern. A small bench-friendly format is great for phones. It is the wrong answer for a larger automotive or industrial stack.
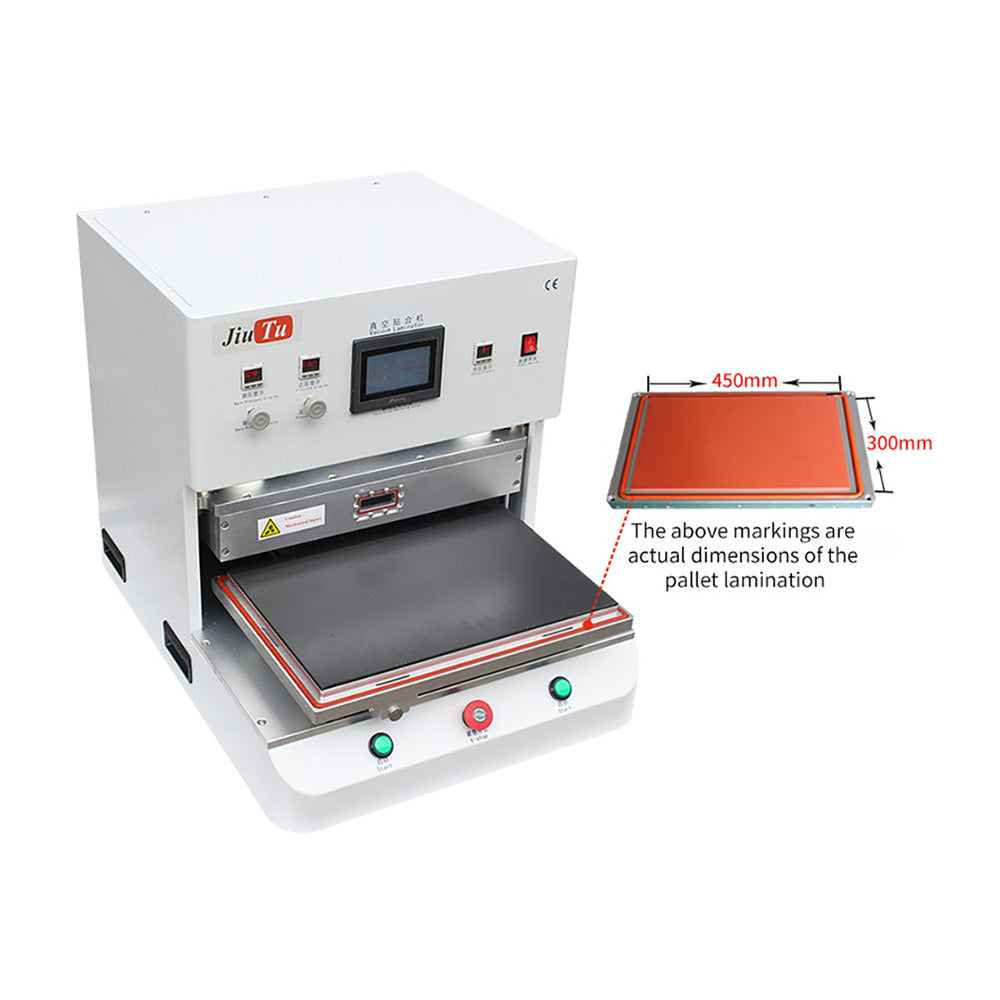
Plate size and usable area are practical details. Once screens get larger, they stop being small details.
7) Downstream compatibility with debubble conditions
A lamination result should arrive at the debubble station in a condition the chamber can actually improve. That sounds obvious, but plenty of lines ignore it. If the laminated panel already contains dirt, visible misalignment, scratch marks, or major trapped channels, the debubble step becomes a false hope.
The key point is simple: the chamber is a finishing step for residual bubbles, not a repair step for every upstream error. That is the right way to view debubble equipment. It should complete a near-correct panel, not rescue a bad one.
The process flow: from alignment to debubble
This is the part that usually decides whether a station feels calm or constantly behind. The steps themselves are not mysterious. What matters is that the same sequence happens in the same way, with the same checks, even when the room is busy.
Step 1: Inspect the incoming stack before any liner opens
Start with the panel, glass, and OCA condition before exposing the adhesive. A quick look under angled light saves time later. Tiny chips near an edge, dust around a sensor cutout, and uneven liner tension are small details, yet they often become very visible after pressing.
In many workshops, this is where impatience sneaks in. A stack looks fine at arm’s length, so it goes straight to lamination. Ten minutes later, one white dot under backlight sends the whole part back through rework. The point is simple: particle dots, scratches, and true alignment errors are not debubble problems. They begin earlier.
A practical habit helps here. Keep inspection lighting at the same angle and distance for every job. Thirty extra seconds under stable light is cheaper than reopening a bonded part.
Step 2: Dry-fit and confirm alignment points
Before pressure starts, the stack should have a known reference. On a phone screen, that might be a border edge, ear speaker window, or camera opening. On a larger module, it may be a fixture shoulder, locating pin, or a taped stop on the mold.
This is where many technicians get tempted to “eyeball the last millimeter.” That works until it doesn’t. A dry-fit takes little time and reveals whether the jig truly supports the model. If the stack wants to rock, twist, or creep during light contact, the problem is already visible before the vacuum cycle begins.
For mixed-model repair work, a smaller laminator oca setup can still do excellent work when the jigs are accurate and the placement routine is disciplined. Without that routine, even a stronger machine will simply press mistakes faster.
Step 3: Begin vacuum lamination with controlled contact
Once the stack is aligned, the vacuum stage should do one thing well: remove air before the adhesive is forced into full contact. The same point comes up again and again in real workflow analysis. Wide parts and edge structures reduce margin. Small deviations in vacuum stability, fixture flatness, and pressure timing create defects that look random only after the fact.
In daily work, the laminator oca step should never be rushed just because the panel is small. Small panels are quick, not forgiving. They hide less area, but they still trap dust, edge air, and peel-stretch marks if the start sequence changes from one job to the next.
A practical example makes this clearer. Imagine a repair bench doing twelve phone screens before lunch. The first five look clean. Then one model with a tighter edge radius goes through on the same settings. If the vacuum draw or press timing is a little off, the first hint may be a faint corner crescent that shows only after the part cools. That is not bad luck. It is a workflow mismatch.
Step 4: Release, rest, and avoid rough handling
After lamination, the panel should not be handled like finished stock. The bond is started, not finished. Pressing, lifting, or flexing too quickly can disturb areas that have not fully stabilized yet. That is especially true on larger parts and on structures where the adhesive path is longer.
A short rest period sounds old-fashioned, but it helps. Even one or two minutes on a clean, flat tray can make the next step more predictable. The point is simple: do not create handling defects and then blame the debubble chamber.
Step 5: Debubble to finish the optical bond
This is the moment many lines talk about the least and depend on the most. A good debubble step does not replace proper lamination. It finishes it. A proper debubble chamber is there to finish a near-correct bond under controlled pressure and heat, not to serve as a guess-and-wait box for every upstream defect.
This is also where weak process logic often shows up. Some benches treat every bubble as the same bubble. That wastes time. A micro-air cluster after otherwise good wet-out is a chamber job. Misalignment is not. A particle-anchored dot is not. A scratch under the glass is not. That distinction matters because it separates what the chamber can improve from what it cannot.
The practical effect is huge. Once a line stops throwing every defect at debubble, cycle planning gets cleaner. Good panels go in. Bad panels are screened out earlier. Throughput improves even without buying a faster machine.
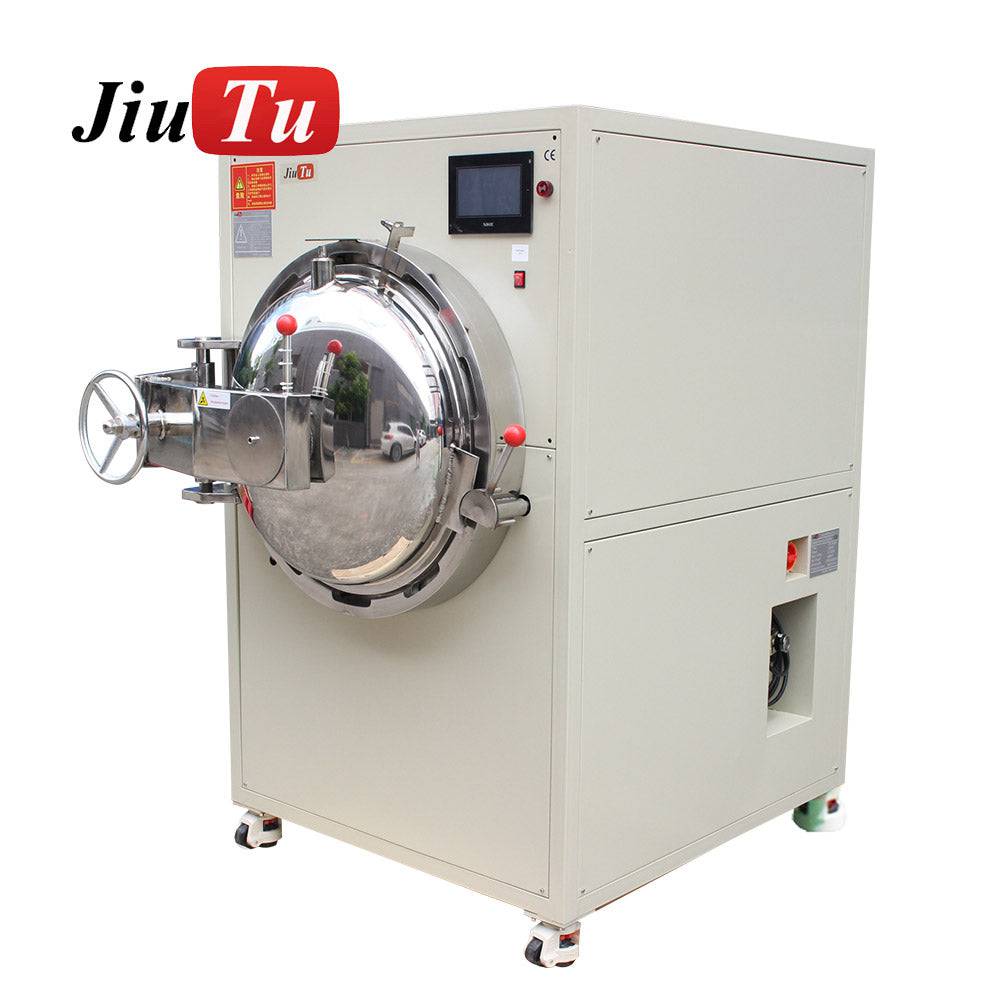
Debubble works best when it is finishing a near-correct bond, not trying to hide upstream mistakes.
Step 6: Inspect under backlight, not only under room light
Backlight inspection is where a process becomes honest. A panel that looks acceptable on a grey bench may show haze, edge crescents, pepper dots, or ring-like patterns as soon as light comes through it. That is why final QC should match actual use conditions as closely as possible.
For smartphone repair, a quick functional test fixture and angled backlight check are usually enough to sort good from questionable parts. For larger modules, a stable light source and repeatable inspection angle help more than long discussions after the fact. If defects keep appearing at the same corner or around the same cutout, the line already has a clue. The station should listen.
A workflow checklist that keeps the line honest
Below is a simple shift-start and run-start checklist. It is plain on purpose. Fancy SOP language rarely prevents a bad panel; consistent habits do.
Pre-run checklist
-
Bench wiped after dirty tasks, not during OCA handling
-
Inspection light on and fixed at the usual angle
-
Fixture or mold matches the exact panel version
-
Cover glass, display, and adhesive checked for chips, dust, and liner issues
-
Vacuum pump, air line, and plate surface checked before the first cycle
-
Lamination settings confirmed for that structure, not copied blindly from the last one
-
Rest tray prepared so bonded panels are not stacked too early
-
Debubble chamber schedule matched to the current batch type
-
QC light or backlight test ready before finished parts accumulate
-
One trial panel reviewed before the line moves into full rhythm
None of those ten checks is complicated. That is exactly why they get skipped when a bench gets busy. That checklist looks almost too simple. Still, most repeated defects on a busy bench come from skipping one of those ten points, not from missing some secret parameter.
Pairing logic: lamination and debubble should be chosen together
A lot of equipment decisions go wrong here. A team buys a lamination unit first, then later adds whatever bubble remover seems available. That backward order can work, but it often leaves a mismatch between output rhythm and finishing capacity.
The stronger approach is to think in pairs. If the upstream station is fast and compact, the downstream chamber has to absorb that pace without becoming a parking lot for half-finished panels. If the upstream station handles larger parts, the downstream chamber has to match the physical size and the defect profile of those parts. That is why an OCA vacuum laminator is not just an isolated purchase. It is one side of a line logic.
What changes between phone work and industrial module work
Phone work rewards rhythm. The same models come back again and again, and the line gets faster when fixtures, cleaning, and lamination timing stay consistent. Industrial module work rewards preparation. The mix is wider, the parts are larger, and one mistake can tie up far more material.
That difference explains why the phrase oca machine 2 in 1 appeals more in one environment than another. On a high-turn phone bench, a tighter combined flow can reduce movement and dust exposure. On a larger module line, separate stations often make more sense because part size, fixture variety, and chamber scheduling need more room to breathe.
Buying advice: choose the workflow, not only the machine
A buying decision becomes easier once the process is clear. The question stops being “Which machine is best?” and becomes “Which workflow stays stable for the actual part mix?” That is a much better question.
The better selection rule
Here is the blunt version: buy for the hardest regular job, not the easiest frequent one. If the line occasionally sees larger tablets, edge structures, or industrial panels, selection should not be based only on the cleanest phone demo. The hardest regular job exposes fixture needs, usable plate limits, and whether debubble capacity is realistic.
That is why the broader laminator oca equipment category matters. The broader equipment landscape makes it clear that one station type does not fit every use pattern. Compact units, larger vacuum laminators, polarizer-focused machines, and separate bubble-removal equipment exist because the work itself varies.
Different workloads do not stress the process in the same place.
What changes is not the basic workflow logic, but where that logic gets tested first.
| Workload | Where the workflow usually gets stressed first | What operators need to watch most closely | What a stable setup should make easier | |
|---|---|---|---|---|
| Repeated phone screen refurbishment | Repetition fatigue and invisible shortcut habits | Alignment drift, rushed transfer, and inconsistent backlight checks across repeated models | Fast, repeatable placement, short transfer distance, and a debubble rhythm that does not turn into a bottleneck | |
| Mixed rework benches | Variation between panel structures, sizes, and border conditions | Whether the stack sits naturally, whether first contact starts evenly, and whether settings are being reused too casually | Clear fixture logic, readable vacuum behavior, and enough flexibility to handle model changes without improvised workarounds | |
| Larger tablets and display modules | Support weakness becomes easier to see once the bonding area gets wider | Uneven support, corner stress, flex during handling, and repeat defects that appear on one side of the panel | Better support across the working area, calmer handling after lamination, and a debubble stage matched to the larger bonded stack | |
| Industrial or shaped display work | Small process variation turns into repeatable output variation across runs | Fixture repeatability, edge and cutout behavior, and whether the same inspection method is being used every time | Stable molds, controlled lamination conditions, and a workflow that stays predictable across batches rather than only in one-off demos |
That is why the same workflow can feel calm in one environment and fragile in another. The sequence stays the same, but the pressure points move with the workload.
A compact laminator oca makes sense when the bench mainly sees standard phone work and the rest of the line is already tidy. That route is practical, not small-minded. The mistake is expecting the same setup to feel equally comfortable on much wider panels or awkward module shapes.
What phone repair benches should look for
For a phone refurbishment line, three things matter more than a dramatic spec list. First, fixture repeatability must be easy, because the line lives on short cycles. Second, the transfer from lamination to debubble should be short and clean. Third, the operator sequence should stay simple enough that the fourth hour of the shift looks like the first.
That is why compact automation and bench rhythm matter so much. In a phone repair environment, the real target is steady repetition rather than oversized capacity. Easy setup, short transfer distance, and a routine that stays clean under repeated models matter more than dramatic headline specs.
What screen rework engineers should look for
A rework engineer usually worries about different things. One odd defect repeated three times is already too many. So the key checks become plate flatness, fixture support around weak edges, and how settings translate between different structures.
For this kind of work, a machine that exposes and controls the process is better than one that hides it under marketing language. PLC setting control, clear vacuum sequencing, and enough plate area to support the part properly are more useful than vague claims about being “strong” or “advanced.” What matters is whether the machine description makes the operating logic clear, not just the headline result.
What industrial display procurement should look for
Procurement on the module side usually carries two burdens at once. The line needs enough capacity and the defects need to stay predictable. One without the other is expensive. A low-cost station that creates variable output is not cheap in any meaningful sense.
For that reason, industrial selection should focus on five things: usable plate size, mold strategy, repeatable pressure path, matching debubble capacity, and the supplier’s willingness to talk about the workflow as a system rather than a single box. The important thing is to evaluate optical bonding as a workflow ecosystem rather than pretending one machine solves every scenario.
Common buying mistakes that show up later
One common mistake is choosing on cycle time alone. A fast first press is not valuable if the station creates more debubble load, more handling damage, or more backlight rejects. Another mistake is treating larger-format capability as a bonus rather than a different class of work. Wider panels ask for different fixtures, different support, and often a different pace.
The third mistake is easy to miss. Some lines buy lamination first and leave debubble for later. That feels cheaper in the moment. Later, though, it creates a mismatch in capacity and defect handling. A line that thinks ahead usually spends less time improvising around bubbles after the machine arrives.
FAQ
1) Does a laminator oca need heat for every screen job?
No. Plenty of OCA work does not depend on high heat. What matters more is whether the adhesive wets out evenly under the chosen vacuum and pressure path. In some jobs, especially standard phone refurbishment, the process can run well with little or no added heat if the adhesive, stack condition, and settings already match.
Still, heat has a place. Heating becomes important when viscosity control or hot-melt behavior starts to matter. The mistake is assuming more heat automatically means cleaner lamination. On sensitive stacks, extra heat can add stress instead of solving the real problem.
2) Can debubbling fix visible misalignment?
No. Debubbling removes residual bubbles. It does not recenter glass, erase dust, or undo a poor fixture. That distinction saves a lot of wasted cycles. If a panel is visibly off around an edge, a notch, or a camera window, the defect belongs to alignment, not the chamber.
The key point is that the chamber is a defoaming step after lamination or assembly, not a correction step for bad alignment. The blunt version is this: some defects point upstream and stay upstream.
3) When does a tighter lamination-and-debubble flow make more sense than separate stations?
It makes sense when transfer handling is part of the problem and the regular workload stays in smaller formats. A compact combined flow can shorten the time a freshly laminated panel spends moving around the bench. That helps with dust exposure and operator rhythm, especially on busy phone refurbishment work.
It makes less sense when the line sees a lot of larger modules, odd shapes, or wider plate requirements. In those cases, separate stations usually offer more flexibility in fixtures, part support, and chamber scheduling. The combined route is best seen as a workflow choice, not a universal upgrade.
4) What is the first parameter to verify when bubbles repeat in one corner?
Start with fixture support and pressure balance in that area. Corner-only patterns often point to local mechanical conditions before they point to “bad adhesive.” If the same corner repeats across several runs, the line has a clue already. Plate parallelism, mold flatness, contact sequence, and part support should be checked before changing a long list of settings.
That logic holds up in practice because repeat patterns usually reveal root causes. Random-looking bubbles are often structured once the line pays attention to where and when they appear.
The selection call gets easier once the workflow is honest
A clean optical bond usually comes from a steady chain, not from one heroic press. Alignment has to stay put. Vacuum has to remove air before force finishes the contact. The bonded part has to rest without rough handling. Debubble has to finish a panel that is already close to correct. That is the real meaning of “from alignment to debubble.”
For teams comparing options now, the practical next step is simple. Match the machine to the hardest regular job, not the easiest demo panel. Then match the lamination station to its fixtures, transfer rhythm, and debubble capacity. When the goal is fewer repeats and steadier output, the best laminator oca choice is the one that keeps the full line calm, not the one with the loudest headline. For teams planning a phone repair, rework, or larger-module bonding line, Jiutu can help match the lamination setup, fixtures, and debubble stage to the actual workflow.
Three useful next steps
-
Review the actual part mix from the last 30 days and separate phone work from larger module work before choosing equipment.
-
Test one fixture and one panel under backlight after lamination and again after debubble, then compare where the defect really begins.
-
Choose lamination and debubble as a pair, so output rhythm, plate size, and finishing capacity stay aligned.