
Bubble-free OCA lamination is a controlled routine, not a lucky pass. Clean staging keeps particles out, stable flash-off keeps residue from outgassing, and a consistent press cycle keeps edges from rebounding. In that chain, a vacuum laminator matters because air is removed before pressure locks layers together. Afterward, pressure+heat bubble removal (often called defoaming or autoclave-style conditioning) stabilizes micro-voids that would otherwise show up later. When the whole workflow stays calm, clarity improves, rework drops, and edge lines stay quiet after warm soak.
Bubble-Free OCA Lamination: What “Pass” Looks Like Under Inspection
A “pass” bond looks uniform in more than one lighting mode. Backlight reveals bubbles and wet-out gaps. Side light exposes residue film and dust points. Angle sweeps show rings and silvering that hide at normal viewing angles.
A common trap is judging a screen too early. A stack can look clean right after pressing, then show a thin edge line after 30–60 minutes of warm soak. That late change usually points to stress, residue, or micro-void behavior rather than “bad luck.”
Defect patterns that point to the true stage
Most benches solve problems faster by naming the pattern first. Location and shape usually point to the stage that created the defect.
-
Large center bubbles: trapped air during laydown, rushed alignment, or short vacuum stabilization.
-
Edge bubbles near bezel: weak edge support, edge contamination, or release stress that pulls the rim back.
-
Pepper dots (pinpoints): dust pickup, static attraction, liner contamination, or glove transfer.
-
Silvery haze under side light: cleaning residue, solvent film, or incomplete wet-out across micro-texture.
-
Newton rings / rainbow patterns: micro-gaps with thickness variation and uneven pressure distribution.
OLED jobs often fail at the perimeter. Thin stacks and curved edges magnify rebound, so an edge that “looks fine” can open later. In colder seasons, micro-voids become more visible because wet-out slows down.
Why OCA behaves differently from liquid optical adhesive
OCA is a solid optically clear adhesive film with defined thickness. It bonds by wet-out, meaning full-area contact must develop across the stack. If wet-out remains incomplete, micro-gaps stay behind. Under certain light, those micro-gaps show up as haze, dots, rings, or thin edge lines.
Why Bubbles Happen on Repair Benches: The Causes That Repeat
Bubble issues are usually predictable. A few small drifts stack up, and defects appear “random.” The fastest way to stabilize output is controlling the drift sources that show up most often.
The top five causes (bench reality order)
1) Residue that looks invisible in overhead light
Adhesive haze, polishing compound, and micro-oils can remain after a “clean-looking” wipe. Under pressure, residue zones resist wet-out and create haze or micro-void clusters. Corners and sensor windows are typical residue traps.
2) Static that turns OCA into a dust magnet
Dry air plus fast liner peel creates static. Dust then lands exactly where it causes the most pain—between layers. Pepper dots spike on low-humidity days for this reason.
3) Materials starting too cold
Cold film is stiff and wets-out slowly. Cold glass holds micro air pockets longer. In winter, a process that ran stable in summer can suddenly show micro-void haze and edge lines.
4) Uneven pressure and weak perimeter support
Plate flatness, cushion wear, and fixture mismatch can leave the last millimeter unsupported. That “last 1 mm” often decides edge bubbles, especially on OLED and curved glass.
5) Solvent film not fully flashed off
IPA and adhesive remover chemistry need a flash-off window. If solvent remains as a thin film, it can outgas later and create haze or late bubbles. That failure is common after aggressive de-glue steps.
Environment and consumables management that stabilizes yield
Small controls matter more than fancy slogans. A stable line usually standardizes room behavior and consumables first.
-
Temperature discipline: keep glass and film near room temperature before laydown.
-
Humidity discipline: moderate humidity reduces static; extreme dryness increases dust pickup.
-
ESD discipline: anti-static mat, grounded tools, consistent glove selection.
-
Wipe discipline: one lint-free wipe type, one folding method, one-direction wipes.
-
Staging discipline: covered trays for cleaned parts and exposed OCA.
A short “bench truth” fits here: sudden pepper dots often come from low humidity plus fast liner peel. A machine fault is less common than that combination.
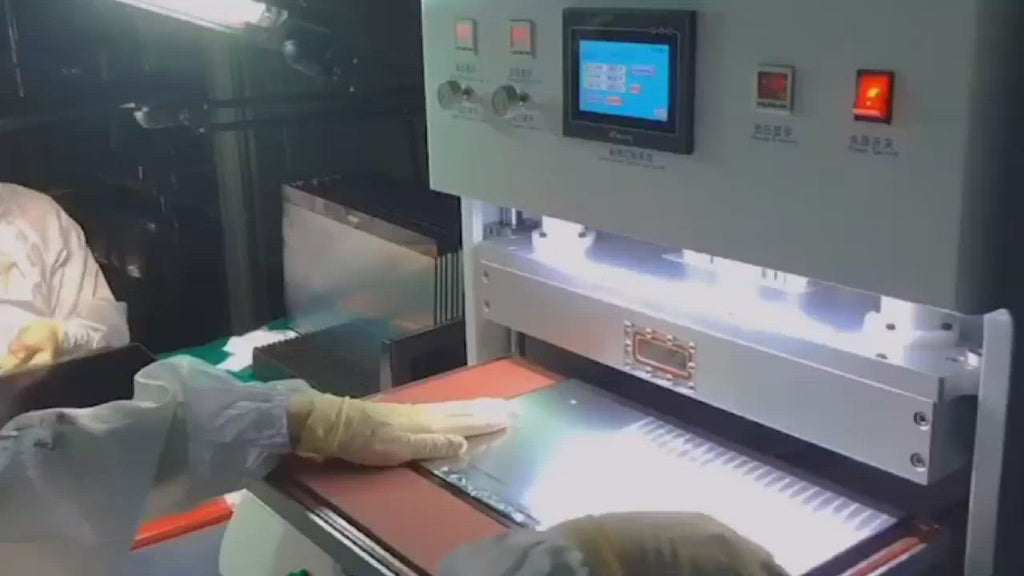
How Vacuum Lamination Works: Air Out First, Pressure Second
Vacuum lamination changes the order of physics. Air evacuation happens first. Controlled compression happens second. That sequence removes the most common trapped-air defects and improves wet-out uniformity.
The two phases that decide the optical outcome
Vacuum stabilization phase
Air expands and evacuates more easily in low-pressure conditions. Stabilization that is too short leaves pockets behind. Stabilization that is stable reduces “air work” during the press stage.
Press + release phase
Uniform pressure spreads contact evenly. A controlled ramp avoids edge shear and stress lines. A controlled release prevents the rim from springing back and reopening micro-gaps.
Peak numbers matter less than stable curves. A healthy cycle reaches the target smoothly and holds without drift. An unhealthy cycle reaches slowly, then wanders during hold.
Bubble removal, defoaming, autoclave: one definition that stays consistent
This guide uses one main term: bubble remover. It refers to the pressure+heat defoaming stage used after lamination. Some benches call it an autoclave-style step, while others call it defoaming. The equipment goal stays the same: compress micro-voids, stabilize wet-out, and calm edge behavior.
Units and Display Differences: A Quick Conversion and Reading Guide
Machines do not speak one measurement language. Press pressure can show in MPa, bar, or kgf/cm². Vacuum can show as absolute kPa, relative kPa, mbar, or a percentage. A short conversion guide makes recipes portable across equipment.
Pressure conversion quick chart (press and bubble remover)
| Unit shown on screen | Quick relation | Useful reference points |
|---|---|---|
| 1 MPa | = 10 bar | ≈ 145 psi |
| 1 bar | = 0.1 MPa | ≈ 14.5 psi |
| 1 kgf/cm² | ≈ 0.098 MPa | ≈ 0.98 bar |
| 1 psi | ≈ 0.0069 MPa | ≈ 0.069 bar |
Practical shorthand helps on a busy line. “0.60 MPa” is roughly “6 bar” and roughly “6.1 kgf/cm².” That is usually close enough for setup discussions, then fine tuning can follow.
Vacuum display types: absolute vs relative (gauge)
Vacuum readouts cause confusion because two common display styles look opposite.
Absolute pressure (kPa abs):
-
Lower numbers mean deeper vacuum.
-
Atmosphere is roughly 101 kPa abs.
-
Deep vacuum might read 10–30 kPa abs depending on system.
Relative/gauge vacuum (kPa gauge or “-kPa”):
-
More negative numbers mean deeper vacuum.
-
Atmosphere is 0 kPa gauge.
-
Deep vacuum might read -80 to -95 kPa gauge.
A quick bench translation keeps things clear:
-
101 kPa abs ≈ 0 kPa gauge (atmosphere)
-
20 kPa abs ≈ -81 kPa gauge (deep vacuum range)
-
10 kPa abs ≈ -91 kPa gauge (very deep range)
Different machines also show mbar. In that case, 1013 mbar is atmosphere, and lower is deeper vacuum. A reading of 200 mbar indicates deeper vacuum than 400 mbar.
Practical “vacuum health” checks that beat chasing a number
Instead of arguing over a display style, stability checks keep processes repeatable.
-
Pull-down time: time to reach the line’s target value.
-
Hold stability: drift during stabilization hold should be minimal.
-
Repeatability: same recipe should give similar curves across runs.
-
Noise clues: hissing near seals or fittings often matches drift.
A useful habit is logging pull-down time at “healthy baseline.” When pull-down time grows week by week, leaks, seal wear, or pump health become likely culprits.
Step-by-Step SOP: From Cleaning to Stable Edges
A strong SOP prevents defects before the chamber door closes. It also reduces the “every unit is different” feeling that kills throughput. Each step below includes what the step protects, plus the common failure mode seen in daily work.
Step 1 — Cleaning chemistry and flash-off window
Cleaning is about residue control, not just dust removal. Overhead light can hide residue film. Side light catches it early.
Chemistry roles (practical bench framing):
-
Adhesive remover / de-glue chemistry: dissolves old adhesive and haze; must be fully wiped off.
-
IPA final wipe: removes light oils and residue; needs flash-off time.
-
Residue-free cleaner: helps reduce streaking and micro-film transfer (line-dependent).
Flash-off is where many “silvering haze” problems begin. A wiped surface can still have a solvent film. Under pressure, that film can outgas and create micro-void haze.
A workable flash-off rule (keeps both residue and dust controlled):
-
After final wipe, allow 1–3 minutes flash-off under stable room conditions.
-
Use covered staging during that window to prevent dust fall.
-
Avoid strong airflow directly over the surface; it can deposit more particles.
A short reminder fits the bench: “Wipe done is not dry done.” Flash-off is a real step.
Step 2 — Anti-static control and handling discipline
Static control is not a nice-to-have. It directly drives pepper dots. It also affects liner peel behavior.
Controls that usually show improvement immediately:
-
grounded bench mat and grounded tools
-
consistent glove type with low shedding
-
slower liner peel speed
-
covered trays for cleaned glass and exposed OCA
Dry days make the same line behave differently. When humidity drops, slowing liner peel often does more than adjusting pressure.
Step 3 — OCA storage: stability and condensation prevention
OCA film storage affects curl, tack, and liner cleanliness. It also affects micro-void behavior. Poor storage can look like a machine problem, which wastes troubleshooting time.
Storage rules that prevent common failures:
-
keep film sealed until use
-
track lot and open date
-
limit open-air exposure time
-
avoid touching adhesive zones even with gloves
Cold storage adds one special rule: sealed packs must warm to room temperature before opening. Cold film opened early can collect condensation. That moisture can produce haze that refuses to disappear, even with good pressing.
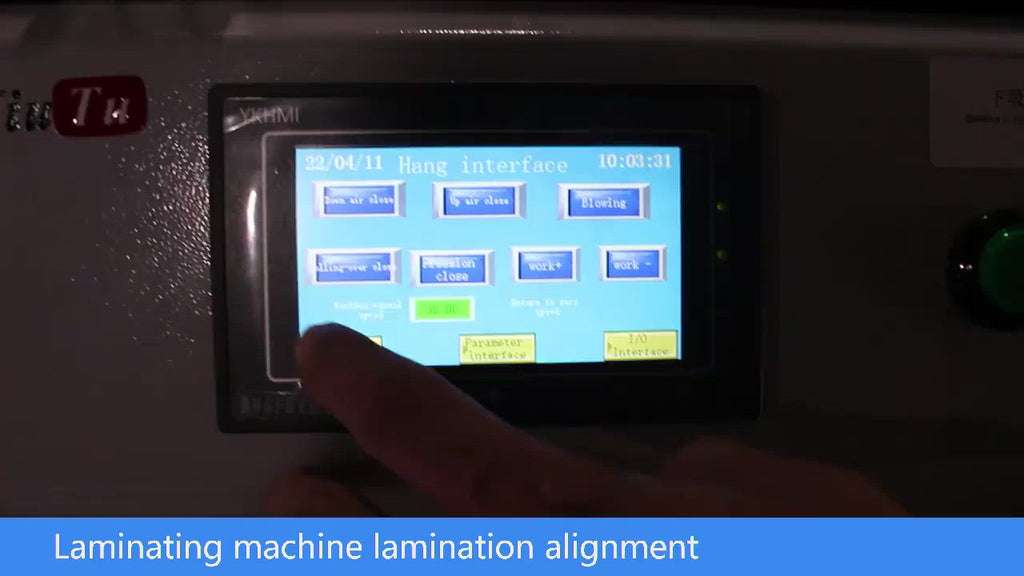
Step 4 — Alignment method: reduce repositioning and trapped air
Repositioning smears contamination and traps air. Stable alignment reduces that risk.
A stable alignment pattern in OCA work:
-
use fixtures or reference edges
-
anchor one edge first
-
lay down progressively
-
avoid pressing the center early
Curved edges and thin OLED stacks need perimeter support. Without it, the rim can rebound after release. That rebound often becomes a thin edge bubble line after warm soak.
Step 5 — Fixture and cushion setup: the fast “is this still good?” checks
Fixtures and cushions wear quietly. When output becomes inconsistent, these are often the hidden drift points. A short checklist makes it easier to confirm whether the perimeter is truly supported.
Fixture check (6–8 fast checks)
-
Side-light rim scan: look for a thin bright “floating line” at the edge.
-
Repeat-location tracking: repeated bubbles at the same corner usually indicate geometry, not dust.
-
Edge contact test strip: a thin paper strip should not slide under the rim where support is expected.
-
Pin and stop wear: loose pins and worn stops cause micro shifts that trap air.
-
Warp and twist check: place fixture on a flat reference and look for rocking.
-
Surface damage check: scratches and dents can imprint pressure patterns into the stack.
-
Cleaning check: adhesive residue on fixture edges can contaminate OCA and create haze.
-
Model mismatch check: “close enough” fixtures often fail on curved edges and OLED rims.
A bench-style rule helps here: if the defect repeats in the same place, geometry deserves attention first.
Cushion check (6–8 fast checks)
-
Permanent imprint marks: visible dents that do not rebound signal fatigue.
-
Glossy hard spots: uneven sheen can indicate hardened zones and uneven pressure.
-
Thickness drift: measure a few spots; local thinning often tracks bubble bands.
-
Edge compression lines: repeated edge marks can indicate uneven rim loading.
-
Sticky residue transfer: tacky zones can pull or shear edges during release.
-
Particle embedding: tiny debris pressed into the cushion can print defects.
-
Cracks or edge fraying: small tears can create pressure gradients.
-
Bounce feel change: a cushion that feels “dead” often stops distributing pressure smoothly.
Cushion failure rarely looks dramatic. It looks like “more random edge bubbles this week,” which is why a checklist helps.
Step 6 — Lamination cycle: stable parameters, small changes only
Parameter tuning works best when the recipe stays calm. Large swings often hide the true cause. Small changes show cause and effect more clearly.
Core recipe elements to control:
-
vacuum stabilization time
-
press pressure and hold time
-
ramp speed (avoid slamming)
-
gentle heat (uniform and moderate when used)
-
release timing (avoid rim pull-back)
A simple tuning rule saves time: one variable change per test run. That makes defect pattern shifts meaningful.
Parameter Starting Ranges: LCD vs OLED vs Curved (with units)
Starting ranges shorten the path to stability. They also help new lines avoid “pressure chasing.” The table below stays conservative, then pattern-based tuning can follow.
| Screen type | Vacuum stabilization | Press pressure | Press hold | Plate heat (optional) | Bubble remover (pressure+heat) |
|---|---|---|---|---|---|
| LCD (flat) | 20–40 s | 0.50–0.65 MPa | 30–60 s | 30–45°C | 10–20 min at 45–60°C |
| OLED (flat) | 30–60 s | 0.55–0.70 MPa | 45–90 s | 35–50°C | 15–30 min at 50–65°C |
| Curved edge | 45–90 s | 0.60–0.80 MPa | 60–120 s | 40–55°C | 20–35 min at 55–70°C |
These are starting points, not a final recipe. Film type, stack thickness, fixture geometry, and cushion behavior can shift the best values. On the bench, defect patterns decide the direction of tuning.
Bubble Remover Stage: The Stabilizer for Micro-Voids and Edges
The bubble remover stage compresses micro-voids and calms edge behavior. It is especially valuable for OLED and curved edges, where late defects are common. It also helps when the line sees “looks clean, then comes back with haze” patterns.

Loading and process habits that improve consistency
Small loading habits change results. Overcrowding can block uniform heating. Uneven stacking can create pressure differences.
-
keep parts spaced for airflow and heat uniformity
-
avoid stacking delicate assemblies without support
-
keep surfaces clean before defoaming; trapped particles do not disappear
-
allow controlled cool-down in a clean area afterward
Overheating is another common mistake. Excess heat can add stress and cause edge behavior to worsen. Moderate and uniform temperature is usually safer than pushing extremes.
LCD vs OLED vs Curved: What Actually Changes in the Process
A single recipe across all screen types creates predictable failure loops. Separating recipes by stack type is one of the fastest ways to raise yield. It also reduces the “everything is drifting” feeling.
LCD lamination: residue control dominates
LCD stacks often tolerate mechanics better. Still, residue shows clearly under backlight. Many LCD haze problems trace back to cleaning chemistry and flash-off discipline.
Stable LCD output usually comes from:
-
consistent final wipe chemistry
-
defined flash-off window
-
uniform pressure distribution across the plate
OLED lamination: edge rebound is the frequent problem
OLED stacks are thin and stress-sensitive. Edge rebound after release can open micro-gaps. Warm soak then makes the edge line visible.
OLED stability often improves with:
-
slightly longer stabilization time
-
gentler ramp speeds
-
longer holds at moderate pressure
-
consistent bubble remover conditioning
Cold seasons amplify OLED failures. Wet-out slows down when film and glass start cold. A short controlled warm-up for materials often lowers micro-void visibility quickly.
Curved-edge lamination: fixture support decides the pass rate
Curved rims trap air and rebound after release. A fixture that supports 95% of the surface can still fail at the rim. That last millimeter matters.
The fastest curved check is simple: side light the rim and look for floating bright lines. If bubbles repeat at the same edge segment, geometry deserves attention before chemistry or pressure.
Quality Control: A Clear, Executable Acceptance Standard
QC prevents rework snowballing. It also makes troubleshooting faster, because defect patterns are caught early. A stable QC routine uses a few repeatable views rather than long inspection rituals.
The three-light inspection routine
Backlight inspection catches bubbles, haze, and wet-out gaps. It is the fastest pass/fail view.
Side light inspection catches dust points and residue streaks. It is also the best early warning for “silvering haze” problems.
Angle sweep inspection catches Newton rings and interference patterns. Those defects often hide in normal viewing.
When polarizer work is part of the workflow, a film lamination tool can improve placement consistency and reduce creases. Related equipment can be viewed on the Film Laminating machine page.
Acceptance rules written in “shop language” form
Principles are not enough. Pass/fail needs rules that can be applied quickly and consistently. The writing style below is a useful template.
-
Active display area: zero visible bubbles and zero haze under backlight.
-
Bezel / non-active area: isolated specks only; no clusters and no streaks.
-
Edge line: zero continuous bubble line; no edge band that can migrate inward.
-
Side light: no silvering haze across active area; no residue streaks catching light.
-
Angle sweep: no rings visible at normal viewing angles; no “rainbow band” near the center.
A conservative rule helps reduce returns: “Edge line = zero continuous.” That one line prevents many late failures.
A copy-ready QC record template (fast, useful)
-
Date / shift
-
Screen type: LCD / OLED / curved
-
OCA lot + open date
-
Cleaning chemistry set used
-
Flash-off window used (minutes)
-
Stabilization time (seconds)
-
Press pressure (MPa) and hold time (seconds)
-
Heat setting (°C) if used
-
Bubble remover time (minutes) and temperature (°C)
-
Defect pattern (bubble / dots / haze / rings) and location notes
-
Fixture ID and cushion status notes
-
Maintenance note (seal cleaned, drift observed, pull-down time)
This template keeps troubleshooting grounded. Over time, it also reveals drift sources, like wipe batch changes or cushion aging.
Troubleshooting Map: Pattern → Cause → Direction
Troubleshooting becomes faster when the pattern drives the next action. It also prevents “parameter chasing,” which wastes time and creates unstable recipes.
| Pattern seen | Likely root | Best first direction |
|---|---|---|
| Center bubble | trapped air or short stabilization | increase stabilization slightly; slow ramp |
| Thin edge line after warm soak | rebound or weak rim support | improve rim support; longer hold; calmer release |
| Pepper dots spike on dry days | static + liner peel | slow liner peel; improve ESD; shorten exposure time |
| Silvery haze near corners | residue film + short flash-off | stricter flash-off; better residue wipe; side-light check |
| Newton rings at certain angles | uneven pressure distribution | check cushion and fixture flatness first |
One sentence keeps the process sane: “Fix geometry before chasing chemistry.” Repeating-location defects usually prove that rule.
Equipment Selection and Pairing: Building a Stable Line
A lamination line is not one machine. It is the pairing of preparation habits, fixtures, press behavior, and stabilization. Equipment selection should match workload reality: OLED share, curved share, panel size, and throughput goals.
Selection logic stays practical:
-
stable vacuum pull-down and stable holds
-
uniform pressure distribution and controlled ramps
-
fixture ecosystem for core models
-
easy maintenance access for seals and fittings
-
compatibility with bubble remover conditioning
For larger panels or batch loading, a larger platform can help. In those cases, plate flatness and heat uniformity become even more important.

At this point, the second internal reference fits naturally: the vacuum laminator category is the clean entry for matching vacuum lamination equipment to an OCA workflow. For broader category browsing, the JiuTu homepage provides an overview without mixing unrelated steps into the decision.
Maintenance: Keep Curves Stable, Keep Drift Visible
Maintenance prevents “random bubble weeks.” It also makes troubleshooting faster, because vacuum drift and seal wear become visible early.
Daily checks (short, repeatable)
-
wipe plate and fixtures residue-free
-
clean seal contact surfaces
-
watch pull-down time and hold drift
-
scan cushions for dents and embedded debris
Weekly checks (the stability builders)
-
inspect seals for cracks, flattening, or contamination
-
check hoses and fittings for looseness and micro leaks
-
clean ports and filters where dust accumulates
-
log pull-down time against baseline
Pump oil condition matters. Contaminated oil can reduce vacuum stability and pull-down performance. Scheduled checks prevent slow drift from becoming a sudden failure.
FAQ: Search-Style Questions That Come Up Most
1) Why does a screen look clean, then show an edge line later?
That pattern often comes from edge rebound and micro-gaps reopening after warm soak. Weak rim support and aggressive release timing often amplify it. A longer hold and stable bubble remover conditioning usually helps.
2) Why do pepper dots spike on certain days?
Low humidity increases static. Fast liner peel increases static. When both happen together, dust pickup rises sharply even on a clean bench.
3) What is the most common cause of silvery haze?
Residue film and short flash-off windows are frequent causes. Side light inspection before laydown catches many of these early.
4) How should cold-stored OCA film be handled?
Sealed packs should return to room temperature before opening. Opening cold packs can cause condensation, which often shows later as haze or micro-void behavior.
5) Why do Newton rings appear only at certain angles?
Those rings usually come from micro-gap thickness variation and uneven pressure distribution. Cushion aging and fixture flatness issues are common contributors.
6) Which matters more: higher pressure or uniform pressure?
Uniform pressure is usually more important. High pressure with uneven distribution can create edge stress and rebound. Controlled ramps and stable holds often outperform brute force.
7) What is a quick sign of vacuum leakage?
Longer pull-down time compared with baseline, plus drift during hold, is a strong sign. Hissing near seals or fittings often matches that drift.
8) Why can defects repeat in the exact same corner?
Repeat-location defects usually point to fixture geometry, edge support, or cushion imprint behavior. Dust defects tend to look more random and scattered.
9) When is bubble remover conditioning most valuable?
OLED stacks, curved edges, and high-contrast displays benefit the most. It also helps when “next-day bubbles” are a recurring complaint.
10) What helps more than “tuning forever”?
A calm SOP plus logging. A stable flash-off window, stable liner peel speed, fixture checks, and baseline pull-down logs often reduce tuning work quickly.
Summary and Three Practical Actions
Bubble-free OCA lamination is a chain of controlled behavior: residue-free cleaning, defined flash-off windows, low-static handling, stable fixtures, and repeatable pressing. OLED and curved edges raise the bar because edge rebound and micro-void visibility increase. In that workflow, a vacuum laminator supports consistent air evacuation, while bubble remover conditioning stabilizes the last micro-gaps that appear later. When the routine stays consistent, optics stay consistent.
Three actionable recommendations:
-
Standardize flash-off and staging: define a window, then keep cleaned parts covered.
-
Audit fixtures and cushions weekly: repeat-location defects usually come from geometry drift.
-
Log pull-down time and drift: baseline curves reveal leaks and pump issues early.