
A vacuum laminating machine starts to matter in a different way once the work moves from flat LCD to edge OLED. On flat screens, a process can be slightly rough and still look acceptable. On curved OLED, that margin gets smaller. Yield usually does not drop because of one dramatic mistake. More often, a few small controls drift together. The tray is close, but not quite right. Vacuum comes in a bit fast. Pressure lands harder than the curve wants. Then extra heat is used to clean up the result. The machine still looks normal on the screen. The panel edge does not.
That is really what this article is about. Not a list of brochure features. Not a generic “how lamination works” explanation. The point is narrower and more useful: which nine settings most directly affect edge OLED yield, how those settings show up when something goes wrong, and which direction usually makes sense first when the process starts slipping.
One thing is worth clearing up at the start. In this article, “settings” does not only mean numbers on the machine display. Some of the nine are direct controls, like vacuum behavior, pressure, and debubble temperature. Others sit around the machine, such as fixture support and alignment stability, but they still decide whether a curved OLED recipe holds together in real production. That distinction matters, because edge OLED problems rarely come from one isolated number. They usually come from the way several small choices stack up.
For smaller curved-screen rework, a compact integrated laminator is often the practical route. For larger modules, tighter alignment tolerance, or more formal process tracking, a CCD vacuum laminating machine becomes easier to justify. Jiutu has both types in its optical bonding lineup, including a compact vacuum laminating machine aimed at phone-screen work and a CCD platform aimed at more controlled bonding applications.
Why edge OLED punishes small process drift faster
Curved OLED has a way of exposing weaknesses that flat panels let slide. A screen can leave the chamber looking clean in the middle and still come back with a faint silver line near the edge. It can look stable while warm, then show shoulder bubbles ten minutes later under inspection light. That is why edge OLED often feels “unstable” even when the machine recipe looks fine on paper.
What usually makes it hard to troubleshoot is the combination effect. One imperfect setting does not always fail on its own. A slightly loose tray might still pass. A slightly fast vacuum pull might also pass. The same goes for a hard pressure ramp or an over-eager debubble step. Let those stack in the same direction, though, and the defect appears. That is why the process can drift without anybody seeing one obvious red flag.
This matters for repair benches and for engineering teams alike. On a busy bench, the temptation is to treat every defect as a fresh problem and start changing multiple settings in one round. That almost never helps. In edge OLED work, the process becomes easier to fix once the defect is read in sequence. Edge movement points back to support and motion. Shoulder micro-bubbles usually bring pressure arrival and hold time into the picture. A panel that looks better warm than cold pushes attention toward the thermal side. That sequence is not complicated, but it saves a lot of bad adjustments.
The 9 settings that matter most
These nine controls do not carry the same weight on every panel. One job may be dominated by fixture fit. Another may only settle down after vacuum pull and pressure ramp are softened together. Still, these are the settings that most often decide whether edge OLED OCA lamination stays stable or turns into repeat work.
1) Fixture and tray support
A curved OLED panel needs the tray to do more than keep it from moving. The tray sets the basic shape the stack sees once vacuum and pressure begin. If the contour match is only approximate, the machine can run a full cycle and still leave the curve less supported than it should be.
The usual failure sign is easy to recognize after a few jobs. The center looks good, but the outer curve does not match it. Sometimes the edge shows a thin air line. Sometimes the same shoulder keeps trapping fine bubbles. In other cases, the panel seems to shift for no obvious reason, even though the recipe has not changed.
This is where a lot of unnecessary pressure tuning begins. When the center is good and the edge is not, the first suspect should be support, not force. On curved phone display work, extra pressure can make a weak setup look temporarily better while making the next defect harder to read. Reviewing tray geometry, seating, and panel restraint usually pays off earlier.
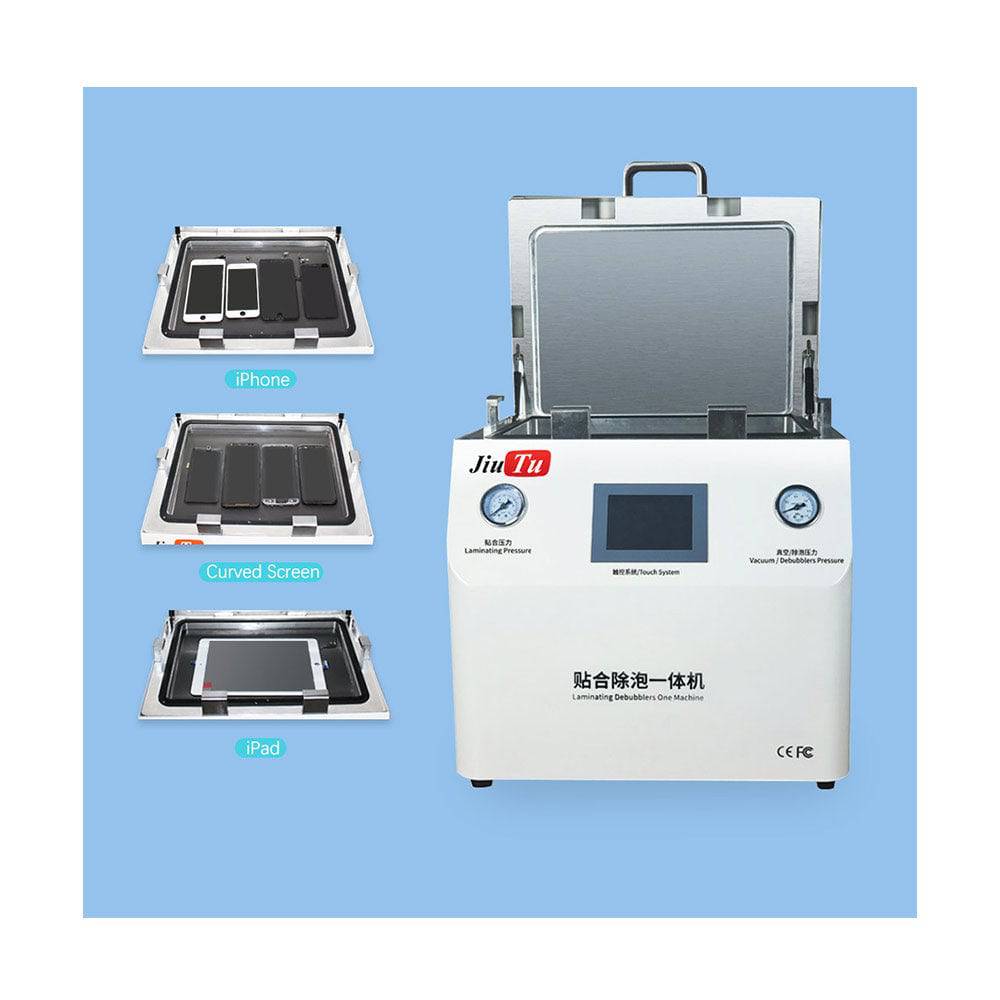
Jiutu vacuum laminating machine for edge OLED and curved phone display lamination
2) Vacuum pull speed
In edge OLED work, the way vacuum arrives often matters more than people expect. If evacuation starts too abruptly, the stack can shift before the lamination step has really begun to do useful work. On a flat panel, that kind of movement may go unnoticed. On a curved one, it often shows up along the edge.
The failure sign here is not always dramatic. Sometimes it is a slight displacement. Sometimes it is inconsistent edge width from left to right. Sometimes the same side of the panel keeps looking narrower, even when loading seemed correct.
When that kind of movement shows up, slowing the pull is usually a better first move than lowering the final vacuum target. A calmer vacuum entry gives the stack time to settle against the fixture instead of being dragged into place. On a vacuum laminator for phone repair, that one change can clean up a surprising amount of “random” alignment drift.
3) Final vacuum level
Final vacuum still matters because trapped air has to leave the bond line before the adhesive gets locked in. But edge OLED does not respond well to the idea that deeper vacuum automatically means better lamination.
If the target is too weak for the stack and OCA condition, fine residual air tends to survive the chamber and later shows up as small bubbles or incomplete seating. If the target is pushed too hard while support and pull speed are already marginal, the process can become less stable rather than more effective.
So the adjustment here is not about chasing the deepest number the machine can reach. It is about matching evacuation to the rest of the recipe. Once tray support and pull speed look sensible, then it makes sense to ask whether final vacuum is doing enough. On a good vacuum laminating machine for edge OLED, vacuum works as part of a sequence, not as a blunt fix.
4) Pressure ramp
Pressure ramp is one of those settings that quietly causes trouble because the final pressure number gets more attention. On edge OLED, the transition often matters just as much as the endpoint. If pressure arrives too quickly, adhesive flow becomes less even around the curve and shoulder, and small air pockets can get trapped before they have a chance to escape.
The failure sign is often a panel that looks almost right. The center bonds cleanly. The curve looks passable at first glance. Then the shoulder starts showing fine micro-bubbles under angled light. That “almost there” look is why pressure ramp gets missed so often.
If the same shoulder defect keeps coming back, softening the pressure ramp is usually worth trying before extending bubble removal. A gentler arrival does not sound dramatic, but it gives the adhesive a better chance to settle around the curve without sealing the problem in too early.
5) Final lamination pressure
Final pressure is still important. It finishes the seating step and decides whether the bond line fully settles. But on edge OLED, it works best when the earlier stages are already close to stable. When those earlier stages are off, extra pressure tends to blur the real issue.
A low-pressure problem often leaves incomplete edge seating even when the center looks fine. Too much pressure is trickier. The panel may leave the chamber looking acceptable, then show stress, whitening, or unstable edge behavior after it cools.
This is why pressure is better treated as finishing force than rescue force. If the panel center is already good and the edge is weak, pressure may need attention. But if fixture support is poor or pressure ramp is too abrupt, more force often compresses the symptom rather than correcting the process.
6) Lamination hold time
Hold time does not get the same attention as vacuum or pressure, but it still affects how the bond line settles under load. Curved OLED geometry simply needs a little more patience than flat stacks do.
When hold time is too short, the process often produces screens that look close to clean but keep showing small defects near the shoulder or edge. These are the panels that tempt a bench to increase debubble heat because the main lamination stage looked “good enough.”
A small hold adjustment can help when the recipe is already nearly stable. Large jumps usually do not. It is also worth checking hold only after pressure ramp behavior makes sense. Extra dwell cannot fully compensate for pressure arriving badly in the first place.
7) Debubble temperature
This is the setting most likely to be overused. Heat does help OCA lamination relax, and it does help clear micro-bubbles. That part is real. The problem starts when debubble temperature turns into the default answer for every weak result upstream.
The common failure sign is the panel that looks better warm than cold. Right after the cycle, it seems cleaner. Later, once the stack cools, the edge or shoulder starts telling a different story. That pattern usually means heat has been carrying more of the process than it should.
When that happens, the first move is not “a little more temperature.” It is the opposite. Step back. Recheck the lamination stage, then review debubble temperature. On edge OLED, heat should finish a sound process, not force a weak one over the line.
8) Debubble dwell time
Dwell time is the quieter version of the same habit. When bubbles remain, extending the bubble-removal stage feels reasonable. Sometimes it is reasonable. Other times, it only makes the recipe longer without making it better.
The failure sign here is a process that keeps gaining seconds while the same defect keeps returning. One run looks cleaner, the next one less so, and the overall result depends too much on panel condition or operator timing. That is usually a hint that dwell is being used to cover instability somewhere earlier.
A narrow dwell adjustment can help when the lamination result is basically correct and only a small amount of micro-air remains. But if the screen enters the debubble stage slightly shifted or poorly seated, longer dwell mostly buys time, not stability.
9) Alignment stability through the full cycle
Initial alignment is only the starting point. The more important question is whether that alignment survives vacuum pull, pressure application, and release. On curved displays, a tiny shift is enough to become visible along the edge.
The failure sign is repeated drift in one direction, uneven edge width, or panels that seem fine in the center but fail a closer cosmetic check around the curve. In bigger display modules, the same issue becomes a repeatability problem across runs rather than a one-off cosmetic annoyance.
This is where a CCD vacuum laminating machine starts to earn its keep. Not because CCD sounds advanced, but because higher-control platforms make it easier to hold positioning and track repeatability across a more demanding process. Jiutu’s CCD lamination platform is aimed at that kind of application, while its compact all-in-one system is aimed at smaller-screen rework. The split is practical, not theoretical.
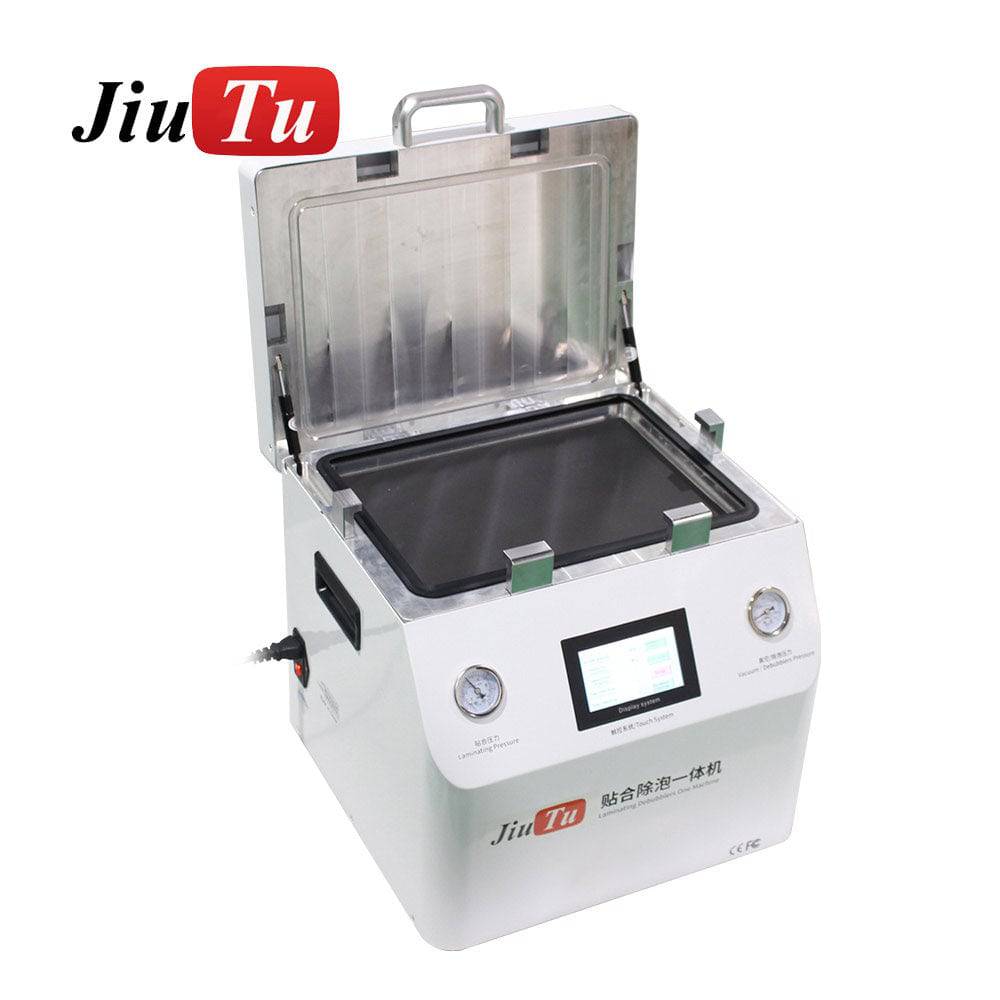
compact vacuum laminator machine with integrated OCA lamination and debubble process
A more practical order for reading defects
A lot of yield gets lost because several settings are changed in one round and the process stops being readable. That is why a rough troubleshooting order matters more than many teams admit.
If the defect is edge displacement or uneven alignment, start with tray support and vacuum pull speed. Movement usually enters early. Raising pressure or heat at this stage tends to hide the trail.
If the defect is shoulder micro-bubbles with a clean center, pressure ramp and hold time are usually the first places to look. That pattern often says the adhesive never settled cleanly around the curve before the process moved on.
If the result is good while warm and worse after cooling, the thermal side deserves attention before anything else. Debubble temperature and dwell time are the obvious first checks there.
If the defect is center good, edge poor, do not rush to add force. On curved-screen rework, that pattern still points back to fixture fit more often than people want it to.
That order helps because many bench problems are not really machine drift. They are recipe drift. One small change gets made during a busy shift, then another, and by the end of the day the process has quietly moved away from the recipe that actually worked.
Common mistakes that cut yield
Some mistakes stick around because they feel efficient in the moment. One is using debubble heat to compensate for weak lamination. Another is copying one recipe across every curved OLED model that arrives. A third is judging the result too early because the screen looks clean when it comes out of the chamber. A fourth is chasing faster cycle time before the recipe is actually stable.
These mistakes do not look dramatic, which is why they survive. But they add up quickly. Edge OLED rarely punishes one bad decision in isolation. It punishes a string of small shortcuts.
A short inspection habit helps keep those shortcuts from turning into routine.
Edge OLED lamination checklist
-
Check center, shoulder, and outer edge separately
-
Inspect the curve under angled light, not only overhead light
-
If the same side repeats the defect, review fixture support first
-
If alignment drifts, check vacuum pull before changing pressure
-
If warm-state appearance is cleaner than cooled appearance, review debubble heat and dwell
-
Record single recipe changes instead of stacking several together
-
Let the panel cool briefly before calling the result stable
This is not a complicated checklist. That is the point. A short list that gets used is better than a long one that gets ignored.
Compact vs CCD: where each route actually fits
At this point, the machine choice becomes easier to frame. The question is less about which machine sounds more advanced and more about which workflow the process actually needs.
For curved phone-screen rework, mixed small-screen traffic, and faster bench turnover, a compact integrated laminator usually makes sense. It shortens handling, keeps lamination and bubble removal in one path, and fits the reality of daily repair work. Jiutu’s compact vacuum laminating machine is positioned around that kind of use, which is why it fits small-screen OCA lamination more naturally than a larger industrial platform.
For larger modules, tighter alignment control, or jobs where repeatability has to be documented more carefully, a CCD route is easier to justify. This is where optical bonding starts to look less like bench repair and more like controlled process work. Jiutu’s CCD machine is presented for that side of the workflow, with the kind of operating-condition discipline that industrial platforms usually care about.
A quick comparison helps make that split clearer:
| Process situation | Compact integrated laminator | CCD vacuum laminating machine |
|---|---|---|
| Curved phone display refurbishing | Strong fit | Usually more than needed |
| Mixed small-screen repair bench | Strong fit | Useful when alignment control becomes a recurring issue |
| Larger display modules | Limited | Better fit |
| High repeatability and traceability | Basic | Better fit |
| Main advantage | Compact handling and workflow speed | Alignment control and process consistency |
That does not mean one route is “basic” and the other is “advanced” in a marketing sense. It means the workflow changes. When the job is mostly curved phone repair, a compact integrated machine is often the sensible starting point. When the job moves into larger modules or tighter alignment tolerance, CCD becomes much easier to justify.
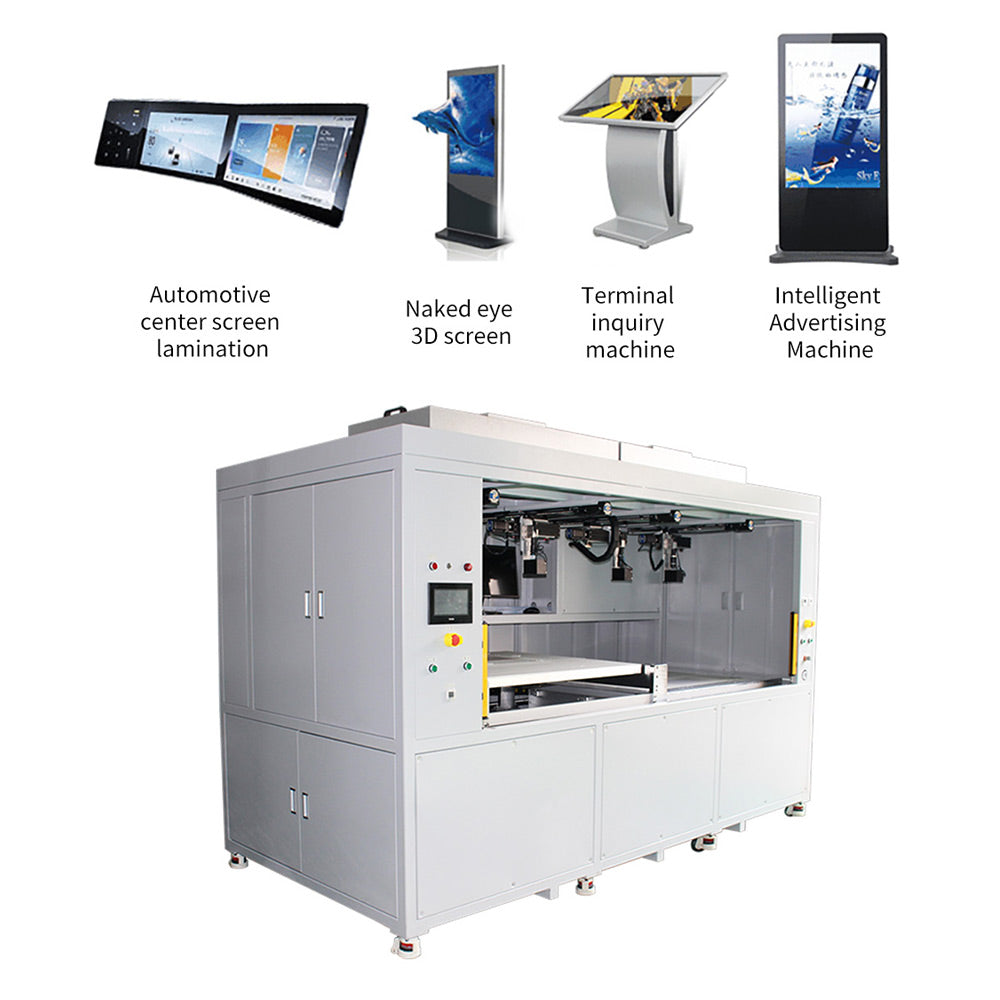
Jiutu CCD vacuum laminating machine for industrial display bonding and stable alignment control

industrial CCD vacuum laminating machine for larger modules and optical bonding lines
Two questions that usually still come up
Are these nine settings all machine-menu values?
No. Some are direct machine settings, such as vacuum behavior, pressure, and debubble control. Others are process controls around the machine, including fixture support and alignment stability. For edge OLED, both matter because the panel reacts to the full sequence, not just to the numbers on the interface.
Is a CCD vacuum laminating machine necessary for every OLED job?
No. For curved phone-screen work, a compact integrated laminator is often the more practical answer. CCD becomes more relevant when screen size grows, alignment tolerance tightens, or the process needs stronger repeatability and tracking.
Closing thought
The reason these nine settings matter is not that any one of them looks dramatic on its own. Edge OLED problems are usually quieter than that. A tray that is almost right. A vacuum pull that is slightly too quick. A pressure ramp that lands a bit hard. A debubble step that has been asked to do more than it should. Put together, those small shifts are enough to turn a decent process into a frustrating one.
Once that pattern becomes familiar, the machine itself gets easier to judge. For curved phone repair, a compact integrated laminator is often the right place to start. For larger modules and tighter alignment control, a CCD route tends to make more sense. Jiutu covers both ends of that workflow, so anyone comparing solutions for edge OLED, OCA lamination, or curved screen lamination can keep going from the relevant vacuum laminating machine pages and match the equipment to the process instead of to the spec sheet alone.