
Bubble-free LCD lamination is not magic. It is routine, cleanliness, and pressure control working together. On a busy bench, one dust speck can turn into a visible “halo” under backlight. Because of that, a stable process matters more than a fast one. A practical starting point is choosing the right oca machine category for the bonding stage, then building a simple workflow around it.
Why Bubble-Free LCD Lamination Matters
LCD defects are unforgiving. Under backlight, haze looks like fog and micro-bubbles look like dust trapped in ice. As a result, the same screen can look “fine” in room light and fail immediately under inspection light. For repair work, that gap creates rework and wasted adhesive.
Heat makes weak bonds worse. When a laminated stack warms up during testing, trapped air expands and edges can lift. In addition, bubbles that sit near corners often migrate, especially if the glass edge is under stress. So a clean lamination is not just about appearance; it is about stability.
Rework carries a cost that is easy to underestimate. Every time a stack is opened again, new dust enters, surfaces get scratched, and alignment becomes harder. On the bench, the best time to prevent bubbles is before pressure ever touches the adhesive.
LCD vs OLED: a short reminder
LCD is the focus here, so LCD pain points come first. Backlight makes haze more obvious and small contamination looks bigger. Also, bubbles often become more visible after warm-up because the light path is less forgiving.
OLED can use a similar flow, yet the risks shift. Flexible edges and curved profiles need better support and a smoother pressure ramp. Put simply, the same ideas apply, but fixtures and pressure control must be upgraded when curved edges become routine.
Equipment That Supports Bubble-Free Lamination
A bubble-free result is usually a system, not a single box. In practice, the work splits into four functions: separation, surface prep, vacuum bonding, and bubble removal. Once those roles are clear, troubleshooting becomes faster and training becomes easier.
1) Separation platform (clean removal and flat support)
Separation is where many later bubbles are “born.” If glass removal flexes the stack, corners can warp and later trap air. Also, uneven adhesive removal leaves residue that shows up as edge lift after pressing. For that reason, a stable separation platform is a yield tool, not just a comfort tool.

Caption: A stable separator helps keep the stack flat, which reduces later corner lift.
Shop note: when a corner wedge bubble repeats on the same model, the cause often traces back to early flex during separation.
2) Cleaning and handling tools (the “small things” that decide yield)
Cleanliness is not one wipe. It is a sequence: dirty work ends, then clean work begins, and then touching stops. That sounds simple, yet many benches leak dust across stations through gloves, tweezers, trays, and sleeves.
For LCD bonding, the goal is to reduce exposure time. Once the adhesive liner opens, airborne particles start landing. Therefore, tools should be staged before liners are opened, and parts should be covered whenever there is a pause.
Common mistake: using the same tweezers for scraping residue and then handling clean adhesive liners.
3) Vacuum laminating stage (pressure that stays even)
Vacuum lamination does two jobs at once. It evacuates air before pressure locks layers together, and it improves wet-out so the adhesive spreads evenly. On LCD, that uniform wet-out reduces haze and random micro-voids.
A vacuum laminator is often the core oca machine in the line, but its value depends on consistency. If vacuum level drifts, results drift. If pressure is uneven, Newton rings and edge bubbles appear even with “good vacuum.”
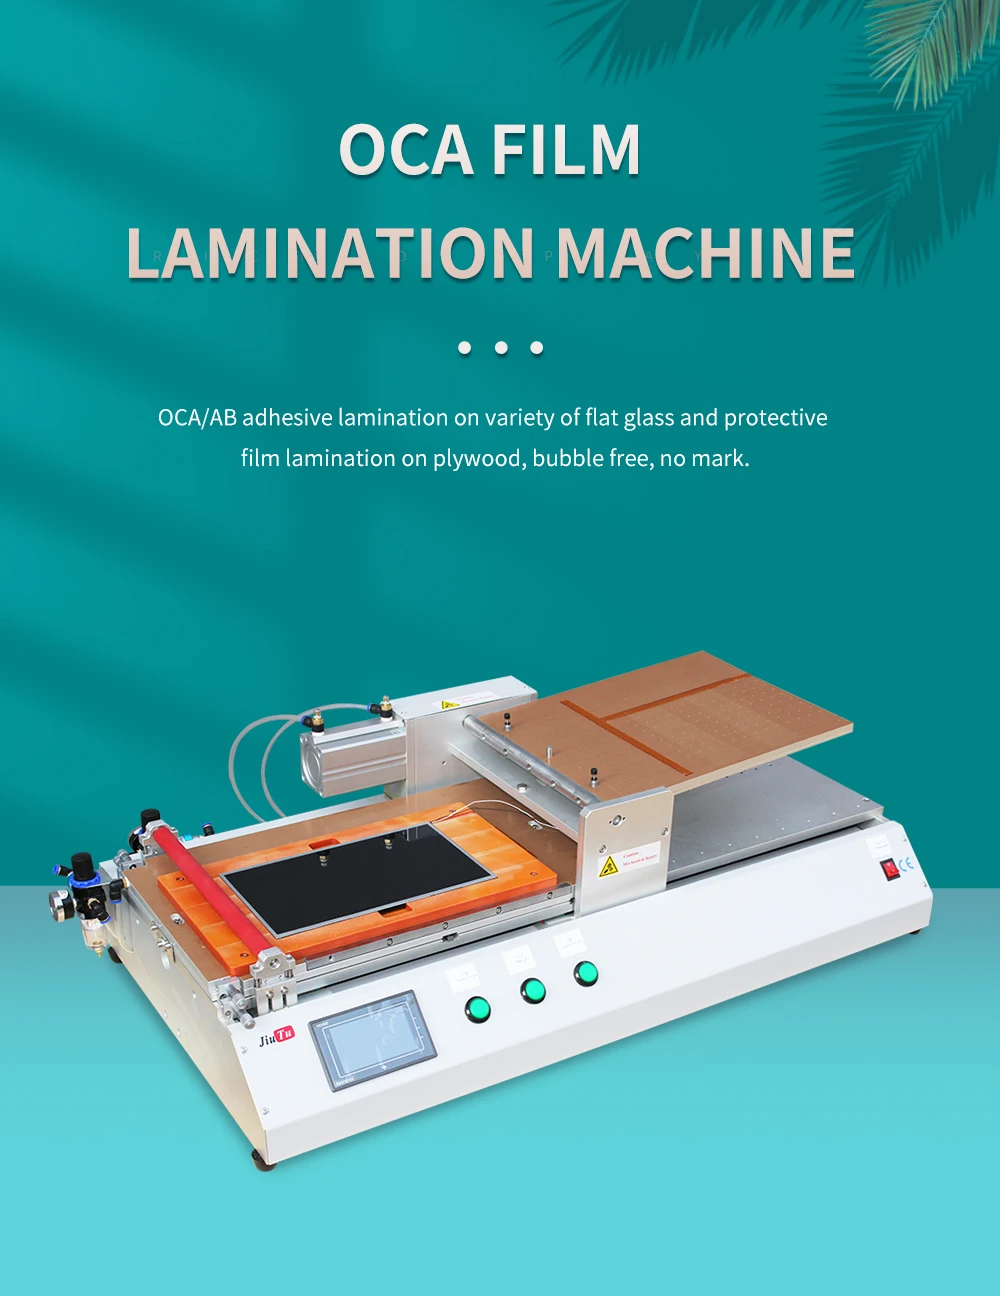
Caption: Vacuum pressing works best when alignment, dwell, and pressure ramp stay consistent.
What to check: when bubbles cluster near cutouts, vacuum dwell is often too short, not “bad adhesive.”
4) Bubble removal / de-foaming (finishing the job)
A bubble remover helps when micro-bubbles remain after an otherwise clean press. It is particularly useful for larger LCD panels and stacks with cutouts that trap air. Still, it should not be treated as a repair button. If large bubbles survive a finishing cycle, the root problem is usually earlier: dust, poor wet-out, corner support, or rushed vacuum dwell.

Caption: A bubble remover reduces residual micro-bubbles after vacuum lamination.
Quick tip: when micro-bubbles repeat only around sensor holes, treat it as a dwell and placement issue first.
5) Fixtures and pads (quiet parts that control pressure)
Fixtures decide whether corners compress evenly. Pads decide whether pressure spreads smoothly. Even a strong vacuum cycle cannot compensate for a corner that never gets pressed. Likewise, a worn silicone pad can create pressure peaks that cause Newton rings.
On LCD work, fixtures should keep the stack flat and supported at the edges. When the fixture rocks, the final bond becomes unpredictable. In addition, fixture surfaces should stay clean; a tiny embedded particle can print as a bubble line.
Shop note: “one corner always lifts” is more often a support problem than a vacuum problem.
6) Inspection lighting (fast feedback, less rework)
Inspection is not a luxury. It is a cost control tool. Backlight inspection finds haze and fine contamination. Low-angle lighting finds edge lift and corner voids. When both are used early, defects are caught before assembly, which saves time and reduces repeated handling.
What to check: if haze is visible only under backlight, the contamination is usually micro-dust or a thin film, not trapped air.
Repair Shop Setup Ideas: Three-Station Layout
A shop layout can raise yield without changing equipment. The key is separation: dirty tasks stay away from adhesive handling. That one decision reduces random defects more than most parameter changes.
Station A: Prep bench (dirty zone)
This station handles separation, scraping, residue removal, and rough cleaning. Because debris is created here, it should stay away from open adhesive. A simple rule helps: nothing from this bench touches the bonding bench unless it is cleaned and covered.
Prep bench checklist
-
Separation platform and heat control tools
-
Residue tools in a dedicated tray
-
Lint-free wipes and a closed waste bin
-
Bright overhead light for edge inspection
-
Covered tray for “ready to bond” parts
Common mistake: finishing residue removal and then placing the part uncovered on the same surface used for scraping.
Station B: Bonding bench (clean zone)
This station is for alignment, adhesive handling, and vacuum pressing. It should be free of cutting mats, scraping tools, and loose cloth. Also, it should be organized so parts do not get bumped while liners are open.
Bonding bench checklist
-
Fixtures and molds for common models
-
Clean tweezers stored in a closed container
-
Dust roller or tack cloth used only here
-
Covered tray for adhesives and liners
-
Vacuum laminator placed close to alignment area
Shop note: the number of “mid-bond adjustments” is a reliable predictor of defects. Dry-fit alignment reduces those adjustments.
Station C: Finishing bench (de-foam and inspect)
This station handles bubble removal cycles and inspection. It is still a clean area, yet it can be separate from bonding to reduce traffic around open adhesive. A consistent inspection order makes training easier and reduces missed corner bubbles.
Finishing bench checklist
-
Bubble remover and stable loading racks
-
Backlight or strong flashlight for haze checks
-
Low-angle light for edge lift detection
-
Simple acceptance checklist and logging sheet
-
Trays for pass / recheck / rework
Quick tip: corner-first inspection catches wedge bubbles early, before they become full edge lift.
Minimal setup vs standard setup (practical, not hype)
A staged plan helps build a workflow without buying the wrong tool first.
Minimal setup (tight space, lower volume)
-
Separation platform
-
Vacuum lamination stage with basic fixtures
-
Strong inspection light and a clean cover tray
-
Strict clean-zone discipline and fixed timing
Standard setup (steady volume, wider model mix)
-
Dedicated prep bench + dedicated bonding bench
-
Vacuum lamination + bubble removal finishing
-
Fixture library for common models
-
Standard inspection station with defect logging
For a clear view of available tool categories by workflow, the Jiutu Store collections page is a useful hub.
SOP: Bubble-Free LCD Lamination Step by Step
This SOP is written to match real repair benches: mixed models, mixed skill levels, and limited time. The goal is repeatable results, not a perfect lab environment. Each step includes a practical check that helps identify the likely failure point.
Step 1 — Start clean by controlling the sequence
Cleanliness begins with “what happens first.” Dirty tasks end, benches get wiped, tools get staged, and only then do liners open. When the sequence is wrong, dust returns even after a clean wipe.
Actions
-
Wipe the bonding bench before opening adhesives
-
Stage tweezers, wipes, and inspection light in advance
-
Cover cleaned parts if any pause happens
What to check: when haze appears across multiple parts, the bench surface or cloth pack is often the source.
Step 2 — Remove residue until corners look boring
Corner residue is sneaky. It can look thin and still cause edge lift. Also, residue left near a frame edge can create wedge bubbles after pressing.
Actions
-
Inspect corners under strong light
-
Remove residue evenly without gouging surfaces
-
Re-inspect edges before moving forward
Shop note: repeated wedge bubbles at a single corner often point to residue or missing corner support.
Step 3 — Dry-fit alignment before any liner opens
Dry-fit checks reduce panic adjustments while adhesive is exposed. It confirms cutouts, sensor windows, and edge fit. It also confirms the fixture supports the stack without rocking.
Actions
-
Place parts into the fixture without adhesive
-
Confirm alignment marks and cutout position
-
Press gently at corners to feel rocking
Common mistake: skipping dry-fit because “it looks obvious,” then correcting alignment after liners open.
Step 4 — Control static during liner removal
Static pulls dust. Fast peeling increases static. Dry air increases static. Therefore, liner removal should be slow and deliberate, with minimal waving and minimal handling.
Actions
-
Peel liners slowly and close to the surface
-
Use tweezers for edges, not bare fingertips
-
Keep a covered tray ready for the part
What to check: if micro-bubbles form in a line, the line often matches peel direction.
Step 5 — Place adhesive with a smooth contact front
Air gets trapped when the entire surface drops at once. A smooth contact front lets air escape while wet-out spreads. On LCD, that method reduces both bubbles and haze.
Actions
-
Start contact from one side and progress steadily
-
Avoid heavy pressing on the active area
-
Stop immediately if a dust speck is seen
Quick tip: dust ignored early often becomes a halo that survives finishing cycles.
Step 6 — Use vacuum dwell before full pressure
Vacuum dwell is where trapped air has time to exit. Short dwell can look “fine” on flat areas yet fail near holes and cutouts. Pressure should also ramp smoothly; a sudden clamp locks bubbles in place.
Actions
-
Run vacuum extraction before full compression
-
Extend dwell for parts with many cutouts
-
Ramp pressure smoothly rather than snapping shut
Shop note: micro-bubbles concentrated around sensor windows usually drop when dwell increases.
Step 7 — Keep handling flat while the stack stabilizes
Warm stacks are easier to flex. Flexing creates edge lift, especially near corners. After pressing, keeping the assembly flat for a short stabilization period reduces late-appearing edge bubbles.
Actions
-
Rest the assembly on a flat surface
-
Avoid twisting during transfer
-
Inspect edges before trimming or scraping
Common mistake: lifting one corner to “peek,” which introduces a small lift that becomes a visible bubble later.
Step 8 — Run a finishing cycle when micro-bubbles remain
Finishing cycles help when micro-bubbles remain after an otherwise clean press. They are particularly useful for larger LCD work. However, they do not correct dust or deep voids caused by poor corner support.
Actions
-
Load parts evenly so conditions stay consistent
-
Use a repeatable cycle for similar stacks
-
Re-inspect under backlight after finishing
What to check: when only one unit in a batch shows micro-bubbles, loading angle or thickness differences are common causes.
Step 9 — Inspect with an order, not a feeling
Inspection should be the same every time. A consistent order reduces missed defects and shortens training time. The simplest order is corners → edges → center.
Actions
-
Backlight check for haze and micro-bubbles
-
Low-angle check for edge lift and corner voids
-
Record defect location and type
Quick tip: recording “which corner” and “which defect” reveals fixture problems faster than guessing.
Defects, Causes, Fixes: A Bench Troubleshooting Table
Bookmark this table. It saves time during busy weeks, because it turns guesswork into checks. The goal is not to memorize everything; it is to use symptoms as a map.
| Defect seen after lamination | Typical location | Likely root cause | Fast bench check | Durable fix |
|---|---|---|---|---|
| Wedge bubble (triangular) | One corner | Corner support missing, residue, warm flex | Check fixture corner contact; inspect residue | Improve corner support; re-clean corner; keep post-press handling flat |
| Edge bubbles repeating | Same edge each time | Uneven pressure, pad wear, edge contamination | Check rocking; inspect pad surface | Replace/clean pad; adjust fixture; slow pressure ramp |
| Haze under backlight | Broad area | Micro-dust, oil film, poor wet-out | Check cleaning sequence; check cloth pack | Reduce exposure time; improve clean-zone discipline; adjust placement method |
| Newton rings | Near center or pressure zones | Platen not flat, pad dent, warped stack | Inspect pad for marks; check platen flatness | Replace pad; verify support plate; reduce pressure peaks |
| Micro-bubbles around cutouts | Sensor windows / holes | Vacuum dwell short, placement pushes air inward | Compare bubble pattern to cutout layout | Increase dwell; change placement direction; improve fixture seal |
| Random isolated bubbles | Scattered | Dust landing during open time | Trace timing: liners open too long | Cover parts; stage tools; reduce open time |
| Edge lift after cooling | Edges/corners | Handling flex while warm, uneven compression | Check transfer method | Stabilize flat; change handling order; improve fixture support |
Reading defect patterns like a “fingerprint”
Defects repeat in specific ways. When a bubble always shows at the same corner, it is not random. It is support, residue, or handling. Likewise, when haze appears evenly, it is usually contamination in the cleaning sequence, not a single trapped air pocket.
Shop note: “random micro-bubbles” often stop being random after a week of defect logging.
Edge bubbles: check fixture and pad before touching parameters
Edge bubbles often tempt parameter changes. Still, parameters cannot press a corner that is not supported. If one corner never compresses, vacuum dwell and pressure will not fix the geometry.
What to check
-
Does the fixture press the corner evenly?
-
Does the pad have dents or embedded particles?
-
Is the stack rocking during dry-fit?
Backlight haze: treat it like contamination, not air
Haze is frequently micro-dust or a thin film. It can also be incomplete wet-out caused by rushed placement. For LCD, backlight makes these issues obvious, which is useful feedback.
Common mistake: assuming haze will “go away” after a finishing cycle.
Newton rings: pressure distribution is the usual suspect
Newton rings tend to appear when pressure is not uniform. A worn pad or uneven platen is a common cause. Also, a slightly warped support plate can create a gap variation that looks like rings.
Quick tip: if rings appear suddenly after a period of good results, inspect the pad first.
Micro-bubbles near cutouts: dwell and direction are the levers
Cutouts trap air. Short dwell leaves air behind. Placement direction can also push air toward openings rather than away from them. Small changes here often reduce micro-bubble clusters without changing anything else.
What to check: do bubbles form a “ring” around the same cutout? That pattern usually points to trapped air that never evacuated.
Recommended OCA Setup for Repair Shops: By Volume
This section is intentionally short and practical. It is not a product catalog. Instead, it lists combinations that match typical workloads and defect risks. For broader category browsing, the Jiutu Store collections hub keeps tool families organized.
Tier 1 — Entry workflow (low volume, limited model mix)
This tier targets consistency with minimal footprint. The focus is clean separation and a stable vacuum press.
Typical combination
-
Separation platform for controlled glass removal
-
Vacuum laminating stage with basic fixtures
-
Strong inspection light for backlight checks
-
Covered trays to reduce exposure time
Where it fits
-
Phone LCD repair with repeat models
-
Basic tablet work where panel size stays modest
-
Benches that rely on strict process discipline over automation
Common win: reducing “open adhesive time” often raises yield more than parameter tuning.
Tier 2 — Standard workflow (steady volume, mixed models)
This tier targets predictable output across multiple operators. It adds finishing and improves station separation.
Typical combination
-
Dedicated prep bench + dedicated bonding bench
-
Vacuum lamination plus bubble removal finishing
-
Fixture library for top-volume models
-
Standard inspection order and defect logging
Where it fits
-
Mixed phone + tablet LCD workload
-
Higher throughput benches with multiple technicians
-
Workflows where rework time is the main cost
Quick tip: a finishing step helps most when the main bond is clean but micro-bubbles remain.
Tier 3 — Large-panel workflow (tablets, automotive, industrial LCD)
This tier targets pressure uniformity and stable handling. Large panels magnify small problems, so support and flatness become priorities.
Typical combination
-
Large-area vacuum lamination capability
-
Flat, rigid support plates and pad management routine
-
Strong finishing cycle for micro-bubbles
-
Larger fixtures and careful transport supports

Caption: Large panels reward flat support and consistent pressure distribution.
Where it fits
-
Tablet LCD refurbishment
-
Automotive center display work
-
Industrial LCD panels where uniformity is strict
Common win: improving platen flatness and corner support often reduces defects faster than changing adhesive.
How to Choose Equipment Without Guesswork
Selection should follow defects, not marketing terms. When an oca machine is evaluated, daily consistency matters more than peak numbers. A stable workflow needs vacuum that repeats, pressure that spreads evenly, and fixtures that actually match the model mix.
The four selection dimensions that show up in daily use
1) Vacuum stability
Vacuum that repeats reduces micro-bubble surprises. A small leak can turn into a “bad week,” because every cycle becomes slightly different.
2) Pressure uniformity
Flat platens and healthy pads reduce Newton rings and edge voids. Even pressure also helps wet-out remain uniform across the active area.
3) Temperature stability (only when needed)
For some stacks, controlled warmth helps wet-out and reduces stress. However, uncontrolled heating can increase handling flex and edge lift risk.
4) Fixture and mold ecosystem
Fixtures decide real output. Corner support must match typical failure points. Also, easy fixture swaps support mixed model work without chaos.
Shop note: if one model is always clean and another always fails, fixtures usually deserve the first inspection.
A simple buying logic based on defect types
A grounded logic prevents tool overlap and wasted budget.
-
If corner wedge bubbles are common: prioritize fixtures, corner support, and flat handling.
-
If micro-bubbles cluster near cutouts: prioritize dwell control and finishing cycles.
-
If haze under backlight dominates: prioritize clean-zone layout and exposure time control.
-
If Newton rings appear: prioritize pad health and platen flatness.
-
If large panels are routine: prioritize rigid support and consistent pressure distribution.
Internal process reference (useful for training alignment)
For an additional process framing resource inside the same site, the LCD laminating machine guide can support training notes and station checklists.
Consumables and Environment: Simple Rules That Raise Yield
This part avoids chemical recipes on purpose. For repair benches, principles beat formulas. Most yield gains come from exposure time control, static control, and tool hygiene.
OCA film handling: protect the “open time”
Once liners open, dust starts landing. Therefore, staging matters more than rushing. Parts should be covered during pauses, and liners should be peeled only when everything else is ready.
Practical rules
-
Keep films sealed and flat until the bench is ready
-
Stage tools, trays, and inspection light first
-
Cover parts immediately if there is any interruption
Common mistake: opening liners and then searching for a missing fixture.
Static control: slow hands beat strong tools
Static pulls dust. Fast peeling creates static. Dry air increases static. So the most effective control is simple: slower liner removal and less waving around.
Practical rules
-
Peel slowly and close to the surface
-
Reduce unnecessary movement over open adhesive
-
Keep the bonding bench uncluttered
What to check: if dust defects spike on very dry days, static behavior is likely contributing.
Gloves and tweezers: separation beats brand choices
Gloves help with oils, yet gloves can also carry debris from dirty tasks. Tool separation is the real control. Bonding tweezers should stay on the bonding bench only.
Practical rules
-
One tool set for bonding, stored closed
-
One tool set for prep, stored separately
-
Replace wipes and rollers before they start shedding
Quick tip: when haze repeats across several units, the wipe pack or roller can be the source.
Airflow and dust: avoid “silent blowers” near bonding
Fans, doors, and AC vents can push particles onto open adhesive. Even gentle airflow can carry fine dust. Because of that, bonding benches should sit away from high traffic and airflow.
Practical rules
-
Keep bonding away from cutting and scraping areas
-
Avoid strong airflow near open adhesive
-
Wipe the bonding surface routinely during the day
Shop note: moving a bonding bench a few meters away from a doorway can reduce random defects noticeably.
Fixtures and Molds: Why Corners Fail First
Corners carry stress and they collect residue. During pressing, a corner that lacks support becomes a weak point where air stays trapped. Later, handling and heat can turn that weak point into visible lift.
Why wedge bubbles are often a support problem
A wedge bubble is a shape. Shapes usually come from geometry, not chemistry. If a fixture does not press the corner, the corner becomes a gap. Air stays there, and the final bubble looks triangular.
What to check
-
Does the fixture surface actually contact the corner?
-
Does the stack sit flat in dry-fit?
-
Does the pad have a dent at the same location?
Common mistake: chasing vacuum parameters while the fixture never presses the problem corner.
Mold match: “close enough” creates repeat defects
Similar models can have small differences in frame shape, sensor cutouts, or edge profile. A fixture that is “almost right” can create consistent lift at one edge. Over time, that becomes a pattern that wastes time.
Practical rules
-
Label fixtures clearly by model and revision
-
Keep the fixture library organized by high-volume models
-
Inspect fixture surfaces for embedded particles
Quick tip: if one edge always shows haze, check for fixture contamination or pad wear on that side.
Pad management: small dents become big problems
Pads wear. Pads pick up debris. Pads can be cut by sharp edges. Once a pad changes shape, pressure distribution changes, and rings or voids appear.
Practical rules
-
Inspect pads regularly for dents and embedded dust
-
Clean pads gently to avoid grinding particles in
-
Replace pads when rings become frequent
Shop note: Newton rings that appear “out of nowhere” often follow pad wear, not adhesive changes.
Quality Control: Fast Checks That Prevent Rework
Quality control works best when it is simple and repeatable. A consistent inspection order also makes it easier to teach and easier to track defects.
Backlight check: haze and micro-bubbles
Backlight reveals haze that room light hides. It also makes micro-bubbles visible across the active area. For LCD, this step is essential because backlight is the real viewing condition.
Backlight inspection routine
-
Corners first, because corners fail first
-
Edges next, because edge lift spreads
-
Center last, because center defects are easier to see
What to check: diffuse haze across the screen often means micro-dust or an oil film, not air.
Low-angle check: edge lift and corner voids
Low-angle lighting catches edge lift early. It also shows thin lines that indicate trapped air near an edge. When done quickly, it prevents installing a part that will fail later.
Low-angle inspection routine
-
Rotate the panel and scan reflections
-
Focus on corners and long edges
-
Mark any wedge bubbles immediately
Quick tip: a thin reflective line at an edge is often the beginning of a later bubble.
Defect logging: the fastest way to stop repeat failures
Logging sounds slow, yet it saves time. When defects are logged by location and type, fixture issues and handling issues become obvious. Over a week, the pattern usually points to one or two root causes.
Simple log fields
-
Model name
-
Defect type (haze, wedge bubble, rings, cutout micro-bubbles)
-
Defect location (corner, edge, cutout zone)
-
Station where the issue likely started (prep, bonding, finishing)
Shop note: “same corner, same defect” usually means fixture or handling, not adhesive.
FAQ
What makes LCD lamination harder than it looks?
LCD backlight reveals everything. Even small haze and tiny bubbles become visible. Also, heat during testing can expand trapped air and make defects appear larger.
Does vacuum lamination always improve yield?
In most LCD workflows, vacuum lamination reduces trapped air and improves wet-out. Still, it cannot compensate for dust, residue, or missing corner support. So the biggest gains usually come from combining vacuum with clean handling and stable fixtures.
Why do micro-bubbles cluster around sensor holes?
Cutouts trap air. Short vacuum dwell often leaves air behind in those pockets. Placement direction can also push air toward holes instead of away from them.
Why do bubbles appear hours after a clean-looking press?
Edge lift can form after handling, especially while the stack is warm. In addition, small trapped pockets can expand with heat. That is why early edge inspection and flat handling after pressing matter.
What is the quickest way to reduce corner wedge bubbles?
Corner wedge bubbles are often support or residue problems. Checking fixture corner contact and corner cleanliness usually beats parameter changes. Keeping post-press handling flat also prevents a small lift from growing.
Is a bubble remover required for every job?
A bubble remover helps most when micro-bubbles remain after a clean vacuum press. For some small LCD repairs, a disciplined vacuum process and strict cleanliness can be enough. When larger panels or thicker stacks become common, finishing cycles tend to pay back.
How does this workflow extend to OLED without losing focus on LCD?
The same steps apply, but OLED edges are more sensitive to stress. Curved edges need better support and a smoother pressure ramp. For LCD work, backlight haze control remains the main priority.
How does the bonding stage fit into a three-station line?
In a three-station layout, the bonding stage sits between prep and finishing. At that point, the oca machine stage benefits most from strict clean-zone discipline and minimized liner-open time. When that discipline holds, defects become more predictable and easier to trace.
Conclusion + 3 Actionable Recommendations
Bubble-free LCD lamination comes from repeatable control, not luck. Clean separation prevents corner stress and residue traps. Stable vacuum pressing prevents trapped air and improves wet-out. Finishing cycles remove the micro-bubbles that survive a good press. When the workflow is built as a closed loop, the oca machine step becomes reliable instead of temperamental.
Three actionable recommendations
-
Keep a strict three-station layout and prevent dirty tools from entering bonding space.
-
Diagnose defects in order: fixture support and residue first, then dwell and pressure ramp.
-
Standardize inspection order (corners → edges → center) under backlight and low angle.