A practical field-style guide for repair teams, refurbishment shops, and display lines that need faster fault judgment, smoother daily use, and a clearer path from the blog page into the right Jiutu machine.
A cof bonding machine rarely gives its first warning in a dramatic way. In real work, the first clue is often something quiet. A panel powers on normally, then shows a line after cooling. One side of the bond looks calm while the other side feels less convincing under a closer check. A piece that looked “good enough” five minutes ago suddenly starts telling a different story once it has been lifted, placed on a tray, or moved under side light.
That is why readers looking for this topic usually want more than machine language and parameter lists. They want to know what they are likely to see with their own eyes, what the hand notices on the fixture, what the bench feels like when the process is drifting, and which judgment tricks actually save time. They also want a workflow that sounds real instead of theoretical. Because on a normal day, the machine is only part of the story. The support, the waiting time, the rework history, the operator rhythm, and the finishing path all leave fingerprints on the final result.
This version is written in that spirit. It keeps the technical meaning, but puts the reading experience closer to the shop floor: what appears first, how to judge it fast, what to avoid doing too early, and when the smartest move is not another adjustment but a better-matched machine or a cleaner optical bonding workflow.
For technicians comparing cof bonding machine failure modes in real repair work, the goal is not only to identify visible defects, but to judge which signs are meaningful, which ones are misleading, and which inspection sequence saves the most time at the bench.
- Why bond failures feel confusing in real repair work
- What readers usually see first on the bench
- COF bonding machine failure modes: fast judgment techniques before touching the settings
- How to use the workflow better day to day
- Root cause troubleshooting table
- When the issue is not only bonding
- When small corrections are enough and when upgrade makes more sense
- Extended reading
- FAQ

For many repair benches, the difference between a rushed result and a stable result begins with how well the bonding setup matches the actual job flow. Shop this machine
Why Bond Failures Feel Confusing in Real Repair Work
In a clean handbook, failures look easy to classify. On a real bench, they do not. The screen is warm. Another job is waiting. The tray on the right already has three pieces in it. Someone in the room is asking whether the next batch can move forward. In that moment, the first instinct is usually to simplify the problem too quickly. If the panel looks weak, it must be heat. If the line drops after handling, it must be pressure. If the finish looks poor, it must be the bond.
Real repair work rarely behaves that cleanly. What makes a bond failure confusing is not only the machine itself. It is the overlap between causes. A support issue can look like weak bonding. A small timing drift can look like unstable material. A trapped bubble or post-lamination stress mark can look like poor connection quality, even when the electrical path is not the main problem. And because these symptoms can arrive in similar ways, the line can lose half a day by treating every bad result as the same kind of bad result.
This is where a more human way of reading the process becomes useful. Instead of starting with a number, start with a moment. When did the defect appear? Was it visible immediately, or only after cooling? Did it repeat in the same place, or did it move around from piece to piece? Did it show up after a light lift, after a wait on the rack, or only after a later visual check? Those are not soft questions. They are some of the fastest hard filters available at the bench.
Readers also care about this because most shops do not have the luxury of troubleshooting in silence. The work keeps moving. The wrong decision is rarely dramatic in the first minute. It becomes expensive because it multiplies. One wrong assumption turns into three unnecessary adjustments. Three unnecessary adjustments turn into inconsistent samples. Then the team stops trusting what it sees. Once that happens, even good pieces start feeling uncertain.
A strong cof bonding machine workflow is not only about making a bond. It is about preserving trust in the process. The team needs to believe that what it sees means something, that a repeated edge failure is actually informative, and that one careful comparison is worth more than three random corrections. The calmer that logic is, the faster the line returns to control.
In other words, bond failure feels confusing when the room starts moving faster than the evidence. The whole aim of this guide is to slow that part down just enough to let the right clue stay visible.
What Readers Usually See First on the Bench
Most readers do not start with the words “root cause analysis.” They start with what is in front of them. A screen that looked fine now feels a little wrong. A corner seems less settled than it did a minute ago. A line appears only after the panel has been off the station for a while. These are the moments that matter most, because they are the moments that shape the first decision.
One common scene is the delayed defect. The panel comes off the station, powers on, and looks acceptable. No obvious issue is visible under the first glance. Then, after cooling or after a small move, the weak area shows up. That kind of failure is easy to underestimate because the first impression was reassuring. In reality, it often means the bond was not truly strong; it was only temporarily calm while everything was warm and still.
Another common scene is the one-sided result. One edge looks fuller, more settled, or more convincing. The opposite side looks lighter, drier, or less secure. When readers see this, the instinct is often to think globally. Maybe the whole process needs more energy. But one-sided evidence often points in a more local direction. Something physical has shape, and the failure has inherited that shape. It could be support, flatness, local contamination, fixture wear, or uneven landing.
Then there is the moving defect. This one frustrates people because it refuses to behave neatly. Yesterday the weak zone appeared near the edge. Today it shows up closer to the center. The next piece fails somewhere else. A moving defect rarely feels satisfying because it does not let the line blame one fixed object. Yet it is often honest evidence that the trouble is coming from timing, handling, prep discipline, or variation around the station rather than one constant machine point.
Readers also often describe a screen that “just doesn’t look right” even though the connection seems stable. That is one of the most important categories to separate. A finish problem and a bond problem can look like cousins. A trapped bubble edge, a lamination mark, or post-process stress can make the whole result feel weaker than it really is. When the eye sees a disappointing finish, the mind wants to blame the most important station. That is natural, but it is not always correct.
This is why good troubleshooting begins with symptom language instead of fix language. Say what happened before saying what to change. The screen passed warm and failed cool. The same side opened twice. The defect moved from piece to piece. The finish looked bad but the bond path stayed stable. Once the symptom is named honestly, the rest of the workflow gets easier.
What readers want here is not a perfect theory. They want a way to look at the part in front of them and know which family of trouble they are really dealing with. That single act of sorting saves more time than almost any early adjustment.

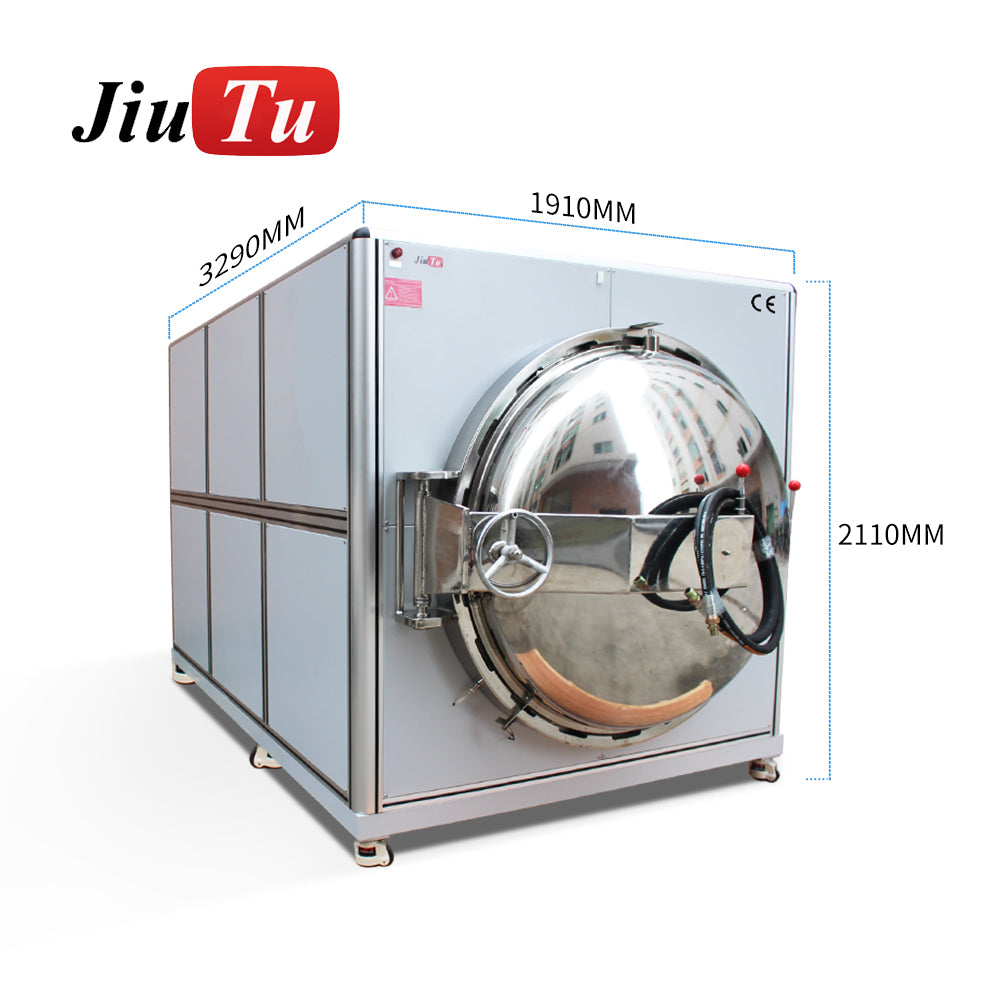
Larger panels usually need more than patience alone. They need steadier support, clearer handling logic, and a machine built for wider repair work. Shop this machine
COF Bonding Machine Failure Modes: Fast Judgment Techniques Before Touching the Settings
The fastest useful judgment does not begin on the control screen. It begins with the part, the support, the waiting time, and the sequence of events around the part. That is good news, because it means some of the most valuable checks are available immediately. No special report is needed. No over-analysis is needed. Just a cleaner reading of what the bench is already showing.
Many cof bonding machine failure modes can be identified faster when operators judge the cooled state, compare the bond shape across the width, and review what changed around the station before adjusting settings.
Check the cooled state, not only the fresh state
Heat can flatter a weak result. A fresh bond may look calm because the part is still warm and mechanically quiet. Cooling tells a more honest story. That is why one of the simplest and most valuable habits is to stop judging too early. Give the piece a short pause. Check it again after the temperature has settled. If the same weakness appears after cooling on consecutive pieces, the process has already given a clear warning.
This small pause changes the whole mood of troubleshooting. Instead of reacting to a first impression, the line waits for the part to show its stable character. That is not lost time. It is decision time saved.
Use left-center-right comparison
When a result feels uneven, compare the bond visually across the full width. Do not ask whether the bond is simply good or bad. Ask whether it behaves the same way everywhere. Does one side look fuller? Is one area drier? Does the width change slightly from left to right? A line that compares across the width catches mechanical imbalance faster than a line that stares only at one “bad” spot.
This is one of the most practical judgment tricks because it turns vague worry into shape recognition. If the problem has shape, a physical cause often has shape too.
Read the fixture with the hand
People often trust the visual result but forget what a calm hand can tell them. A panel that rocks slightly in the fixture, a support surface that feels less settled at one corner, or a tiny rise where it should feel flat can change the real contact condition more than expected. These are not dramatic flaws. They are exactly the sort of small flaws that create persistent one-sided weakness.
This is why experienced operators often touch the setup before they touch the settings. The hand notices instability faster than the screen language does.
Use one light, repeatable flex check
Controlled flex is useful. Random handling is not. A light, repeatable movement can show whether the bond margin is genuinely stable or only pretending to be stable. If the same area fails under the same gentle motion each time, the weakness is meaningful. If the panel is waved around emotionally, the result becomes noise.
Readers often want a dramatic test because dramatic tests feel decisive. In practice, calm repeatability is much more informative than force.
Review what happened around the station
Some of the most expensive mistakes begin because the line treats every fault as machine-centered. The part may have waited too long after prep. The station may have been interrupted. The tray rhythm may have changed. A rework piece may have been handled differently because everyone wanted it to succeed this time. None of this looks like machine data, but it is process data.
When the defect moves around from piece to piece, this surrounding rhythm deserves attention before a global correction does. A cof bonding machine can only look stable if the workflow around it stays legible.
- Check the piece after cooling, not only right after bonding.
- Compare left, center, and right before assuming the whole process is weak.
- Touch the fixture and support to feel for instability.
- Use one gentle, repeatable flex check.
- Notice whether the same edge repeats or the defect moves around.
- Review prep timing and handling around the station.
- Separate electrical weakness from optical finish disappointment.
How to Use the Workflow Better Day to Day
Readers do not only want to know how to diagnose a failure. They want to know how to make failure less likely in the first place. That is where day-to-day use matters. A good process does not rely on big rescues. It relies on small habits that keep the work readable.
One of the most useful habits is to keep a known-good sample nearby. Memory is unreliable, especially during a busy shift. A real comparison piece is not. When a questionable result appears, a known-good sample makes the eye more honest. The width, the edge shape, the visual calmness, and even the way the part sits in support become easier to judge when there is something real to compare with.
Another habit is to treat cooling as part of the process instead of as dead time between steps. A line that rushes every piece into the next action is a line that will keep being surprised by delayed defects. A line that bakes a short cooling check into its rhythm sees the truth earlier and wastes less effort later.
It also helps to reduce emotional handling. When a bond looks uncertain, the natural human response is often to test it harder. That rarely makes the evidence clearer. Good use is gentler than that. A consistent, careful movement tells more than an aggressive one. The aim is not to prove the part weak. The aim is to learn whether the part is stable.
The workflow around rework pieces deserves its own discipline as well. A rework piece is never psychologically neutral. The team already wants that piece to succeed. That desire often leads to bigger, faster corrections than the piece actually needs. The wiser move is usually the opposite. Slow down slightly. Clean the observation. Assume that a rework piece is carrying stress history and should be treated with a cleaner routine, not a rougher one.
Another daily-use principle is to watch the room, not only the machine. A station can feel stable in the morning and unstable in the afternoon even when the machine settings have not changed. Why? Because the rhythm changed. More interruptions. More waiting trays. More split attention. More handling. The machine is still doing what it does. The workflow around it is what became less calm.
This is where a lot of hidden yield loss begins. People assume process drift is always technical drift. Sometimes it is routine drift. The work got busier, more cluttered, and less predictable. Then the bond result got noisier too.
Better daily use is rarely glamorous. It is more about discipline than about cleverness. Keep the comparison piece. Keep the support clean. Keep the handling repeatable. Keep the cooling pause. Keep the troubleshooting sequence narrow. That is what gives a cof bonding machine the best chance to feel stable not only in a controlled demo, but in ordinary working life.
In everyday use, many cof bonding machine failure modes become easier to control when cooling checks, support consistency, and handling rhythm stay repeatable from piece to piece.
Root Cause Troubleshooting Table
Once the symptom has been named clearly, the first move should become simpler. A good troubleshooting table is not there to impress anyone. It is there to reduce unnecessary motion. The goal is to give the bench one sensible next check, not ten speculative ones.
| What shows up first | What it often suggests | Fast inspection point | Best first move |
|---|---|---|---|
| The same side keeps looking weaker | Support imbalance, local flatness issue, or uneven landing | Compare bond width left to right and feel for instability in the fixture | Correct the mechanics before changing the whole process |
| The piece passes first, then fails after cooling | The margin is weak, not absent | Check two consecutive cooled pieces before deciding it was random | Treat it as a stability issue rather than a one-off miss |
| The defect moves from piece to piece | Handling drift, prep timing, material condition, or contamination | Review what changed around the station, not only on the machine | Tighten routine and consistency first |
| A corner looks calm hot and lifts later | Marginal bonding or local stress release | Compare fresh and cooled condition at the same exact corner | Check cleanliness and support before any aggressive correction |
| The finish looks poor, but the path seems electrically stable | The real issue may be elsewhere in the optical workflow | Review lamination and debubble context | Do not force the bond station to solve a finish problem |
| The same station zone keeps creating trouble | Localized wear or repeatable support error | Map the failure against the exact work area each time | Inspect tooling and support hardware carefully |
The deeper lesson inside the table is simple. A good cof bonding machine routine does not try to solve everything at once. It narrows the family of the problem first, then takes one useful step. That sequence protects both time and confidence.
When reviewing cof bonding machine failure modes, it also helps to compare bench observations with broader electronics manufacturing quality practices. For a general reference, see IPC standards for electronics manufacturing. This gives readers an additional quality reference beyond day-to-day repair experience.
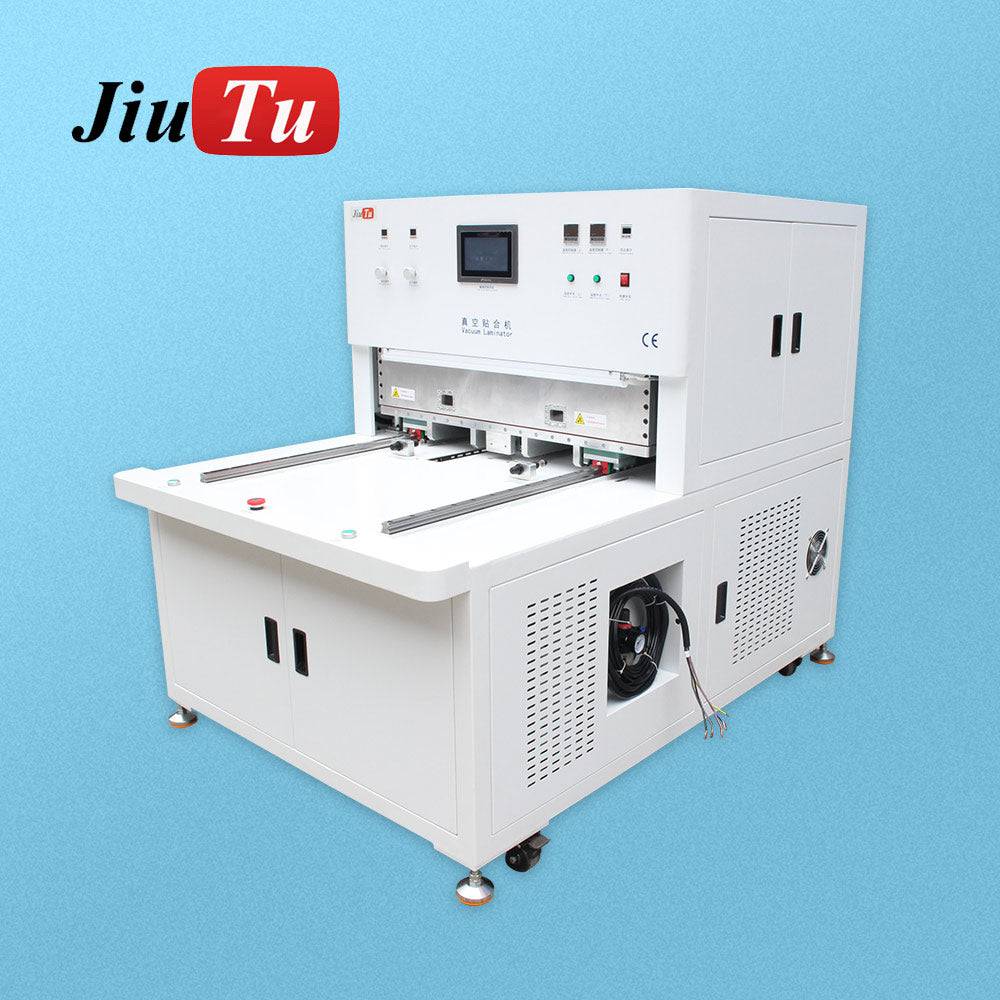
Sometimes the screen finish tells a different story from the bond itself, which is why a cleaner finishing step can save a lot of unnecessary rework. Shop this machine
When the Issue Is Not Only Bonding
This is the section many readers need most, because it is where wasted effort often begins. The bond station is emotionally central in the workflow, so it becomes the first suspect. That makes sense. But some of the most frustrating “bonding problems” are not pure bonding problems at all. They belong to the wider optical path.
A screen can finish poorly because of what happened before or after the actual bond. Lamination stress, trapped air, post-process marks, or incomplete bubble removal can all change the way the result feels. To the eye, the part looks disappointing. To the team, that disappointment can sound like weak bonding. Yet the electrical path may not be the main failure. When the workflow forgets this distinction, it starts asking the wrong station to carry the wrong burden.
That is why an experienced line learns to ask two different questions. First: is the bond path stable? Second: does the whole repaired screen finish well? These are related questions, but they are not the same question. Keeping them separate makes the whole operation more efficient. It also stops the team from overcorrecting one process to compensate for another.
This broader view becomes even more important in shops that handle mixed work. Small phone screens, tablet work, larger displays, automotive panels, and industrial screens do not all create the same kind of pressure on the workflow. One station can begin life as a comfortable fit and later turn into a bottleneck simply because the work around it has changed.
A well-built cof bonding machine routine works better when it sits inside a process that knows its own boundaries. Bonding should do bonding work. Debubbling should solve debubbling problems. Lamination should stabilize the optical stack. Rework tools should support local correction rather than forcing everything through a single bench station.
This is one reason the wider optical bonding range matters for readers who are really shopping for a better process, not just a single machine. Once the workflow is viewed as a chain instead of a point, the right purchase decision often becomes clearer. Sometimes the main need is a more suitable bonding station. Sometimes the real need is to stop asking the bonding station to clean up finishing problems that belong elsewhere.
The best troubleshooting habit here is intellectual honesty. If the finish looks wrong but the connection looks stable, say that. If the piece feels mechanically weak only after cooling, say that. If the problem keeps crossing station boundaries, say that too. A cleaner diagnosis leads to a cleaner purchase path.
When Small Corrections Are Enough and When Upgrade Makes More Sense
One of the hardest calls in repair work is deciding whether the process needs a cleaner routine or a different tool. Teams usually keep correcting for too long. That is understandable. If the current setup once produced good work, people want to believe it still only needs one more careful adjustment. Sometimes that is true. Sometimes the workload has changed so much that the honest answer is no longer “tune it,” but “match it better.”
When a tighter routine is probably enough
A tighter routine is probably enough when the defect pattern is narrow, recent, and still readable. The line used to feel stable, then one family of faults appeared. The same edge began opening. The same cooling-related issue started repeating. One fixture started behaving worse than the others. In that sort of situation, the process still has a center. A known-good sample still looks close to the bad sample. The line still trusts what it sees. That is a good sign.
In those cases, the best return often comes from steadier support care, cleaner handling discipline, better cooling checks, or a narrower troubleshooting sequence. The machine may not be mismatched. The routine around it may simply need to become more disciplined again.
When the line is telling you the machine match is no longer ideal
The line is telling you that when good output increasingly depends on one experienced person constantly making small saves. It is telling you that when the work mix has changed but the setup has not. It is telling you that when larger panels now move through a bench that was comfortable only for smaller jobs. It is telling you that when bonding, finishing, and rework are getting blurred into one overloaded station.
Another useful sign is emotional fatigue in the workflow. People stop feeling surprised by trouble and start expecting it. They can still make good pieces, but not with confidence. That kind of fatigue is not just a mood. It is process information. It usually means the current setup is being stretched beyond what feels natural.
| Path | Best fit | What changes in real daily work | Main gain |
|---|---|---|---|
| Keep the current setup and tighten routine | One readable defect family, stable work mix | Cleaner support checks, calmer cooling checks, more disciplined handling | Lowest immediate spend |
| Add adjacent support tools to the workflow | The bond path is serviceable, but finishing and rework confusion is growing | Each stage gets a clearer role | Less forced compensation and better reading efficiency |
| Move larger jobs to a larger-format repair setup | TV or industrial display work is increasing | The small bench stops carrying every job type | Better stability on wide-panel jobs |
| Rebuild the path around a broader optical bonding workflow | Bond, lamination, and finishing issues keep crossing into each other | The workflow becomes clearer station by station | Higher confidence and stronger process separation |
For many readers, the buying decision becomes much easier once they stop asking only, “Which machine has the right name?” and start asking, “Which workflow match will reduce confusion, repeat failure, and technician dependency fastest?” That is a better question because it sounds more like real work.
A cof bonding machine is valuable not only when it can make a good part, but when it can make good parts with less drama around it. That is the standard that makes upgrade decisions clearer and more grounded.
A smoother repair result often depends on the full workflow, not only the bond point, especially when lamination and finishing quality affect the final look. Shop this machine
Extended Reading
This section is designed to improve both reading efficiency and site flow. Some readers are clearly still in diagnosis mode. Others are already moving toward a purchase decision. These links help both types of readers go somewhere relevant instead of dropping off the page.
FAQ
These are the questions readers usually ask once they have seen a few uncertain pieces and need a smarter next move.
How can a weak bond be judged quickly without rushing into the wrong correction?
Why do some bonding failures only appear after the panel cools?
What is the most common mistake when a cof bonding machine starts feeling unstable?
How can readers tell whether the problem is bonding or part of a larger optical workflow issue?
When does larger-format equipment become the more practical choice?
Why add natural “Shop this machine” links under images instead of big hard-sell buttons?
The best troubleshooting habit is usually the quietest one
A strong cof bonding machine workflow does not depend on dramatic rescue. It depends on calm observation, readable routine, and honest separation between bond problems and broader optical workflow problems. Watch what changes after cooling. Notice whether the same side repeats. Keep the handling gentle enough to learn from it. Those small decisions make the whole process feel more stable.
When the work has clearly outgrown the current setup, that is useful information too. It means the next step may not be another adjustment, but a better match in product choice, larger-format repair flow, or wider optical bonding support.
In practice, recurring cof bonding machine failure modes usually become easier to control when the workflow stays readable, the support stays consistent, and the inspection rhythm remains calm from piece to piece.
For quote support, sample machine advice, or a matching configuration plan, contact Jiutu.