Fint-pitch-bonding fejler sjældent af "mystiske årsager". I stedet ophobes små afvigelser i varme, tryk eller justering ved gentagen efterbearbejdning. Valgprocessen bør fokusere på gentagelig kontrol, ikke prangende påstande. I praksis bliver en ACF-bondingmaskine værdifuld, når den producerer den samme bond line efter den tiende cyklus, som den gjorde på den første. Den "rigtige" model afhænger af fugegeometrien, pitch, fastgørelsesstrategi og hvor ofte opgaver ændres i løbet af dagen. Denne artikel fokuserer på indkøbslogik, praktisk egnethed og praktisk parring, samtidig med at den introducerer en konkret produktmulighed for den samme arbejdsgang.
Hvad ACF-bonding reelt gør i reparationsarbejde
ACF er en klæbefolie med ledende partikler. Som et resultat opstår ledningsevne hovedsageligt gennem tykkelsen efter presning, mens lateral ledningsevne forbliver begrænset. Denne retning betyder mest, når spor er stramme, og puder er skrøbelige.
På mange moderne samlinger skal en binding levere kontinuitet uden at tilføje højde. ACF-bonding erstatter ofte voluminøse samlingsmetoder, der kan revne under bøjning. Samtidig kan processen også reducere efterbearbejdningssløjfer, når puder ikke tåler gentagne lodderetter.
Typiske anvendelsestilfælde omfatter:
-
FPC/FFC-hale-rebonding, hvor pitch er lille, og puder er tynde
-
Chip-til-fleks-samling, hvor varmen skal forblive lokaliseret
-
Fleks-til-printplade-forbindelser nær plastik, skum eller belægningslag
-
Laboratorie-valideringsarbejde, hvor parametre skal være gentagelige på tværs af prøver
Samtidig sidder ACF-bonding sjældent alene på en arbejdsbænk. I stedet findes den ofte ved siden af laminerings- og optisk bonding-trin. Hvis din arbejdsbænk også omfatter optisk bonding/lamineringsarbejde, skal du planlægge dette som en separat station med egen renlighed og arbejdsflowkontrol.
Klare synslinjer til bordet og limhovedet hjælper med at stabilisere justeringen over lange sessioner.
Køb starter med arbejdsmængdens realitet
En maskine kan se "stærk" ud på papiret, men stadig kæmpe med virkelige opgaver. En nyttig købsbeslutning starter med et kort over arbejdsbyrden. Dette kort behøver ikke at være kompliceret, men det skal være ærligt.
1) Identificer de fugtyper, der vises hver uge
Først skal du liste de samlinger, der vises regelmæssigt. Nogle borde ser for det meste flex-haler. Andre ser mere chip-bonding. Imens kræver blandede arbejdsbyrder hurtigere skift og et bredere udvalg af fastgørelser.
Almindelige fugefamilier omfatter:
-
Flex-hale til printplade-puder
-
Flex-hale til glas-tilgrænsende strukturer
-
Chip til flex for signalgendannelse
-
Flex til flex til kabelreparationer
Noter dernæst den mindste pitch, der vises ugentligt. Denne detalje driver justeringskravene mere end nogen anden variabel.
2) Vurder frekvensen af skift og jobvariationen
Volumen betyder noget, men trykket fra skift betyder mere. Spor, hvor ofte værktøjer skifter pr. dag. Hyppige skift belønner en justerbar kameraposition og en scene, der smidigt vender tilbage til nul uden slør. Samtidig hjælper stabile forindstillinger, når lignende reparationer gentages ofte.
3) Se på fejlformer, før du sammenligner mærker
Fejl afslører, hvor kontrollen skal forbedres. Derfor kan en kort log over tilbagevendende symptomer guide udvælgelsen bedre end en lang brochure.
Almindelige symptomer omfatter:
-
Kontinuiteten er i starten god, men bliver periodisk efter bøjning
-
Den ene kant af halen binder godt, mens den anden kant fejler
-
Puder viser buler eller aftryk efter presning
-
Harpiksudskydningen ser ujævn ud langs bindingslinjen
-
Justeringen ser korrekt ud ved presning, men skifter lidt efter afkøling
Med andre ord, fejltypen peger ofte direkte på trykdrift, temperaturdrift eller armaturkrybning.
De tre kontrolpunkter, der afgør, om bindinger forbliver stabile
Marketingtekster fremhæver ofte maksimal temperatur eller maksimal kraft. Dog afhænger stabilt arbejde af kontrollerede profiler og gentagelig mekanik. Købskriterier bør bygges op omkring tre kontrolpunkter.
Kontrol af varmeprofil: stabilitet slår "topnumre"
En kraftig varmelegeme kan stadig beskadige sarte stakke, hvis den overskyder. Den vigtigste varmefunktion er forudsigelig opvarmning, stabil holdetid og ren frigivelse.
Under efterbearbejdning kan tynde flex-haler og nærliggende plastik reagere hurtigt på varme. Derfor kan en lokaliseret opvarmningsstil hjælpe med at beskytte tilstødende dele. Samtidig er ensartet holdetid vigtig, fordi harpiksflow og partikelkomprimering sker inden for et smalt procesvindue.
Når du evaluerer varmekontrol, er disse tegn værd at se efter:
-
Referenceværdien holder sig stabil uden at svinge op og ned
-
Hovedet når målet hurtigt uden et skarpt udsving
-
Holdetiden forbliver konsistent mellem cyklusser
-
Afkøling forårsager ikke pludselig halebevægelse
Derfor bør enhver ACF-bondingsmaskine bedømmes ud fra gentagelighed, ikke kun hvor højt den kan gå.
Trykstabilitet: et snævert bånd afgør ledningsevnen
ACF-ledning afhænger af kontrolleret komprimering af partikler. Derfor er trykstabilitet vigtigere end trykområde.
For lavt tryk ligner ofte "næsten god" kontinuitet. For højt tryk kan derimod knuse kobber, bule puder eller vride et tyndt substrat. Disse fejl viser sig måske ikke med det samme, men kan opstå efter termisk cykling eller bøjning.
Praktisk trykforhold bør omfatte:
-
Finjustering, der føles forudsigelig
-
Lav drift i holdetiden
-
Jævn nedpresning, ikke et pludseligt ryk
-
Jævn frigivelse, der ikke trækker i halen
Derudover er hovedets fladhed under belastning vigtig. Ellers koncentreres trykket ved kanterne og skaber ujævn ledningsevne.
Klarhed i justering: den skjulte drivkraft bag gentagne omarbejdninger
Selv perfekt varme og tryk kan ikke rette en skæv binding. Derfor fortjener justering og scenens adfærd lige stor opmærksomhed.
I dagligdagen afhænger justeringskvaliteten af optik og mekanik sammen. Blænding, dårlig dybdeskarphed eller slør i scenen kan forvandle "godt nok" til gentagne fejl. Samtidig afgør lysstabiliteten ofte, om pad-kanter forbliver synlige under forstørrelse.
Et pålideligt justeringssystem tilbyder typisk:
-
Klart udsyn til pudernes kanter og sporglinjer
-
Justerbar kamerahøjde til forskellige armaturstakke
-
Jævn XY-bevægelse uden ryk eller 'stick-slip'
-
Stabil fokus, når hovedet nærmer sig emnet
Bænkmontering betyder mere end de fleste specifikationer
En maskine kan være præcis og stadig føles svær at bruge. Derfor bør bænkmontering behandles som et købskriterium, ikke en eftertanke.
Scene størrelse og adgang afgør, om armaturer forbliver stabile
Armaturer kræver plads. Derfor bør sceneområdet og adgangen omkring klemmer kontrolleres tidligt. Trange rum tvinger akavet placering af klemmer, hvilket øger krybning under opvarmning.
Ergonomi er også vigtigt. Under gentagne justeringsarbejde bliver små ubehag til fejljustering over tid. En behagelig arbejdsstilling kan indirekte forbedre udbyttet. Komfortable opsætninger reducerer træthed og hjælper med at opretholde justeringsnøjagtigheden.
Gentageligt arbejde afhænger af gentagelige indstillinger. Derfor er klare temperatur- og trykkontroller, synlige displays og stabil forudindstillet adfærd vigtige i praksis.
På dette tidspunkt bliver kontrol-layoutet en del af udvælgelsen. Samtidig reducerer et tydeligt mærket interface opsætningsvariation mellem operatører og skift.
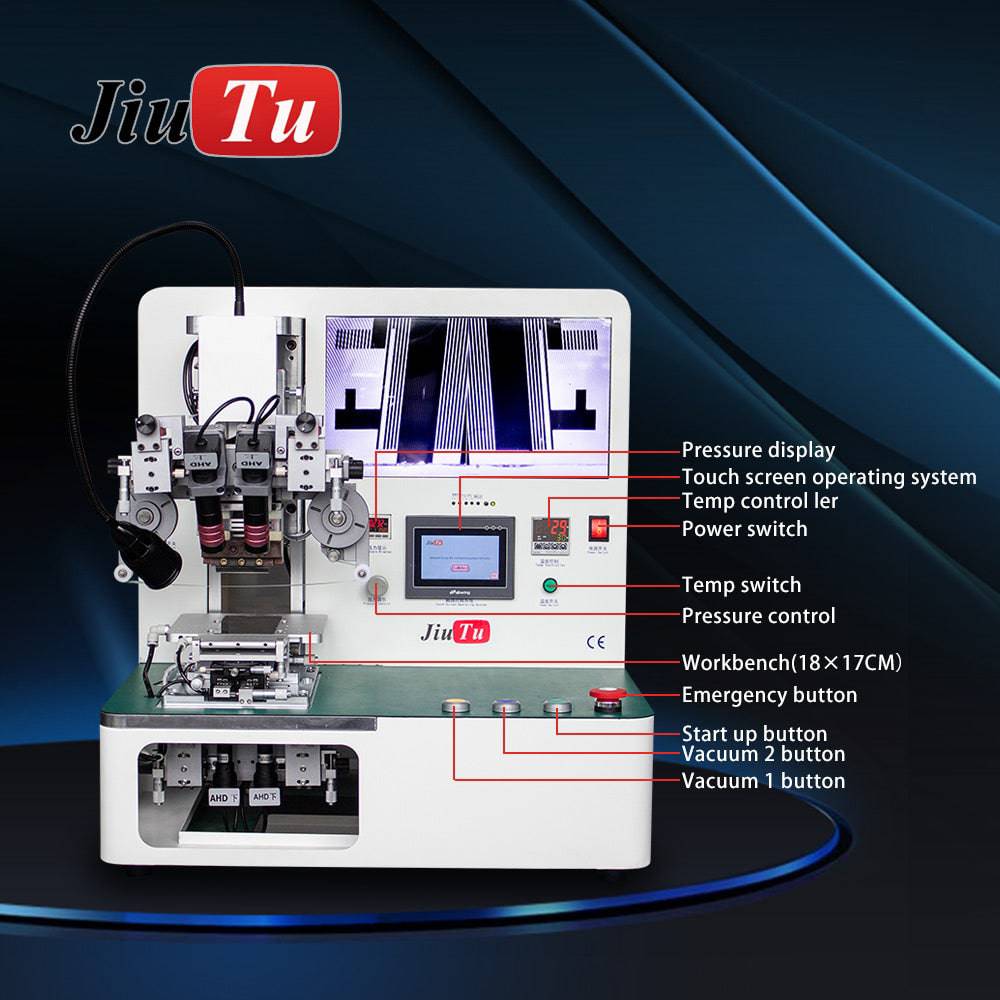
Kontrolsynlighed hjælper med at holde indstillingsværdier konsistente, når jobbene ofte skifter.
Parringsværktøjer afgør ofte succes
ACF-binding bliver ensartet, når de omkringliggende værktøjer understøtter den. Derfor bør parringen planlægges sammen med maskinen.
Høj-impact-parringer omfatter:
-
Stive armaturer, der modstår krybning under opvarmning og afkøling
-
ESD-jordforbindelse og måtter for at reducere statisk relaterede fejl
-
Konsekvente rengøringsværktøjer, der ikke efterlader fnug
-
Enkle inspektionsværktøjer til hurtigt at bekræfte skævhed og kantløft
Hvis din arbejdsgang desuden omfatter skærmrenovering, skal du planlægge tilstødende trin (laminering, rengøring, inspektion) som en del af samme arbejdsflow.
Hvordan man evaluerer en maskine under en prøvekørsel
En prøvekørsel kan være misvisende, hvis den kun kontrollerer "én perfekt prøve". Derfor bør evalueringen efterligne virkelige efterbearbejdningsforhold. Målet er ikke en enkelt smuk binding, men stabile resultater på tværs af gentagelser.
Test 1: Gentag den samme binding tre gange uden at ændre opsætningen
Konsistens viser sig hurtigt. Kør derfor den samme samling tre gange ved hjælp af samme armatur og indstillinger.
Hold øje med:
-
Drift i modstanden efter hver cyklus
-
Synlige ændringer i udpressningsbredden
-
Små skift i justeringen efter afkøling
-
Stigende behov for at "skubbe" scenen for at matche kanterne
Hvis den tredje cyklus kræver ekstra kompensation, kan systemet drive mekanisk eller termisk.
Test 2: Brug et "worst-case" justeringsmål
Nogle haler har svage kanter. Andre har reflekterende puder, der blænder. Derfor bør en realistisk prøve omfatte et vanskeligt justeringstilfælde.
I praksis afslører dårlig optik sig over tid. Hvis justeringen tager lang tid, fordi pudernes kanter er svære at se, bliver det en flaskehals for gennemløb. Samtidig øger lang justeringstid også risikoen for kontaminering fra åben eksponering.
Test 3: Se efter defektsignaturer, ikke kun bestået/ikke bestået
En binding kan bestå kontinuitet, men stadig være skrøbelig. Derfor bør visuelle signaturer være en del af evalueringen.
Nyttige visuelle tegn omfatter:
-
Kanttåge eller mælkeagtig hvidfarvning langs bindingslinjen
-
Ujævn harpiksflow, hvor den ene side ser tør ud
-
Pudeaftryk, der indikerer lokal overpresning
-
Små mellemrum ved kanten, der forudsiger senere løft
Disse signaturer vises ofte før elektrisk fejl. Som følge heraf kan de guide tuning og forbedring af armaturer.
Test 4: Evaluer armaturadfærd under nedkøling
Mange intermitterende fejl opstår efter afkøling. Observer derfor, om halen forskydes en smule, når samlingen afkøles.
Hvis der opstår et skift, er armaturkrybning sandsynlig. Samtidig kan scene-låsning og klemme-design trænge til forbedring. Kort sagt skal maskinen understøtte stabil fastholdelse gennem hele den termiske cyklus.
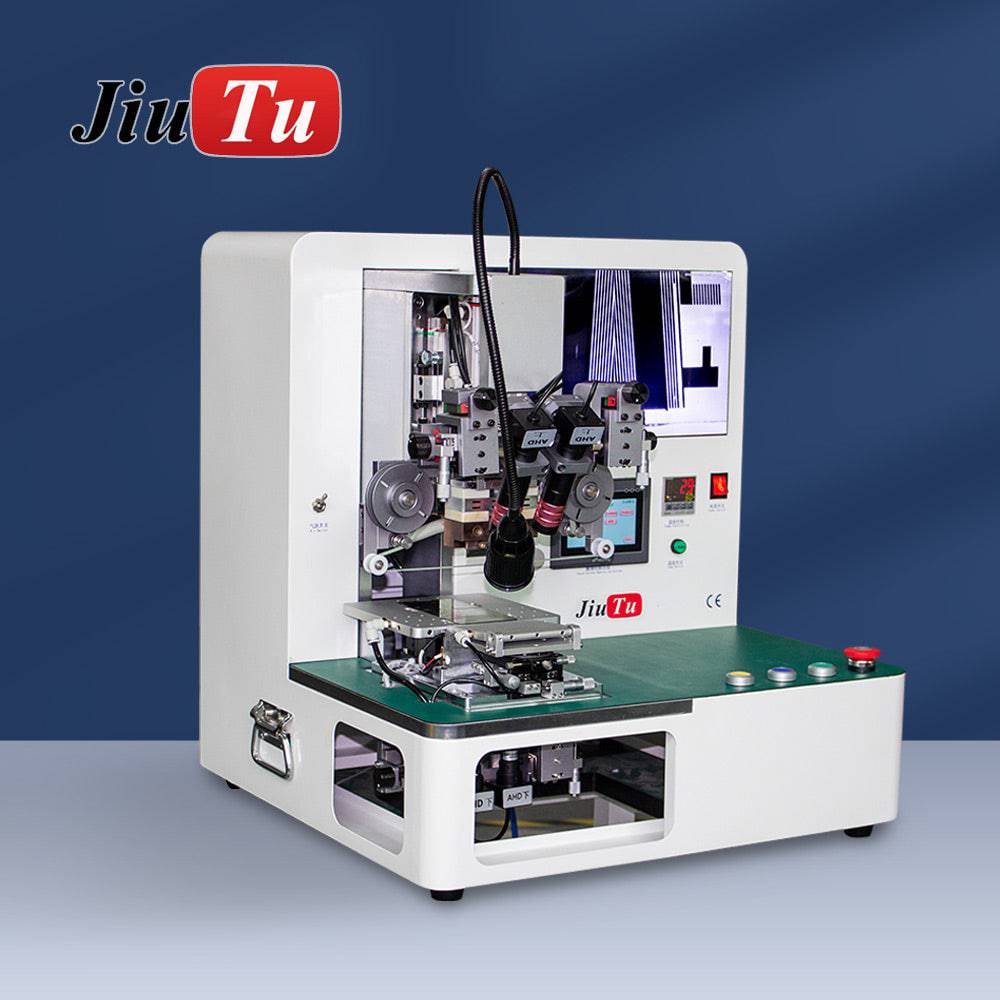
Produktreference: Jiutu 9TU-M039A ACF-bondingmaskine og dens anvendelse
Når udvælgelseskriterierne er defineret, hjælper det at gennemgå en reel konfiguration som eksempel. Jiutu 9TU-M039A er en mulighed at sammenligne med dine krav – den endelige egnethed bør bekræftes af multicyle-forsøg på dine faktiske samlinger.
Produktside: ACF-limningsmaskine
Praktiske funktioner, der matcher almindelige reparationsbehov
Ifølge leverandørens liste tilbydes hovedstørrelse (op til ~90 mm længde, ~5 mm bredde), en forvarmningsplatform og justerbar kamerapositionering. Kontroller de brugbare hovedmuligheder og det effektive arbejdsområde under en prøveperiode, da disse direkte påvirker armaturkompatibilitet og processtabilitet.
Disse detaljer er vigtige, fordi hovedets geometri og forvarmning påvirker processtabiliteten på tynde haler. Samtidig understøtter kamerapositionering forskellige armaturstakke uden akavede løsninger.
Produktbeskrivelsen nævner også pulsvarmning med justerbar temperatur og tryk (brug de offentliggjorte specifikationer og en prøvekørsel til at bekræfte det brugbare procesvindue for dine samlinger).
Denne kombination understøtter kontrollerede varmeprofiler og gentagelig presning, når ACF-vinduerne er snævre. Som et resultat kan justeringen fokusere på stabilitet i stedet for konstant genopdagelse.
Hvorfor byggevejledningen oversættes til daglig stabilitet
Produktbeskrivelsen nævner også en hovedstruktur af 45# stål, en japansk SMC-cylinder med en præcisions trykreguleringsventil, et importeret termisk isoleringsmodul og et wolframstålskærehoved.
Disse byggedetaljer kan hjælpe med stivhed og varmeisolation, men stabilitet bør valideres ved måling: kontroller temperaturoverskridelse, fastholdelsesdrift og modstandsvariation over gentagne cyklusser. Varmeisolation er værdifuld, når tilstødende plast- eller belægninger er i nærheden, men bekræft den reelle varmepåvirkede zone på dine samlinger.
Arbejdsbelastningspasning og passende scenarier
Produktsiden fremhæver FPC/FFC-binding og brug i mobiltelefonkabelarbejde, medicinske opgaver og laboratorieforskningssammenhænge.
Dette spænd stemmer overens med blandede arbejdsbelastninger, hvor gentagelighed er vigtigere end ekstrem hastighed.
I den sammenhæng kan en ACF bindingsmaskine bruges til både rutinemæssige reparationer og kontrolleret validering, så længe armaturer og rengøring forbliver konsekvente.
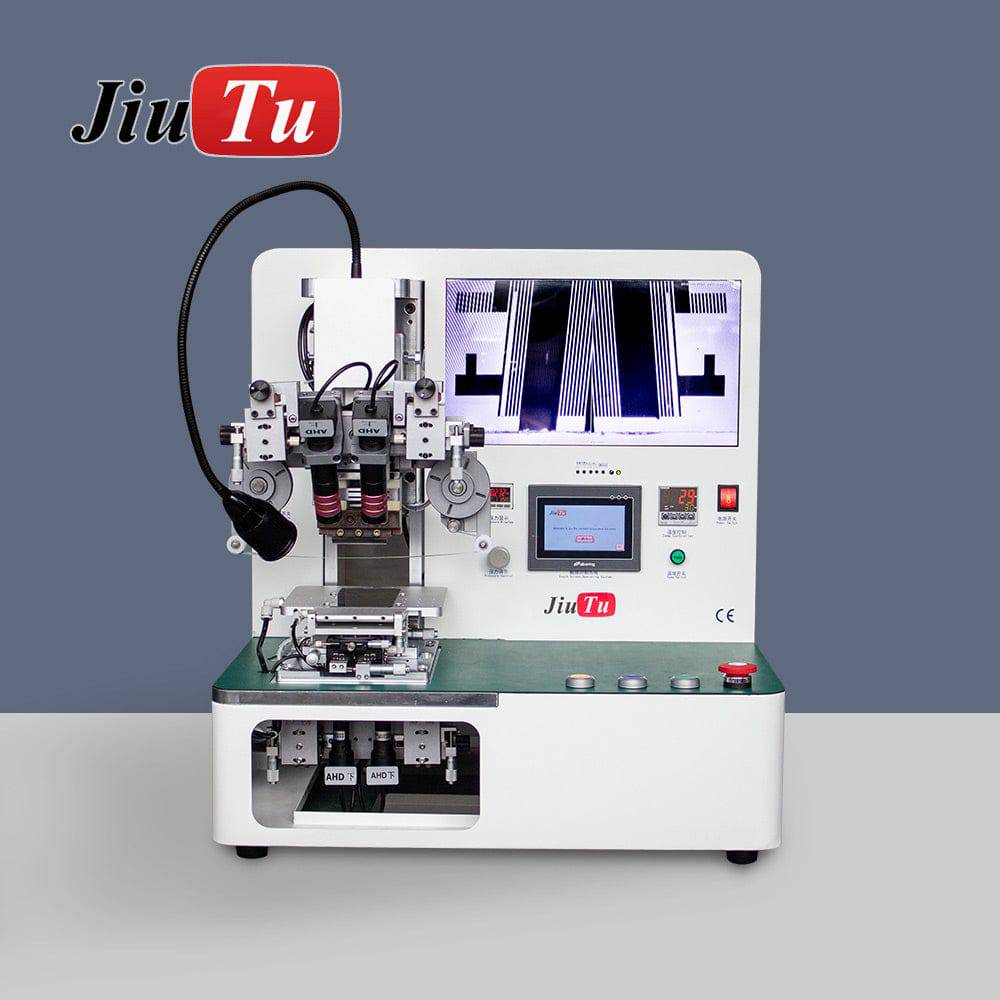
Scenetilgang og klar visningsgeometri understøtter fin-pitch-justering uden overdreven repositionering.
Parringsstrategi: Gør ACF-binding forudsigelig
Maskiner sætter loftet, men parring sætter gulvet. Derfor bør parring planlægges som et system.
Armaturer: forskellen mellem gentagelighed og "held"
Armaturer bør forhindre bevægelse under varme og tryk. Derfor er stivhed og støtte under hele bindingszonen vigtigere end hurtig fastspænding.
Tynde haler har tendens til at bøje under belastning. Samtidig øger ujævn støtte trykgradienter, hvilket skaber ujævn ledning. Derfor forbedrer et armatur, der understøtter hele halebredden, ofte stabiliteten øjeblikkeligt.
Nyttige funktioner ved armaturer omfatter:
-
Referencekanter, der tillader gentagen placering
-
Varmetolerante støtteplader under bindingszonen
-
Jævn fastspænding uden at vride halen
-
Simple stop, der forhindrer krybning under afkøling
Rengøring og forureningskontrol: små partikler forårsager store problemer
Støv og rester viser sig som lokal ikke-kontakt. Derfor bør renlighed behandles som en del af processen, ikke et "nice to have."
En stabil forberedelsesrutine omfatter ofte:
-
Valg af opløsningsmiddel, der ikke angriber belægninger i nærheden
-
Fnugfri klude og kontrolleret tryk under aftørring
-
Hurtig inspektion under forstørrelse før filmplacering
-
Dækket opbevaring af film og rengjorte dele under justering
Derudover øger længere justeringstid eksponeringen. Følgelig kan klarere optik og hurtigere justering indirekte reducere støvrisikoen.
Inspektion: hurtige kontroller reducerer lange omarbejdningssløjfer
Inspektion sparer tid, når den er enkel. Derfor er en konsekvent kontrol efter binding værd at indbygge i arbejdsgangen.
Kontroller af høj værdi omfatter:
-
Kontinuitet og modstandsstabilitet under forsigtig bøjning
-
Mikroskopisk gennemgang for skævhed og kantløft
-
Visuel gennemgang af ensartet udpresning langs linjen
Små ændringer over gentagne reparationer kan vise drift. Samtidig gør en simpel fotolog under samme belysning sammenligninger lettere.
Udvælgelsesstrategi: Matchning af funktioner til reelle scenarier
Udvælgelsen bliver lettere, når funktioner direkte passer til scenarier. Derfor oversætter afsnittene nedenfor arbejdsbelastningstyper til købsprioriteter uden at tvinge et enkelt "bedste" svar frem.
Scenarie A: For det meste fleksible haler med fin pitch
Fin pitch kræver klar justering. Derfor bliver optik og scene kontrol topprioritet.
Trykket skal også være skånsomt og stabilt. Samtidig skal hovedgeometrien passe til halebredden for at undgå kantkoncentration. I dette scenarie kan et bredere justeringsvindue for lavt tryk være vigtigere end høj kraftkapacitet.
Scenarie B: Hyppigt arbejde med chip-til-fleks
Chipbinding øger varmefølsomheden. Derfor er lokal opvarmning og stabil hviletid ofte vigtigst.
Hovedets planhed bliver også kritisk. Samtidig kan forvarmning udvide procesvinduet ved at reducere termisk chok ved starten af cyklussen.
Scenarie C: Blandet arbejdsbelastning med konstante skift
Skift straffer komplicerede opsætninger. Derfor bliver kameraets højdejustering og stabile armaturer vigtige produktivitetsfaktorer.
Forudindstillet stabilitet er også vigtig. Samtidig reducerer klare kontroller "driftsforårsaget af vane", hvor indstillinger langsomt ændres over tid uden dokumentation.
Scenarie D: Valideringsarbejde og kontrollerede eksperimenter
Validering kræver gentagelighed. Derfor bør stabil stigning og hvileadfærd lede sammenligningen.
Logning er også vigtigt. Samtidig reducerer en maskine, der understøtter kontrollerede, gentagelige cyklusser, antallet af "ukendte" når resultater varierer på tværs af prøver.
På dette stadie forbliver udvælgelsesprocessen jordnær. Følgelig bliver det endelige valg en passende beslutning snarere end et gæt.
En praktisk tjekliste til sammenligning af maskiner
En tjekliste holder sammenligningerne konsekvente. Derfor fokuserer listen nedenfor på resultater snarere end markedsføringsfraser.
Tjekliste for varmesystem
-
Stabil stigning uden skarpe overskydende spidser
-
Konstant hviletid ved det valgte indstillingspunkt
-
Lokaliseret opvarmningsadfærd, der begrænser indtrængning i nærliggende dele
-
Hovedmuligheder, der matcher bindingsgeometri
-
Forudsigelig afkøling, der ikke flytter halen
Tjekliste for tryksystem
-
Finjustering, der forbliver gentagelig
-
Lav drift under hviletid
-
Glat pres og glat udløsning
-
Jævn kraftfordeling over hovedbredden
-
Scene- og armaturstabilitet under belastning
Justering og scene tjekliste
-
Klar pudskantsynlighed under realistisk belysning
-
Justerbar kameraposition for armaturstakke
-
Glat mikrobevægelse uden tilbageslag
-
Stabil fokus, når hovedet nærmer sig arbejdet
-
Scene-lås, der forhindrer krybning under hviletid
Tjekliste for vedligeholdelse
-
Nem rengøring af hovedet uden adskillelse
-
Tilgængelig scene til fjernelse af snavs
-
Klare displays, der reducerer opsætningsfejl
-
Rimelig nedetid for rutinekontroller
Når disse punkter er tjekket af, har en ACF-bindingsmaskine til at producere stabile resultater, selv på tværs af blandede arbejdsbelastninger.
Vedligeholdelse og kalibrering: Bevaring af ensartede resultater over tid
Konsistens kan langsomt drive. Derfor beskytter en grundlæggende vedligeholdelsesrutine udbyttet uden at tilføje kompleksitet.
Daglig rutine, der forhindrer tavs drift
En kort daglig rutine forhindrer ofte lange fejlfindinger senere.
-
Rengør hovedfladen for at fjerne klæberester
-
Ryd sceneområdet og kontroller klemmekontaktpunkter
-
Aftør optikflader for at bevare kantklarhed
-
Bekræft, at ESD-jordforbindelsen forbliver intakt
Samtidig kan små ophobninger af rester ændre varmeoverførslen. Følgelig skal rengøring forblive konsekvent, selv når resultaterne ser "fine" ud.
Ugentlige kontroller, der opfanger gentagelighedsproblemer tidligt
Ugentlige kontroller hjælper med at opdage drift, før det bliver et fejlfindingmønster.
-
Kontroller trykets adfærd ved en almindelig indstilling
-
Kontroller nøjagtigheden af hviletiden ved hjælp af den samme cyklus hver gang
-
Inspicér armaturer for slid eller løshed
-
Gennemgå fotologger for voksende skævhedstendenser
Derudover kan en hurtig "tre-cyklus gentagelsestest" afsløre drift. Som et resultat bliver korrigerende handling enkel snarere end reaktiv.
Forbrugsvarer og reservedele, der reducerer nedetid
Nedetid skyldes ofte små dele. Derfor hjælper det at have et simpelt reservesæt.
-
Hovedmuligheder for forskellige bindingsbredder
-
Armaturklemmer og sliddele
-
Rengøringsmaterialer, der ikke efterlader fibre
-
Reservebelysning for konsekvent billeddannelse
Ofte stillede spørgsmål: Køb og brug af ACF-bindingsmaskiner uden gætværk
Hvad gør ACF ledende i én retning?
ACF bruger ledende partikler i en klæbematrix. Under korrekt kompression dannes ledning primært gennem tykkelsen, mens lateral ledning minimeres. Hvis partikeltæthed, harpiksstrøm eller trykstyring er forkert, øges risikoen for lateral lækage/kortslutning – så processtyring er stadig vigtig.
Hvorfor består en forbindelse kontinuitet, men svigter senere?
Marginal kompression eller let skævhed kan bestå en indledende kontrol. Dog ændrer bøjning eller termisk cykling spændingsfordelingen og afslører svag kontakt.
Hvad er normalt årsagen til, at den ene side af bindingen svigter?
Skævhed er almindeligt. Derfor bør justeringsklarhed og sceneturbulens kontrolleres først. Samtidig kan ujævn trykfordeling også skabe ensidig svaghed.
Hvorfor opstår der pudsindtryk efter binding?
Overpres eller koncentreret kraft ved kanter forårsager ofte indhak. Derfor kan et mere skånsomt trykjustering og bedre haleunderstøttelse under bindingszonen hjælpe.
Hvad indikerer ujævn udpresning?
Ujævn udpresning peger ofte på temperaturoverskridelse, forurening eller ujævnt tryk. Følgelig bør rengøring, hovedets planhed og hvileperiodens stabilitet gennemgås samlet.
Hvor vigtigt er en forvarmningsplatform?
Forvarmning kan stabilisere substrattemperaturen, hvilket gør harpiksstrømmen mere forudsigelig og reducerer termisk chok. Det kan dog også øge varmeindtrængning i nærliggende plast/klæbemidler, så verificer den varmepåvirkede zone på faktiske samlinger.
Hvorfor føles justering let på én prøve og svært på en anden?
Pad-reflektionsevnen og haletykkelsen varierer. Derfor afgør belysningskontrol og kameraets position ofte, om kanterne forbliver synlige.
Hvornår er en bredere renoveringslinje vigtig?
Når ACF-binding indgår i trin til skærmrenovering, bliver proceszonering og renlighed vigtig.
Er det normalt at justere indstillinger ofte?
Noget variation forventes på tværs af materialer. Hyppig justering kan dog indikere armaturkrybning eller drift. Derfor reducerer en basislog med fotos og modstandskontroller gentaget prøvearbejde.
Resumé: En renere måde at vælge den rigtige maskine på
En købsbeslutning bliver nemmere, når udvælgelsen følger defektmønstre og kontrolkrav. Derfor bør stabilitet i varmeprofil, trykstabilitet og justeringsklarhed være i fokus i sammenligningen. Samtidig afgør fiksturer og rengøringspraksis, om disse kontroller omsættes til pålidelige bindinger.
Jiutu 9TU-M039A-referencen viser en konfiguration opbygget omkring pulsvarmeteknologi, justerbar trykstyring, en justerbar kameraposition og en forvarmningsplatform.
Disse funktioner kan matche daglig fleks- og chipbindingsarbejde, hvor repeterbarhed er vigtigst.
Endelig bør en ACF-bindingsmaskine behandles som en del af et komplet bænksystem, ikke et selvstændigt køb. Som følge heraf leverer konsistente værktøjer, stabile fiksturer og simpel logning ofte den største forbedring.
Tre konkrete anbefalinger
-
Først, kortlæg de ugentlige fællestyper og mindste afstand, og prioriter derefter optik og sceneres stabilitet.
-
Dernæst, evaluer trykafdrift og holdetidsrepeterbarhed ved hjælp af en tre-cyklus gentagelsestest.
-
Til sidst, opbyg en fikstur og en rengøringsrutine, der forhindrer halekryb og kontaminering.